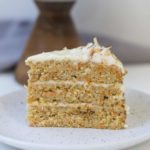
Carrot & Coconut Layer Cake
This carrot & coconut layer cake is soft and moist while being loaded with spices and finished with a silky smooth cream cheese frosting. A little twist on a classic cake flavour!
Ingredients
For the Carrot & Coconut Layer Cake
- 1 ½ cups (300g) brown sugar
- ½ cup (100g) white sugar
- 1 cup coconut oil , melted
- 4 large eggs , room temperature
- ¾ cup crushed pineapple
- 1 teaspoon vanilla
- 2 ½ cups (312g) plain flour
- 2 teaspoons baking powder
- 1 teaspoon bicarbonate of soda
- ½ teaspoon salt
- 1 ½ teaspoons ground cinnamon
- 1 teaspoon ground ginger
- ¼ teaspoon ground nutmeg
- 2 cups (260g) grated carrots , (about 3 large)
- 1 cup shredded coconut
For the Cream Cheese Frosting
- 250 g cream cheese*
- ⅓ cup dairy-free spread**
- 3 cups icing sugar
- 1 teaspoon vanilla
- pinch salt (optional)
Instructions
For the Carrot & Coconut Cake:
- Preheat oven to 180°C and spray 3 x 22 cm cake tins with non-stick spray.
- In a large bowl, whisk together the brown sugar, white sugar, eggs, oil, vanilla and crushed pineapple until combined. Set aside.
- In a separate large bowl, sift the flour, baking powder, bicarbonate of soda, salt, cinnamon, ginger, and nutmeg together. Pour wet mixture into the dry ingredients and mix together using a spatula. Add in carrot and coconut and fold through until just mixed through.
- Divide batter evenly into pans and bake for 20-25 minutes or until a skewer when inserted comes out clean and the cake springs back when lightly touched. Allow cake to cool in the pan on a wire rack for at least 10 minutes to avoid sticking, before turning out. Pan can be used again to cook the remaining layers by following the notes at the end of this recipe if required.
For the Cream Cheese Frosting:
- Using a stand mixer with a beater attachment or a handheld mixer, beat together cream cheese, dairy-free spread and vanilla, adding in icing sugar until everything comes together. Frosting should be a smooth and creamy consistency. Add a pinch of salt if the mixture is too sweet. Depending on the cream cheese and butter/dairy-free substitute you use, you may need to add in more icing sugar to gain the required consistency.
Assemble:
- If your cakes are unlevel, use a knife to slice a thin layer off the top to ensure the surface is flat. Place a cake on cake stand or plate and cover the top with frosting. Do the same with the following 2 layers placing the final cake upside down to ensure the top is perfectly flat. Cover with remaining frosting. I frosted this cake in a semi-naked style meaning that I ran a butter knife around the edges to remove any excess frosting. I found this a great way to enjoy this cake as the frosting is quite rich and therefore the minimal frosting approach does not overpower the flavours of the cake itself.
- I topped my cake with toasted coconut flakes. Simply place about a cup of coconut flakes in the oven for 5 minutes or until golden. Keep an eye on them to make sure they do not burn. Sprinkle toasted coconut around the edge on top of the cake. Place the cake in the fridge to stabilise for at least an hour before slicing.
- Store cake in an airtight container on the bench for 1-2 days or in the fridge for up to 5 days. Cake is best enjoyed when it has come back to room temperature.
Notes
I used 3 pans for this layer cake however if you prefer you can do it with just 2 layers, simply increase the cook time by 5-10 minutes.
* I used Liddells lactose-free cream cheese which only comes in a spreadable form. You can use regular if you do not need the frosting to be lactose-free. If you use brick cream cheese and regular butter, you may need to add a tablespoon or 2 of milk to get the required consistency of the frosting. I had originally wanted to use Tofutti cream cheese substitute as it would have made this cake completely dairy-free however I could not find it at the supermarket. If you can, it will work perfectly as a dairy-free substitute to the recipe as written.
**I used Nuttelex Buttery which is my new favourite dairy-free butter substitute in frosting as it gives that ‘butter’ flavour without being greasy at all.
Tip! If you only have 1 pan, you can bake the cakes in batches. Leave the cake to cool in the pan for 10 minutes before turning it out onto a wire rack to cool completely. Wash the pan in warm soapy water and rinse with cold. Spray with non-stick spray and you are ready to use it again. The remaining cake batter will be fine on the bench in between bakes, just do not leave it out longer than 3 hours.
Adapted From Sally’s Baking Addiction