
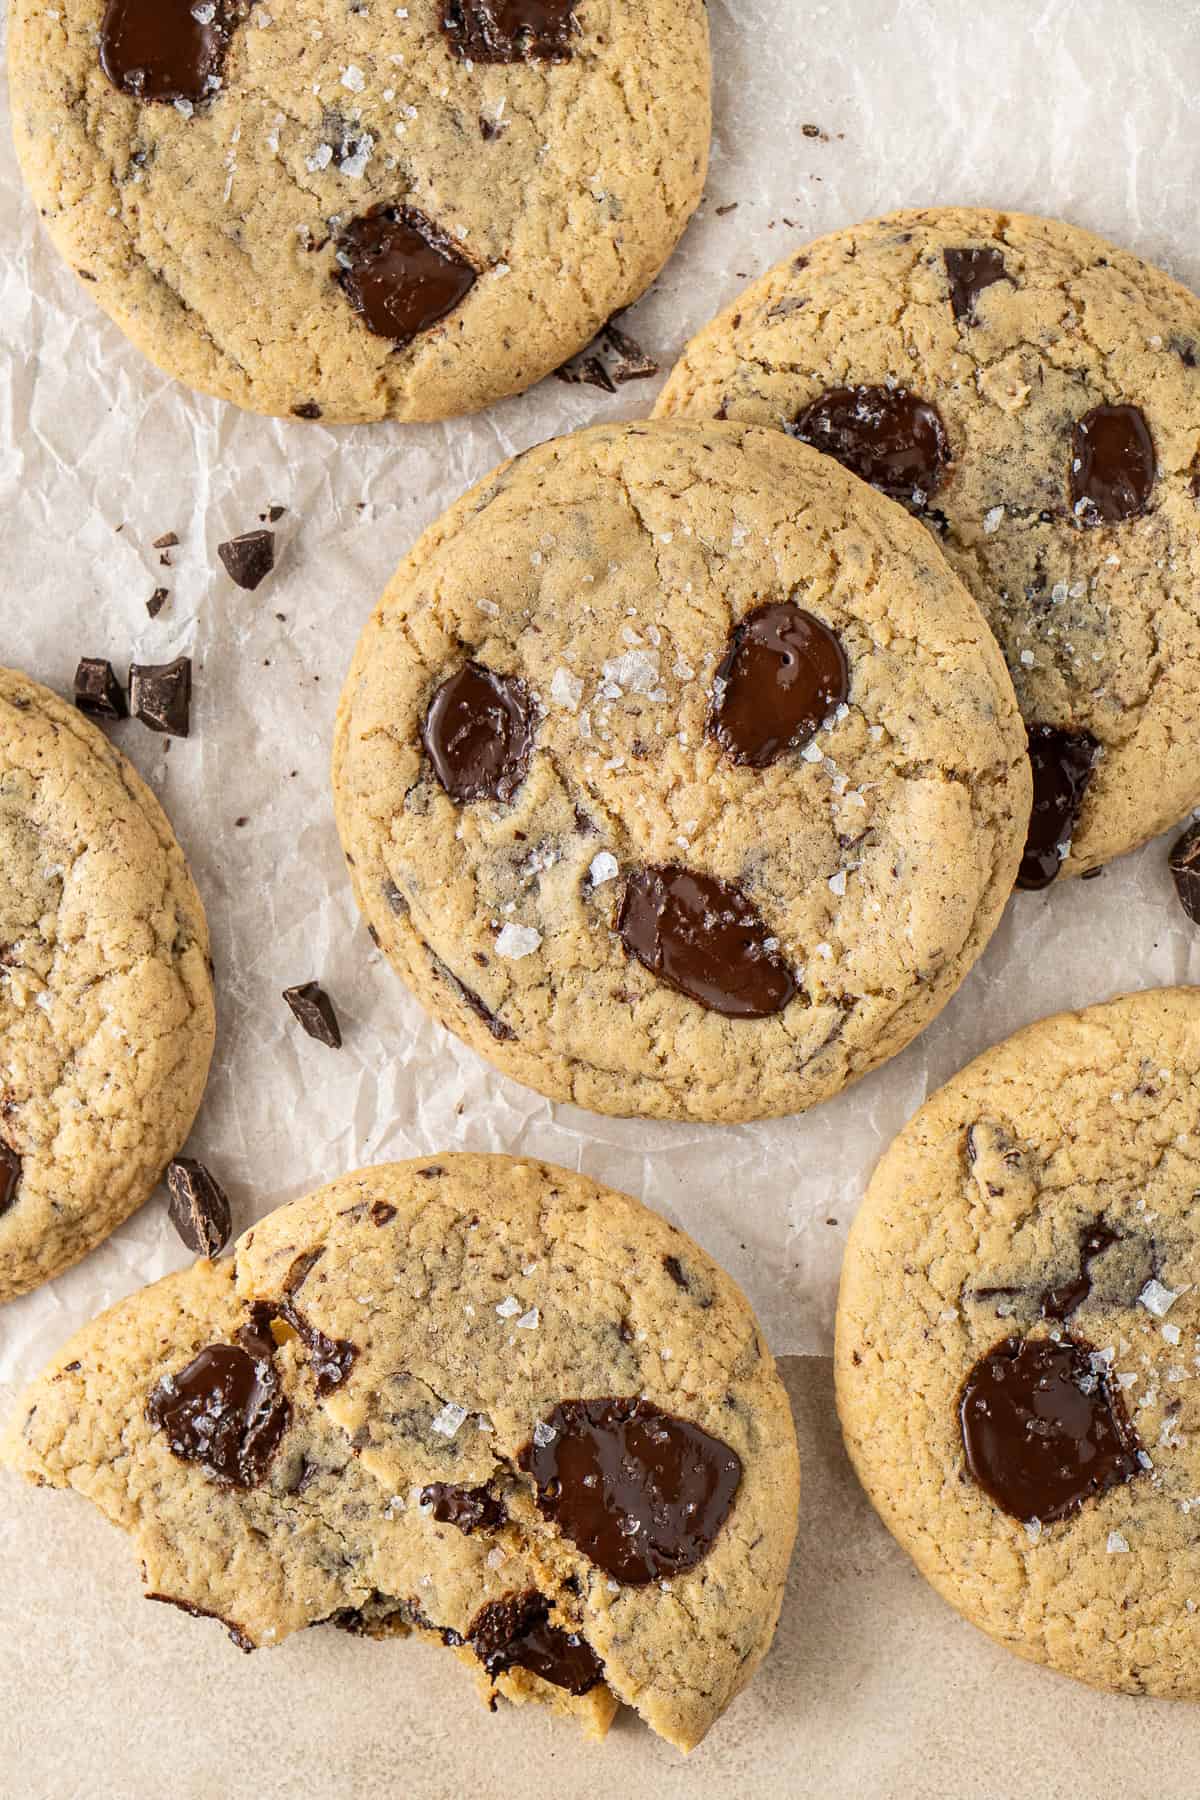
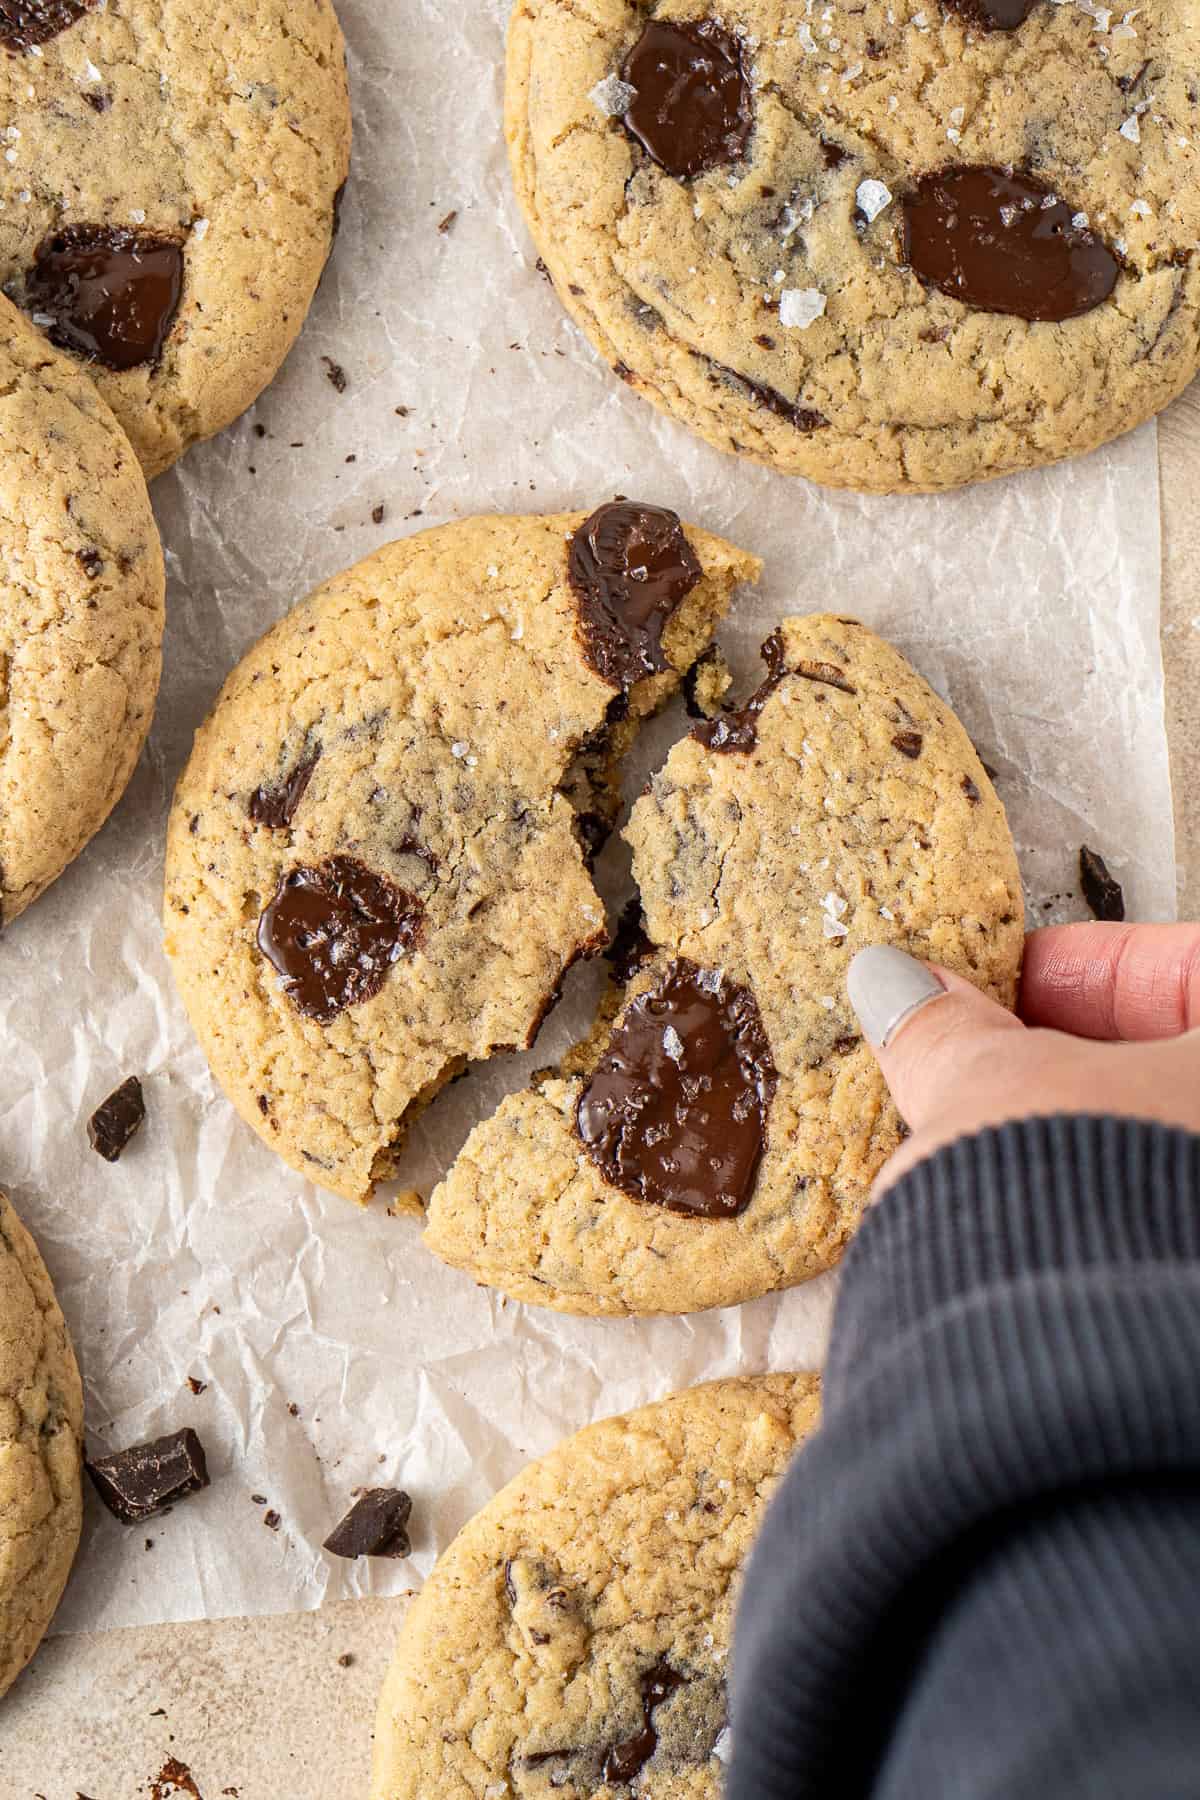
These are my favourite dairy free GIANT chocolate chip cookies! This quick and easy recipe makes 6 huge, thick cookies full of dark chocolate chunks, that are approx. 12cm in diameter. If you like chocolate chip cookies, then you’ll love these!

If you love my dairy free chocolate chip cookies (which are one of my all time favourite recipes btw), then get excited about this recipe. Because the only thing better than a chocolate chip cookie is a GIANT chocolate chip cookie!
I recently made a batch of these cookies after being sick for a week and let me tell you this is the ultimate comfort food. A chocolate chip cookie will solve everything! And one that is as big as my hand? Well that’s just fun!
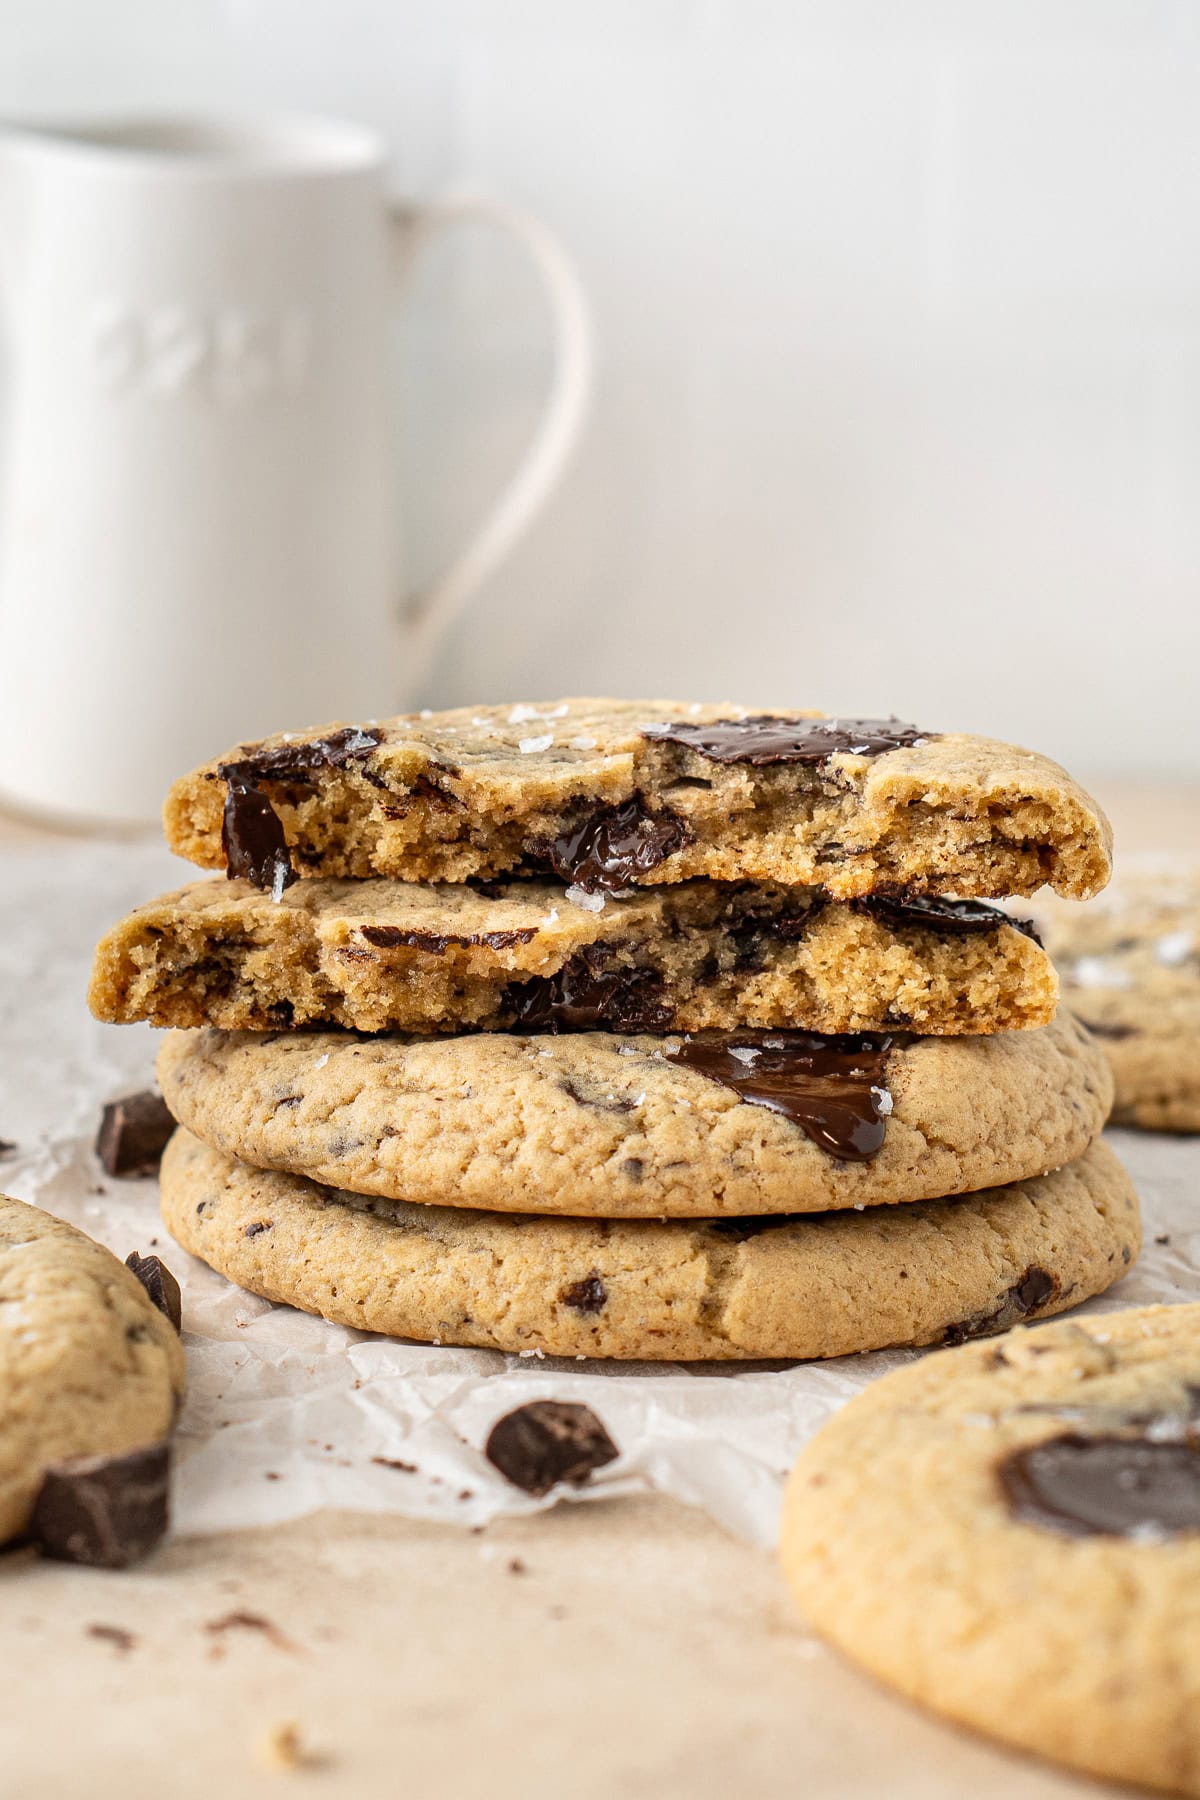
I originally created this recipe from the request of my Husband who wanted me to make a really big, thick and chewy cookie. You know the ones that are slightly under-baked in the centre and the source of pure joy. This has since become one of my favourite cookie recipes as it’s so easy to make and the cookie dough doesn’t require any chilling!
Yes that means less time currently stands between you and a batch of warm chocolate chip cookies. You’re welcome.
Key Ingredients
To make these giant cookies, you’ll need a few baking basics and pantry staples.
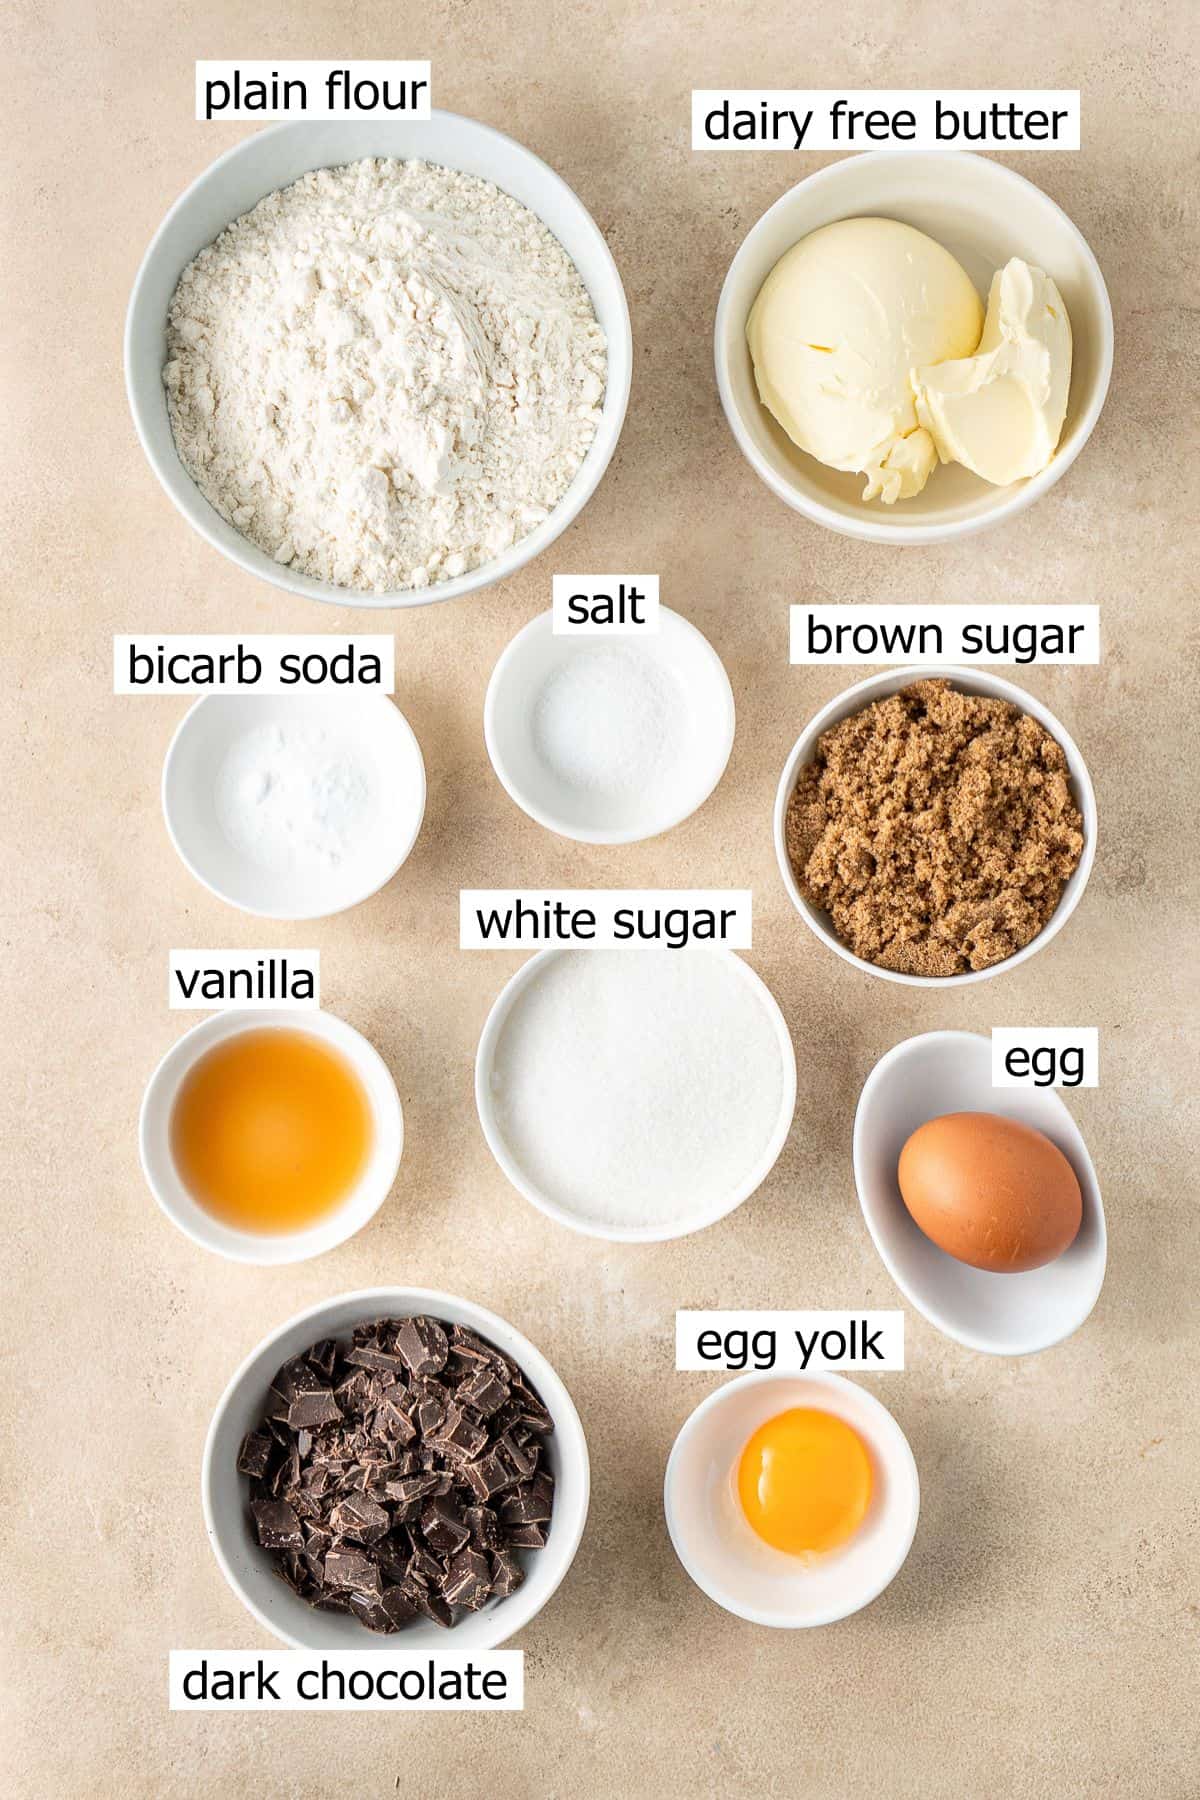
Note all ingredients and their quantities are laid out in the recipe card at the bottom of this post.
- Dairy-free butter – I like to use Nuttelex Buttery which is an Australian product, but any good quality dairy free butter will work. We’re using it straight from the fridge rather than melted so the cookie dough doesn’t need chilling before baking.
- Vanilla – for flavour, we use 2 teaspoons but go ahead and measure this with your heart!
- Brown sugar – for that slight caramel flavour and extra chewy texture.
- White sugar – helps the cookies spread and gives the edges that golden crunch.
- Egg – to bind the cookies helping keep them soft, while the extra egg yolk adds the extra fat needed for a super chewy and thick cookie.
- Plain flour – also known as all purpose flour in the US. We are adding enough to soak up the liquid and form a soft dough that’s firm enough to be baked without chilling.
- Bicarbonate of soda – also known as baking soda in the US, helps the cookie puff up and then deflate leaving us with a thick and chewy texture.
- Dairy Free Chocolate – I like to cut up a dark chocolate bar into chunks instead of chocolate chips (70% or more chocolate is usually dairy free) because it melts when cooked and usually has a better taste than dairy free chocolate chips.
Equipment & Tools
This section may contain affiliate links which means I make a small commission on any purchase made with no extra cost to you. If you’re considering purchasing on Amazon I’d be so grateful if you would do so by first clicking one of these links. Thank you for your ongoing support.
- Stand Mixer – makes easy work of mixing up the cookie dough.
- Baking trays – I just started using the NordicWare baking sheets and while they are expensive they are insanely good quality – I wish I had upgraded sooner!
- Cookie scoop – makes measuring and scooping the cookie dough so easy.
- Cooling rack
Step-By-Step Instructions
In the bowl of your stand mixer, start by adding the dairy free butter, vanilla and both the white and brown sugars and start mixing up. Add the whole egg and the egg yolk and mix until smooth.
If you’re using a spreadable dairy free butter then you can use it straight from the fridge with no issues. We actually don’t want it to get too warm and soft as this may lead to the cookies overspreading.
Add in the dry ingredients of flour, bicarb of soda (baking soda) and salt and mix until a rough dough forms.
Finally add in your chopped chocolate and mix through the dough, saving a few pieces to press into the dough before baking if you like.

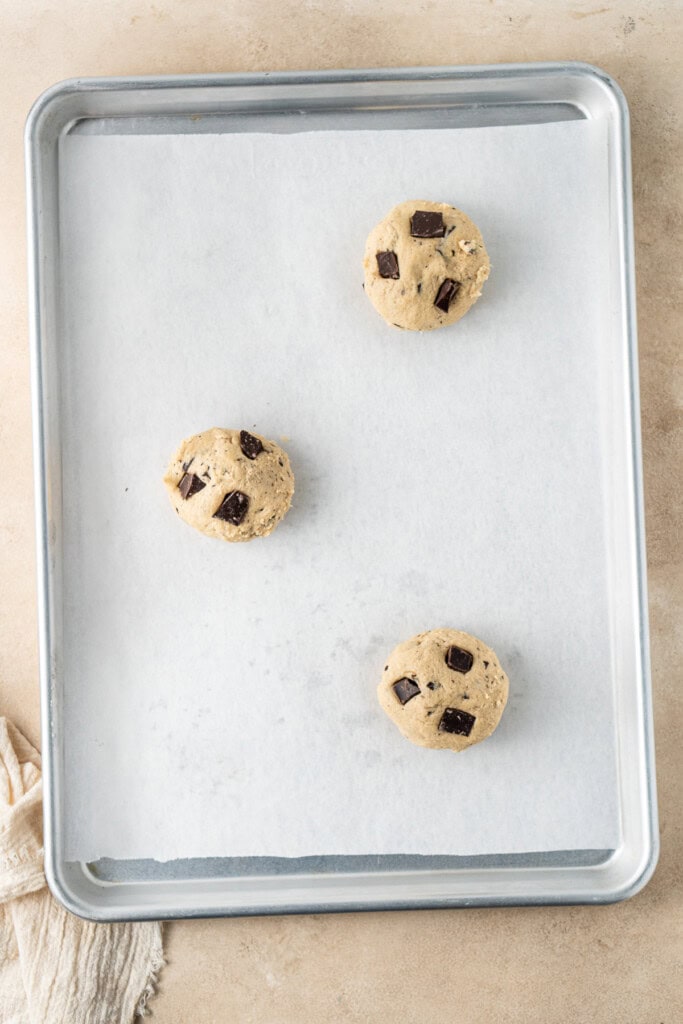
Now the fun part. Divide the dough into 6 huge balls – about 4 tablespoons of dough each. Just press the dough together, don’t worry about the balls looking perfect.
Depending on how big your baking trays are, you’ll need 2-3 baking trays to make sure you have enough space for spreading – remember, these are BIG cookies.
Bake the cookies in a preheated oven until they are golden on the edges and just set in the centre. These are baked at a slightly lower heat and for longer than regular cookies due to their size so that they cook evenly and don’t burn. I find 20 minutes perfect.


👉Tip! For perfect looking cookies, as soon as the cookies have been removed from the oven, use a spoon or a large round cookie cutter that fits over the cookie, to gently shape the cookie back into a circle. This only works if the cookies are still soft so needs to be done immediately before they start to cool.
I also recommend banging the tray on the counter a few times both at the halfway point of baking, and at the end to ensure the cookies are nice and even. This just settles the cookies and releases any extra air and basically just leaves you with a perfect cookie.
Sprinkle the tops of the cookies with some flaky sea salt (technically optional but so good!) and allow to firm up and cool on the tray before transferring to a wire rack to cool completely before storing.
Storage and Freezing Instructions
While these cookies are 100% their best while still warm from the oven while the chocolate is a little melty, they will last around 4-5 days in an airtight container so you can enjoy them all week.
If you need them to last longer, you can also freeze them. To do this you can flash freeze balls of cookie dough on a baking tray for 30 minutes before placing into a zip lock bag. Freeze for up to three months.
To bake, grab the dough balls out of the freezer and place on a baking sheet and bake – no need to thaw first. You’ll just need to cook them for a few minutes longer from frozen.
You can also freeze cooked and cooled cookies in an airtight container or zip lock bag for up to 3 months (which is my preferred option). Let them thaw at room temperature or zap in the microwave for 15-30 seconds.
Recipe FAQs
Yes, absolutely! To make regular-sized cookies, use 1 tablespoon of dough per cookie. Increase the oven temperature to 180°C (350°F) and reduce the baking time to 10–12 minutes, or until the edges are lightly golden.
I always recommend using a chocolate that you love to eat. I recommend just picking up your favourite brand chocolate bar and chopping it up into chunks.
I usually stick with a 60-70% dark chocolate as these are usually dairy free (always check the label), but you can use a dairy free milk chocolate or even chocolate chips if you prefer.
If you do make this recipe, please be sure to leave a comment and ⭐⭐⭐⭐⭐ rating below! And tag any of your creations on Instagram with @eightforestlane as I would love to see.
More chocolate chip cookie recipes:
Vegan Banana Chocolate Chip Cookies
Vegan Pumpkin Chocolate Chip Cookies
Dark Chocolate Chunk Cookies
Easy Chocolate Peanut Butter Cookies

Giant Chocolate Chip Cookies
Ingredients
- ½ cup (125 grams) dairy free butter
- 2 teaspoons vanilla extract
- ½ cup brown sugar
- ½ cup white sugar/granulated sugar
- 1 egg + 1 egg yolk room temperature
- 2 cups plain flour/all purpose flour
- ½ teaspoon bicarbonate of soda/baking soda
- ½ teaspoon salt
- 100 grams dairy free chocolate chopped into chunks
- Flaky sea salt optional
Instructions
- Preheat the oven to 160°C (325°F) and line 2-3 baking trays with baking paper.
- In the bowl of a stand mixer fitted with the paddle attachment, add the dairy free butter, vanilla, brown sugar, and white sugar. Mix until well combined.
- Add the egg and extra egg yolk, and continue mixing until smooth.
- Add the flour, bicarbonate of soda, and salt. Mix on low speed until a soft cookie dough forms.
- Stir through most of the chopped chocolate, reserving a few pieces to press into the tops of the cookies before baking.
- Using a spoon or cookie scoop, portion 4 tablespoons of dough per cookie onto the prepared trays, leaving plenty of space for spreading. These cookies will bake to around 12 cm in diameter.
- Gently press a few extra chocolate chunks into the top of each dough mound.
- Bake for approximately 18-20 minutes, removing the tray halfway through baking to bang it gently on the counter. This helps to deflate any air for a chewier texture.
- Once baked, bang the tray again on the counter to flatten the cookies slightly. If you want neat, round cookies, use a spoon to gently nudge the edges into shape while still warm.
- Let the cookies cool on the tray to firm up before transferring to a wire rack to cool completely. Sprinkle with flaky sea salt if desired.
Nutrition
Nutritional information is provided as a guide only and is calculated using automated online tools, therefore we cannot guarantee the accuracy. We encourage you to make your own calculations based on the actual ingredients used in your recipe.
This recipe was originally published in May 2021 and has been updated in June 2025 with new photos and more helpful content. The recipe remains the same!


sherry says
a giant choc chip biscuit? what could be better?
Sally says
I don’t think there is anything better!