
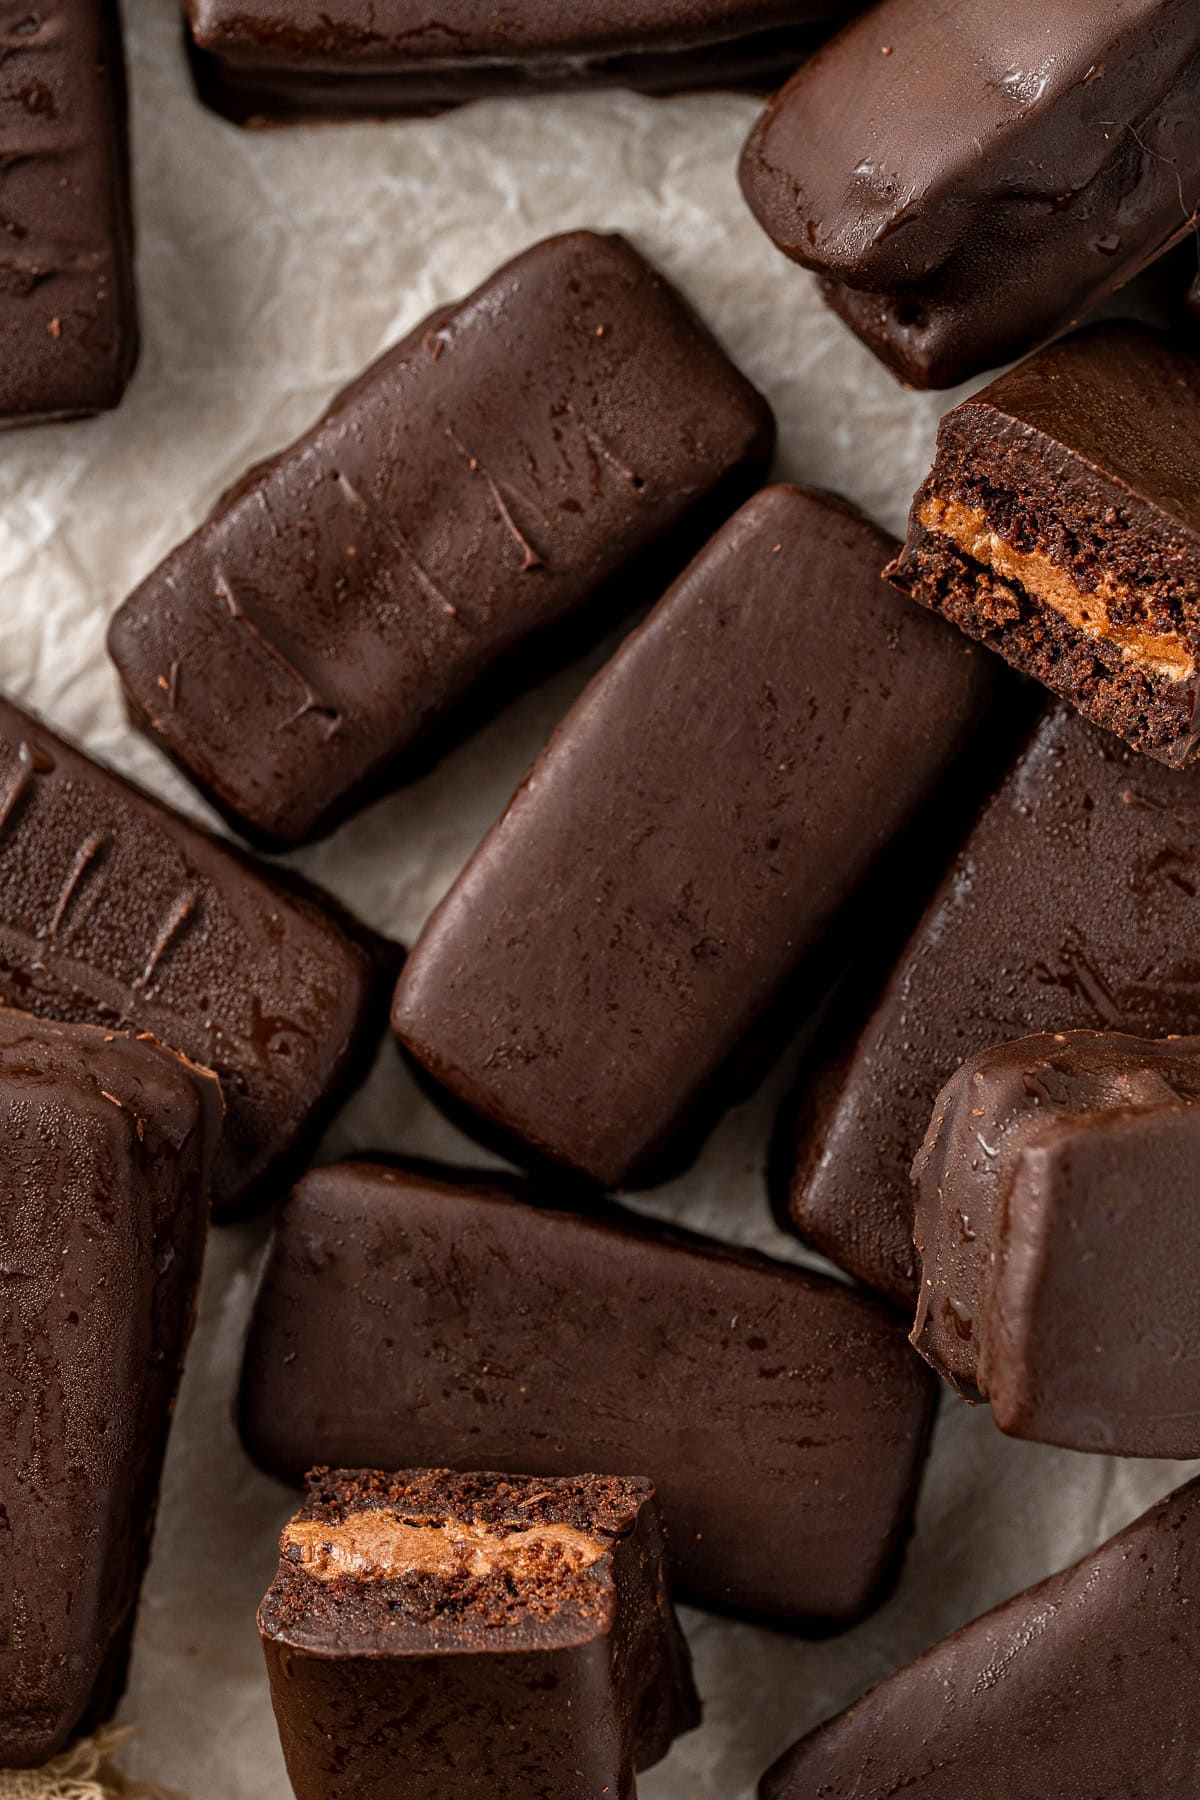
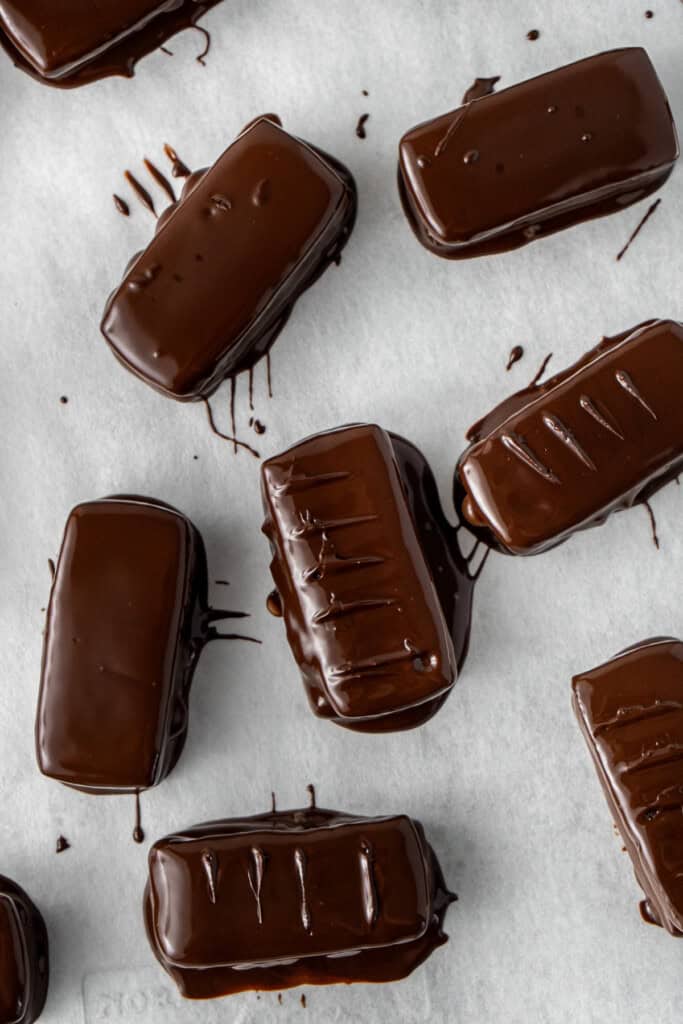
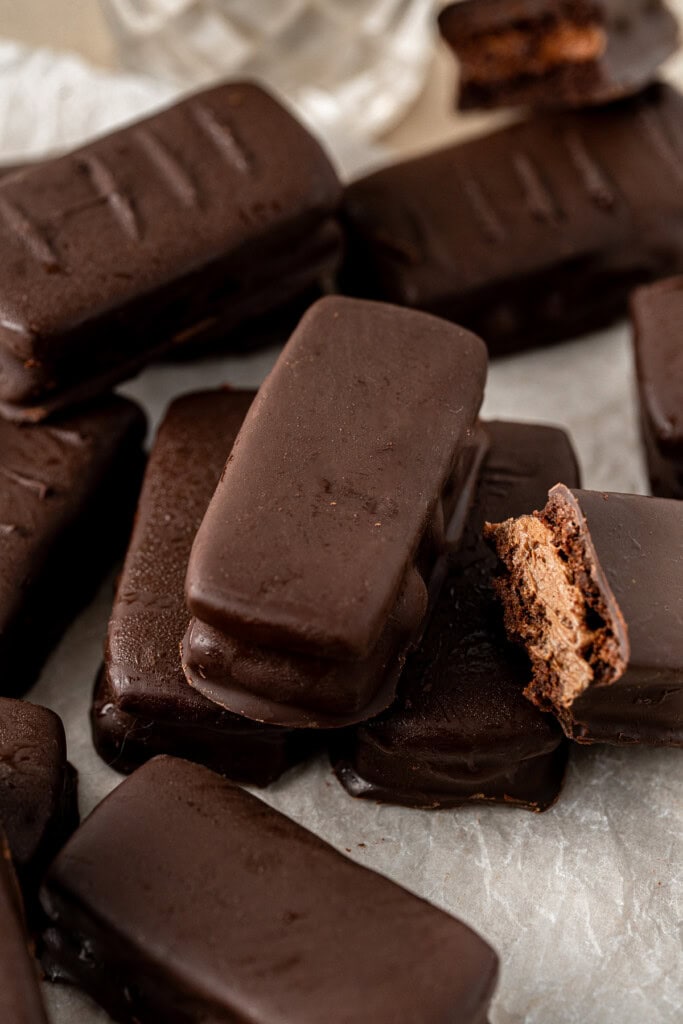
This homemade Tim Tams recipe is a completely dairy free and vegan version of the classic Australian biscuit. With a creamy chocolate malt filling sandwiched between two chocolate biscuits and coated in MORE chocolate, this is the perfect treat for all the chocolate lovers!
⭐⭐⭐⭐⭐ just made these today! and omg! this is not an exaggeration but they seriously taste better than tim tams! i’m obsessed!!💗– steph
I miss Tim Tams. As someone who has been dairy free now for over 10 years, I still am amazed that Arnott’s Biscuits has not produced a vegan version (although they have produced a Gluten Free version that is a smaller packet and of course more expensive!).
Tim Tams are such an iconic Australian food. They rank alongside Vegemite when people visit the country. And for good reason, they are amazing.
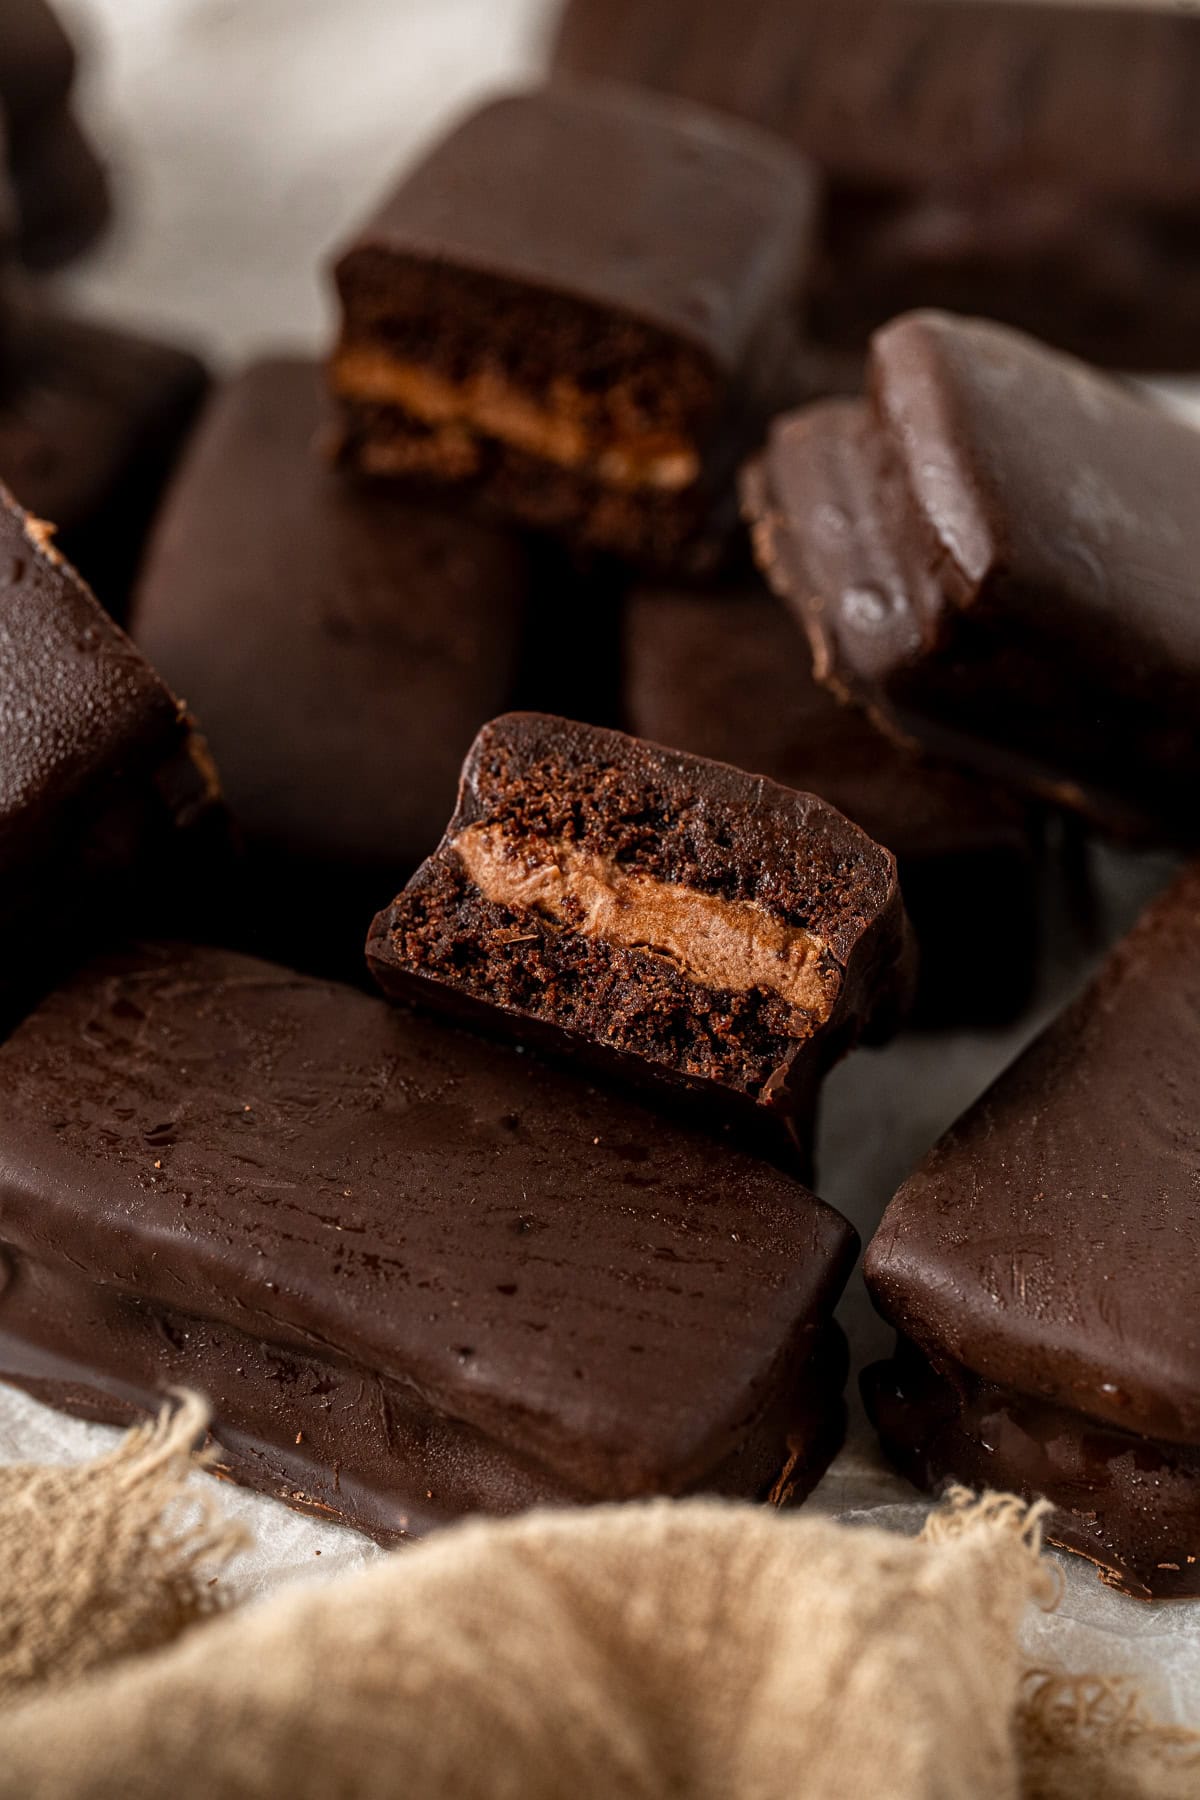
A Tim Tam is essentially a triple chocolate biscuit. There are 2 light, crunchy chocolate biscuits sandwiched together by a creamy chocolate malt filling, and then the whole thing is coated in more chocolate.
They are rich, decadent and exactly what you want to serve for afternoon tea or dessert.
This Tim Tam recipe is one of my proudest vegan adaptions. It brings me so much joy to be able to enjoy these biscuits again, even if they do take a little bit of time to make. It’s very worth it for a special occasion, a weekend baking project, or as a gift for a vegan or dairy free friend. I know it will make their day!
And yes, these will Tim Tam slam, I checked and you’re welcome (IYKYK 😉).
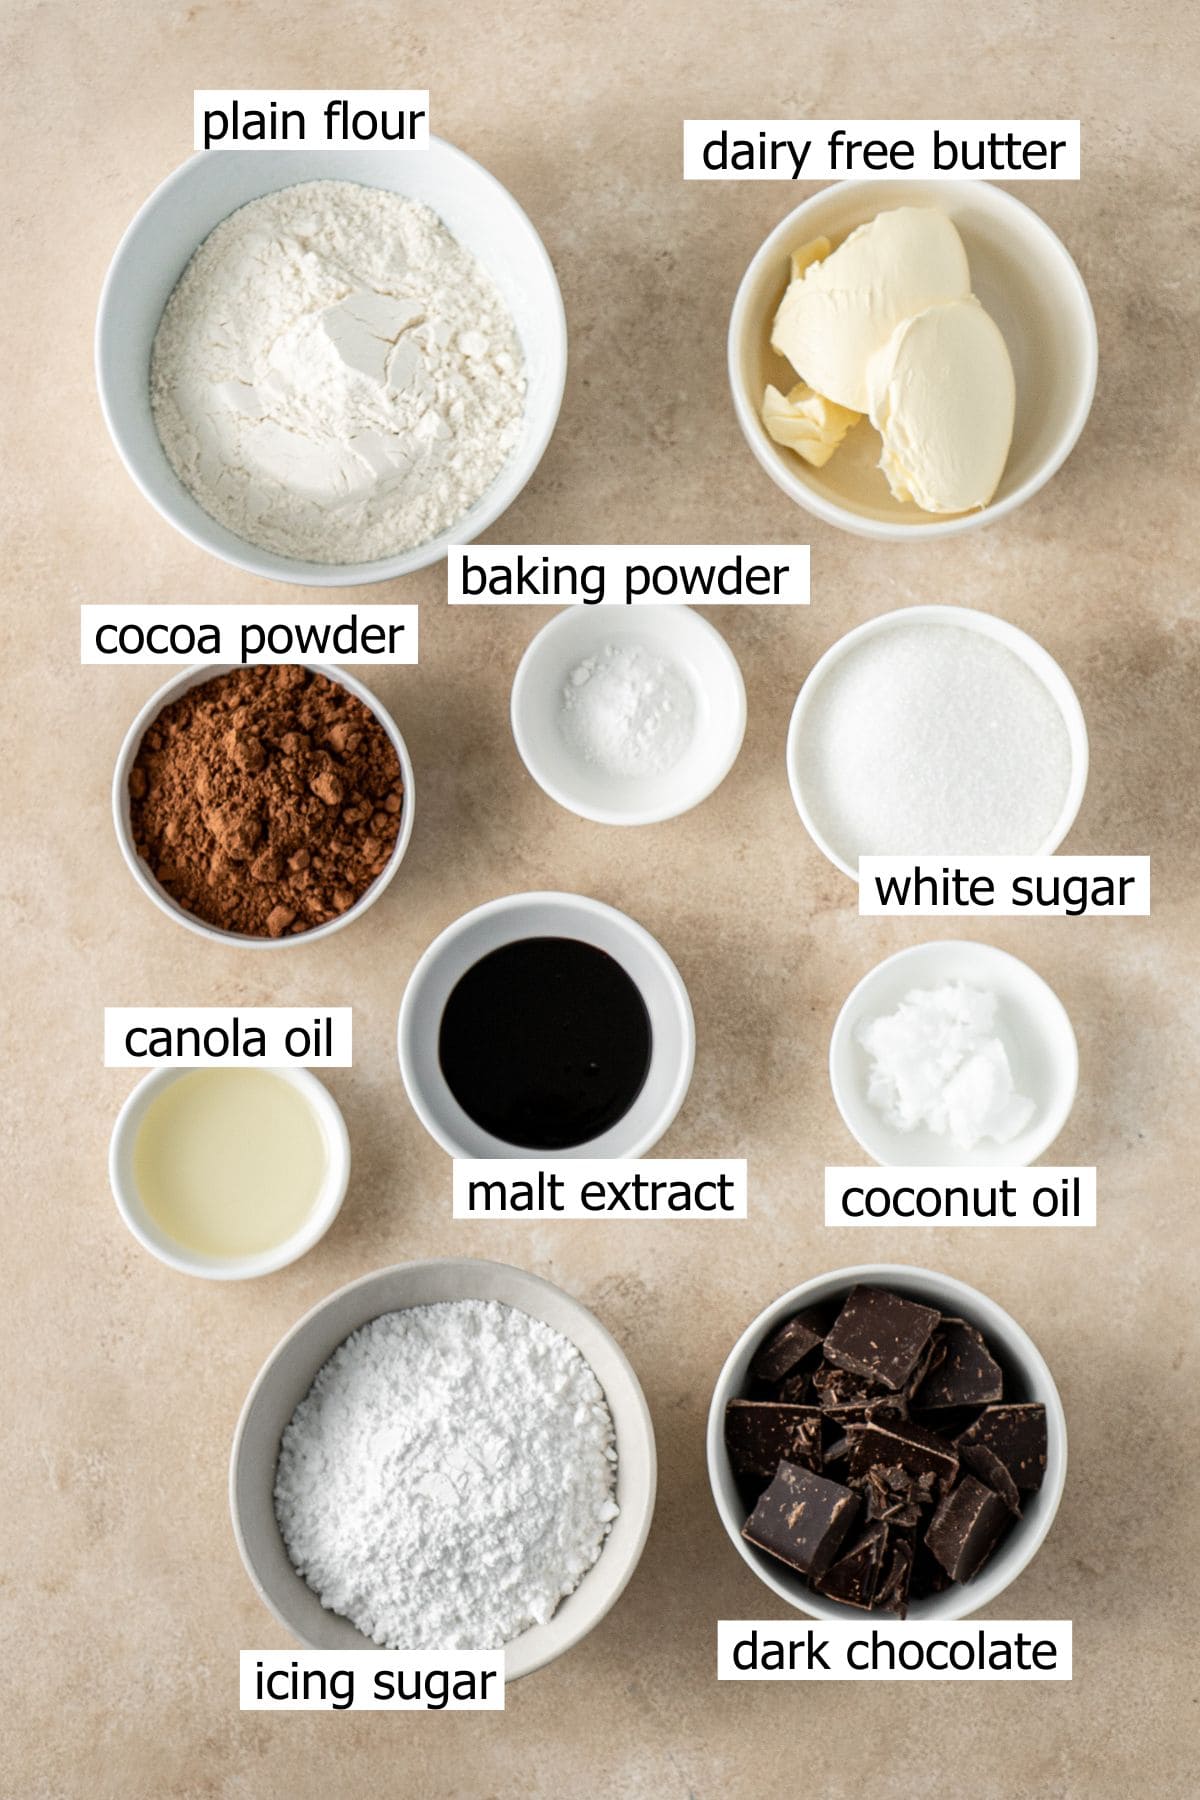
Key Ingredients
There are a few key ingredients that are going to give these dairy free Tim Tams that classic taste that you remember.
Note all ingredients and their quantities are laid out in the recipe card at the bottom of this post.
- Dairy free butter – use a quality dairy free butter substitute here for the best flavour in the biscuits and the filling. I love and always use Nuttelex Buttery which is an Australian product. In the US, the closest alternative is Earth Balance which I understand to be very similar.
- White sugar – used in the chocolate biscuits to help them become crisp when baked.
- Cocoa powder – I always recommend using a good quality cocoa powder for the best, rich, chocolate flavour. I’ve used Cadbury Bournville cocoa powder my entire life because it’s made from the same beans Cadbury uses to make their chocolate so you know it’s going to taste good. For those in the US, this is a Dutch-processed cocoa powder.
- Plain flour – also known as all purpose flour.
- Baking powder – just a little bit in the cookies allows them to become light and crisp.
- Icing sugar – also known as powdered sugar, this is used to make a buttercream filling.
- Malt extract – probably the one ingredient on the list you haven’t heard of but this is going to give the filling that iconic Tim Tam taste. You can pick this up at most grocery stores, the one I use is the Saunders Malt Extract. It has a thick and syrupy consistency similar to molasses. If you can’t find it, you can leave it out but note that you’re biscuits will be chocolate flavoured rather than having that choc malt taste.
- Dark chocolate – to keep these Tim Tams vegan and dairy free, make sure to use a dark chocolate that doesn’t contain any milk products. You can also use a dairy free milk chocolate if you prefer.
Equipment & Tools
This section may contain affiliate links which means I make a small commission on any purchase made with no extra cost to you. If you’re considering purchasing on Amazon I’d be so grateful if you would do so by first clicking one of these links. Thank you for your ongoing support.
- Stand Mixer – makes easy work of mixing up the cookie dough and the filling.
- Baking trays – I just started using the NordicWare baking sheets and while they are expensive they are insanely good quality – I wish I had upgraded sooner!
- Cooling rack
Step-By-Step Instructions
This may not be the simplest recipe on my site, but if you just take the recipe step by step, I know you will find these much easier than you expected!
There are three main parts to making the Tim Tams with some chilling time involved, so you can make them over two days or make it a fun Sunday project.
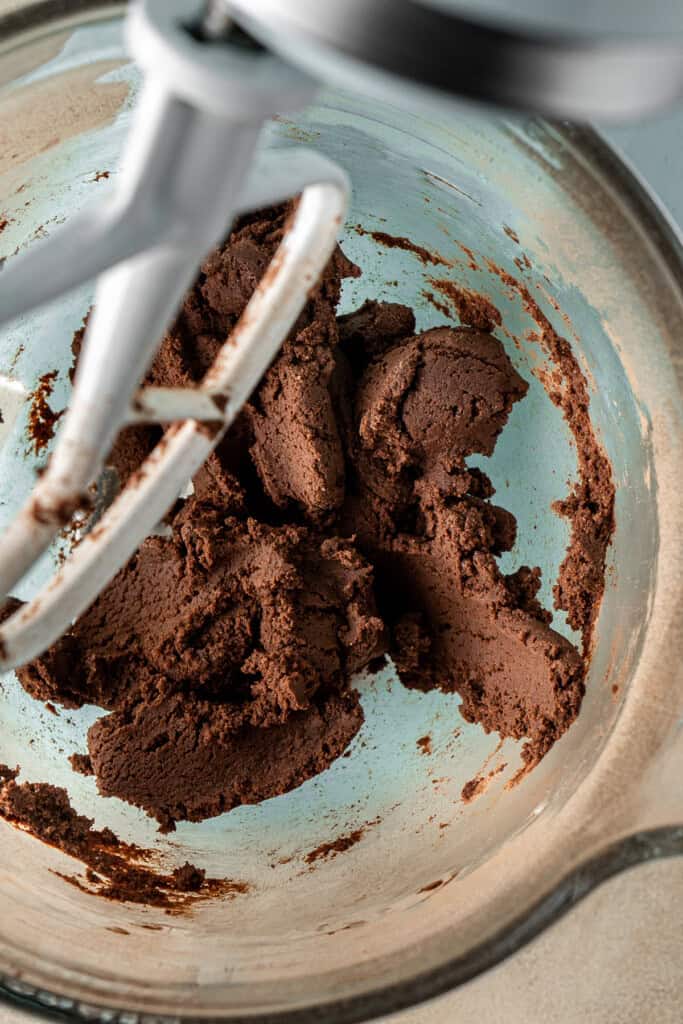
To start, you’ll be making the chocolate biscuits which I like to do in a stand mixer, but you can use a hand mixer as well if that’s all you have. Beat together the dairy free butter and sugar until light and creamy. Add in the canola oil and continue beating until the mixture starts to look pale and fluffy. From here, add in the cocoa powder, plain flour, baking powder, and salt and mix until a dough forms.
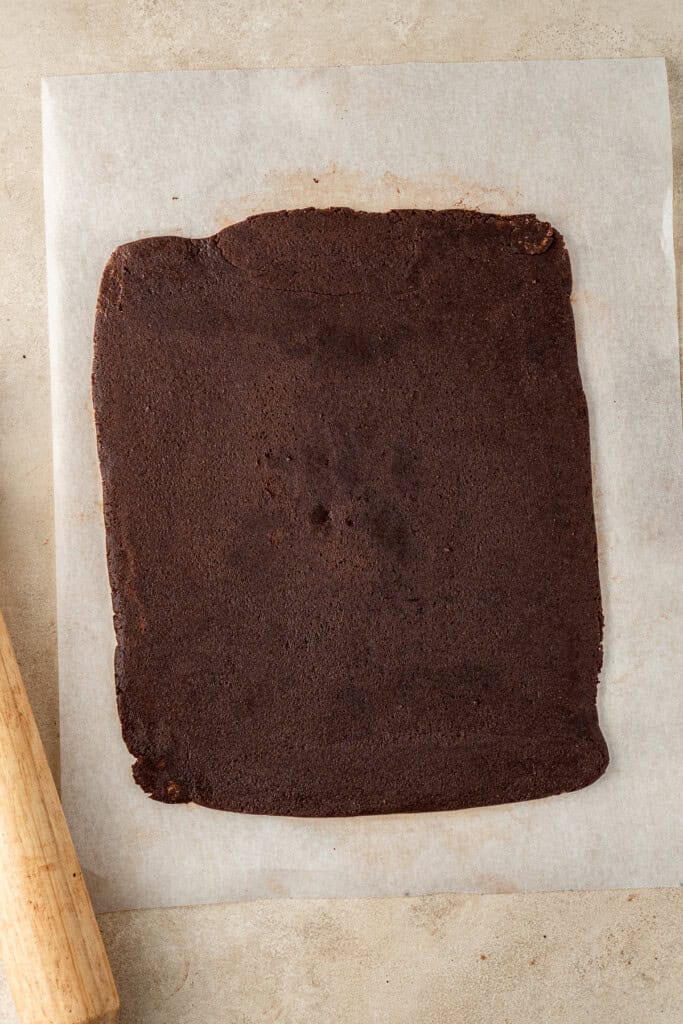
Turn the dough out onto a sheet of baking paper and place another sheet of baking paper on top. Use a rolling pin to roll the dough into a rectangle about 5 mm thick. Use a ruler or spatula to neaten the edges into a straight-sided rectangle, that’s around 25cm x 30cm in size.
Transfer the dough (still between the sheets of baking paper) to the fridge for at least 2 hours, or into the freezer for 30 minutes, until firm.
Preheat the oven and line 1-2 large baking tray/s with baking paper depending on their size.
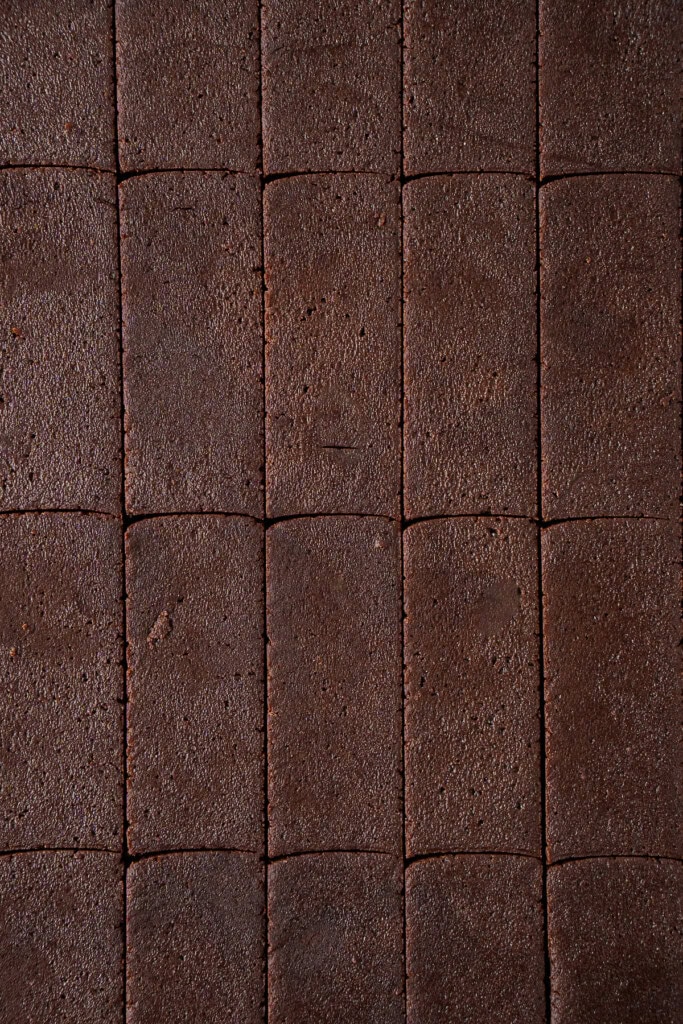
Remove the dough from the fridge/freezer and peel off the top layer of baking paper. Using a ruler and sharp knife, cut the dough into small rectangles approximately 2.5 cm by 6 cm. You should end up with 32 pieces. Make sure you do have an even number.
👉Tip! If the dough starts to soften while you’re working, pop it back in the fridge or freezer briefly to firm up. Just like when making cut-out sugar cookies, this helps prevent spreading in the oven.
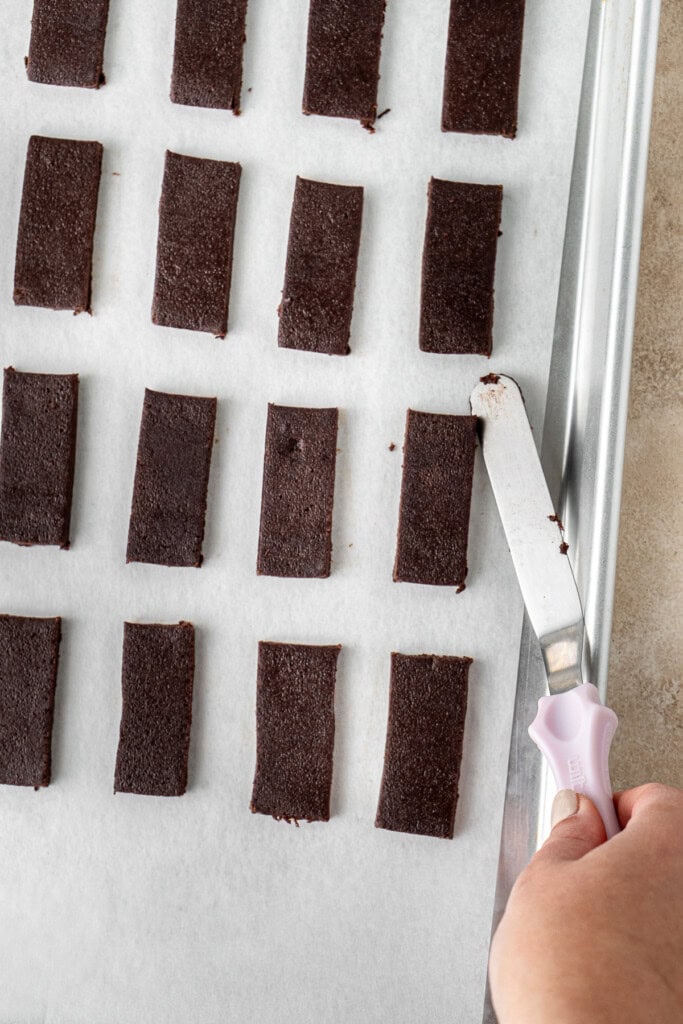
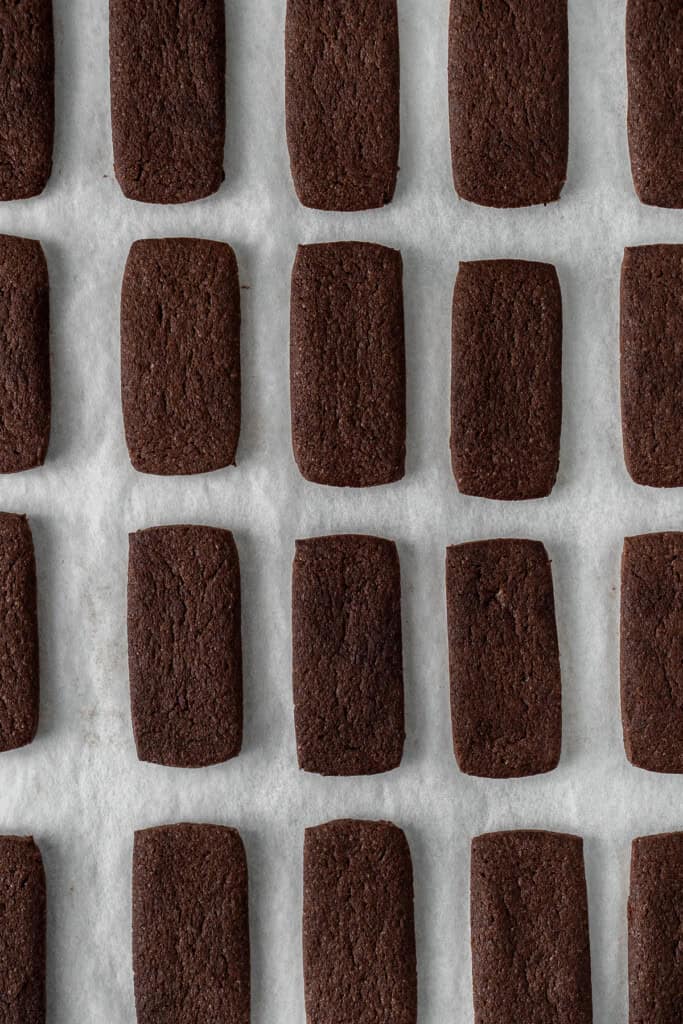
Place the rectangles onto the prepared baking tray, leaving a little space between each. Bake for 8-10 minutes, or until just set. Allow to cool on the tray for 10 minutes before transferring to a wire rack to cool completely.
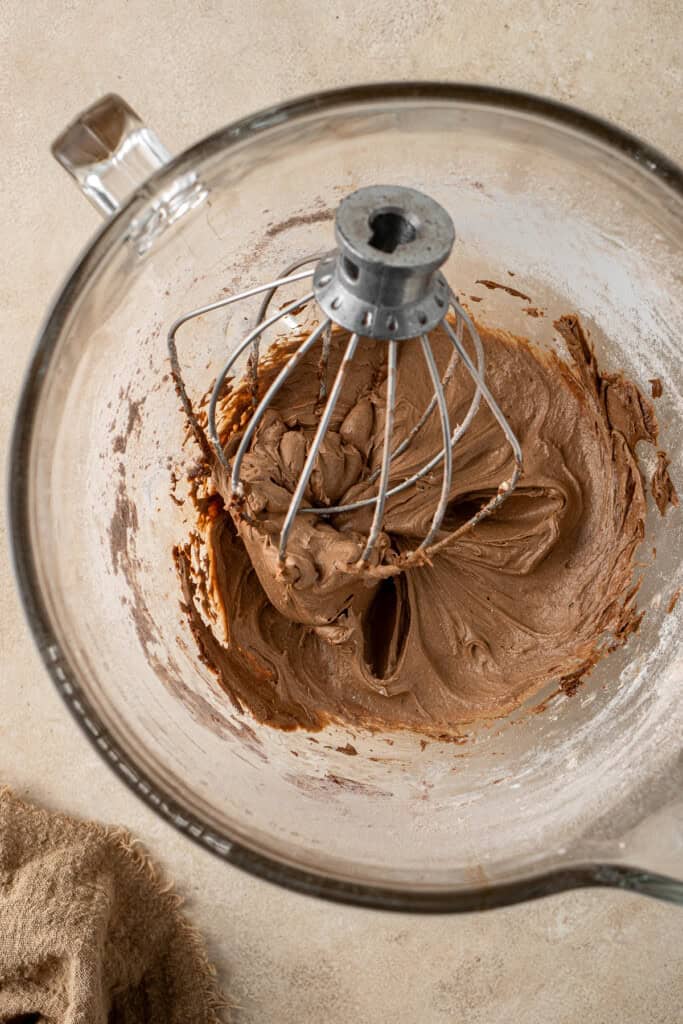
Once the biscuits are cool, it’s time to make the choc malt buttercream filling. Place the dairy free butter, powdered sugar, cocoa powder, and malted barley in a bowl. Beat with an electric mixer (or stand mixer with the whisk attachment) until light, smooth, and creamy.
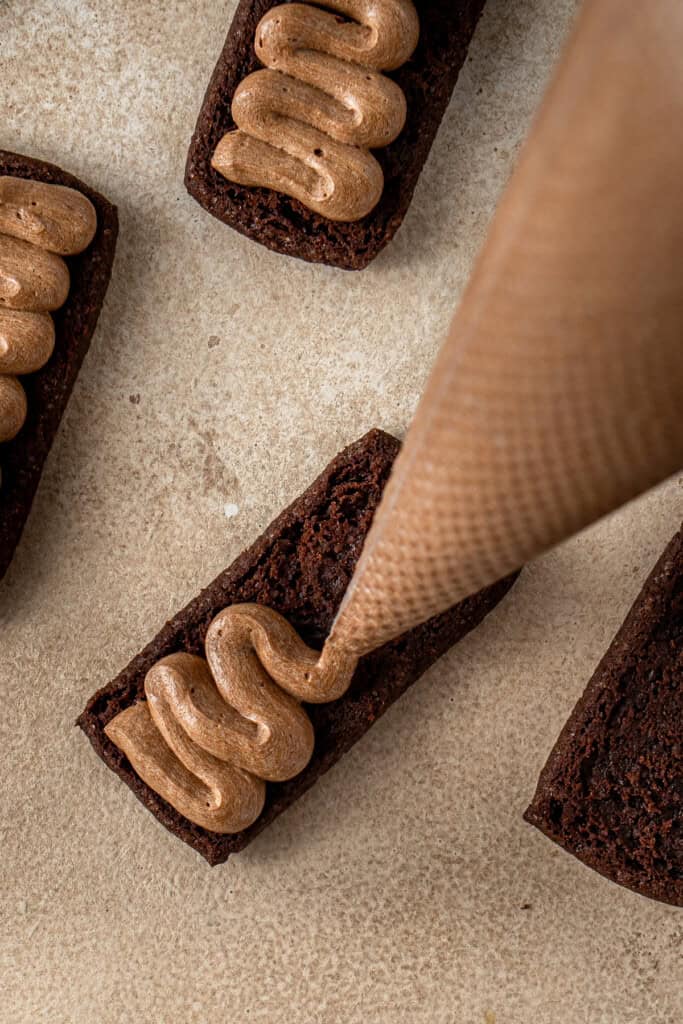
Transfer the filling to a piping bag (or a sandwich bag with the corner snipped off) and pipe the filling onto the flat side of one biscuit, then top with a second biscuit to sandwich. You want a visible layer of filling about ½ cm thick.
Repeat with remaining biscuits. Place the filled biscuits in the freezer for 30 minutes to firm up.

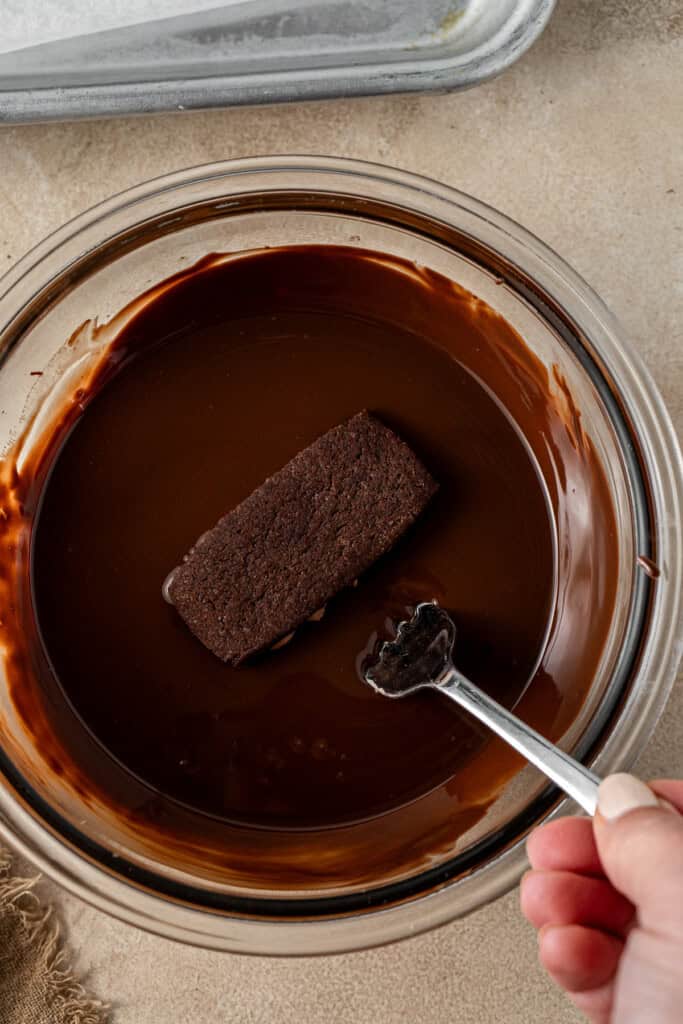
Add the chopped chocolate and coconut oil to a microwave-safe bowl an heat in 30-second bursts, stirring between each, until melted and smooth.
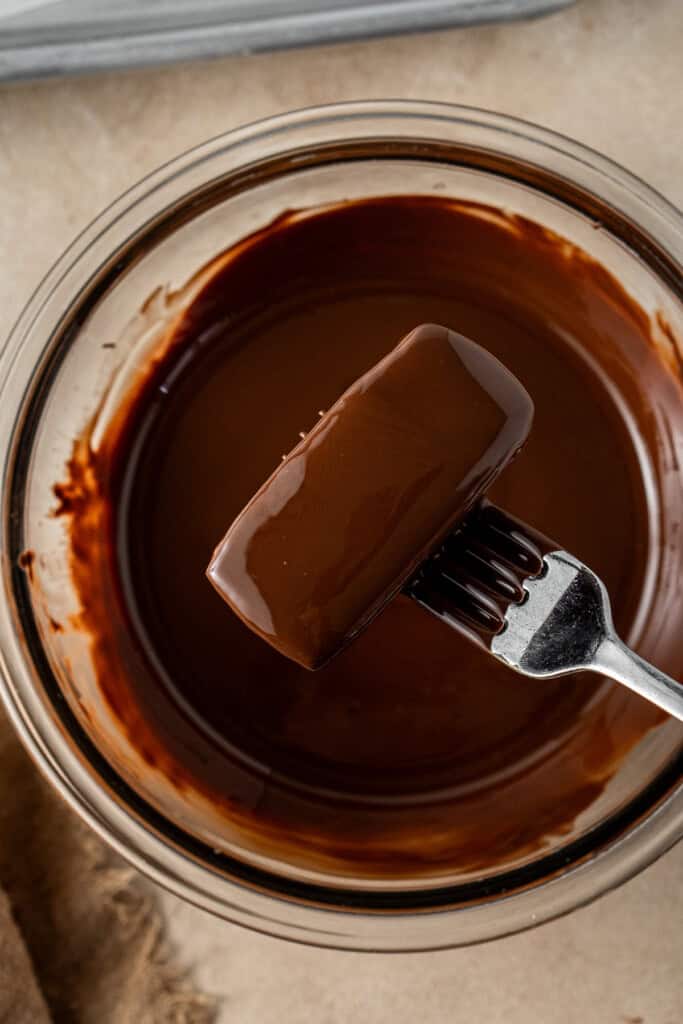
Using a fork, dip each chilled biscuit into the melted chocolate, turning to coat completely. Let any excess chocolate drip off, then place the coated biscuit onto a tray lined with baking paper.
Repeat with all biscuits, then place the tray in the fridge or freezer until the chocolate is fully set.
Note: These Tim Tams are not made with tempered chocolate which is a bit too complex for everyday home bakers, therefore the chocolate coating will melt. Therefore I recommend storing these in the fridge or freezer and enjoy them cold. I generally eat these directly from the freezer.
Sally’s Tips for making Tim Tams
- Use good quality vegan chocolate. You want one that has a creamy texture, and is also not too bitter. I use a 60-70% quality dark chocolate, but you can use any that you like. If you are strictly vegan though, make sure what you are using is too.
- Use a fork to dunk the biscuits into the melted chocolate and scrape off any excess on the sides of the bowl.
- Using a stand mixer will make this process much quicker and easier, but if you don’t have one you can use a handheld mixer as well.
- Use a ruler to make sure your biscuits have straight, even sides as this will make sure they match up when getting sandwiched together.
- Use your ruler to gently tidy up the sides of your biscuits immediately when they come out of the oven while they are still soft by pushing any sides that have been misshapen, back to straight.
Recipe FAQs
Yes! While the malt extract is what gives the filling that classic malty flavour similar to original Tim Tams, you can leave it out if you can’t find it and simply enjoy a chocolate filling.
Yes you can, however you’ll need to skip the malt extract, as this is malted barley. You will also need to use a good quality 1-1 gluten free plain flour for the biscuits such as Bob’s Red Mill.
Store them in an airtight container in the fridge for up to 7 days or in the freezer for up to 3 months. I usually eat them cold straight from the fridge or freezer as they don’t get too firm, but you can also allow them to soften a little at room temperature for a few minutes first.
So glad you asked! It’s super simple.
Bite off the top and bottom of the Tim Tam, then dunk it in a glass of milk, a cup of tea, or a hot choccy, and suck the liquid through the biscuit like a straw.
Quickly shove the Tim Tam into your mouth and enjoy before it all completely falls apart. And congrats, you’re officially Australian!

If you do make this recipe, please be sure to leave a comment and ⭐⭐⭐⭐⭐ rating below! And tag any of your creations on Instagram with @eightforestlane as I would love to see.
More classic vegan biscuits:
ANZAC Biscuits
Vegan Chocolate Sugar Cookies
Vegan Peanut Butter Cookies
Vegan Pumpkin Snickerdoodles

Vegan Tim Tams
Ingredients
For the chocolate biscuits:
- ½ cup (125 grams) dairy free butter
- ½ cup white sugar/granulated sugar
- 1 tablespoon canola oil
- ½ cup cocoa powder
- 1 cup plain flour/all purpose flour
- ½ teaspoon baking powder
- pinch salt
For the malt filling:
- ¼ cup (60 grams) dairy free butter
- 1 cup icing sugar
- 1 tablespoon cocoa powder
- 1 tablespoon malt extract
For the coating:
- 200 grams dark chocolate
- 1 tablespoon coconut oil
Instructions
- Note: Before getting started, review the blog post for all my tips and step-by-step instructions so you know what to expect at each stage.
Make the chocolate biscuits:
- In the bowl of a stand mixer fitted with the paddle attachment, beat the dairy free butter and sugar together until light and creamy. Add the oil and continue beating for another 2-3 minutes, or until the mixture starts to look pale and fluffy.
- Add the cocoa powder, flour, baking powder, and salt. Mix on low speed until a soft dough forms.
- Turn the dough out onto a sheet of baking paper. Place another sheet of baking paper on top and use a rolling pin to roll the dough into a rectangle about 5 mm thick. Use a ruler or spatula to neaten the edges into a straight-sided rectangle that is approx. 25cm x 30cm in size.
- Transfer the dough (still between the sheets of baking paper) to the fridge for at least 2 hours, or into the freezer for 30 minutes, until firm.
- Preheat the oven to 180°C (350°F) and line a large baking tray/s with baking paper.
- Remove the dough from the fridge/freezer and peel off the top layer of baking paper. Using a ruler and sharp knife, cut the dough into small rectangles approximately 2.5 cm by 6 cm. You should end up with 32 pieces (ensure you have an even number).
- Place the rectangles onto the prepared baking tray, leaving a little space between each. Bake for 8-10 minutes, or until just set. Allow to cool on the tray for 10 minutes before transferring to a wire rack to cool completely.
Make the malt filling:
- Place the dairy free butter, icing sugar, cocoa powder, and malt extract in a bowl. Beat with an electric mixer (or stand mixer with the whisk attachment) until light, smooth, and creamy.
- Transfer the filling to a piping bag (or a sandwich bag with the corner snipped off). Pipe the filling onto the flat side of one biscuit, then top with a second biscuit to sandwich. You want a visible layer of filling about ½ cm thick.
- Repeat with remaining biscuits. Place the filled biscuits in the freezer for 30 minutes to firm up.
Coat the biscuits:
- Add the chopped chocolate and coconut oil to a microwave-safe bowl. Heat in 30-second bursts, stirring between each, until melted and smooth. If only a few lumps remain, stir until fully melted.
- Using a fork, dip each chilled biscuit into the melted chocolate, turning to coat completely. Let any excess chocolate drip off, then place the coated biscuit onto a tray lined with baking paper.
- Repeat with all biscuits, then place the tray in the fridge until the chocolate is fully set.
Store and Enjoy!
- Once the chocolate is fully set they are ready to enjoy! Keep the remaining Tim Tams in an airtight container in the fridge for up to 7 days.
Notes
Nutrition
Nutritional information is provided as a guide only and is calculated using automated online tools, therefore we cannot guarantee the accuracy. We encourage you to make your own calculations based on the actual ingredients used in your recipe.
This recipe was originally published in January 2020 and has been updated in 2025 with more helpful information and new photos. The recipe remains the same!


Jo-Ann says
This recipe is amazing!! I had incorrectly calculated the US measurements and had rolled it out twice as thick. When I took the cookie dough out of the freezer to cut it into pieces, I had to split each piece lengthwise. It worked out perfectly though because then the pieces were exactly the same size to sandwich them. Thank you so much for this recipe! I lived in Australia for 11 years before I became vegan, and it brought back some happy memories.
Sally says
Thanks so much Jo-Ann! I’m so happy that you can enjoy a classic Tim Tam once again!
Steph says
Just made these today! And OMG! This is not an exaggeration but they seriously taste better than Tim tams! I’m obsessed!!💗
Sally says
Oh Steph your comment made my day, so glad you loved them!
Jackie says
Hi Sally! After having my first Tim Tam today, I’m planning on making these at a future date. Could you please explain if the malt barley is the same as barley malt syrup? I’m in the US and want to be sure I’m using/looking for the correct product. Thank you so much! These look so good!
Sally says
Hey Jackie! Welcome to the world of Tim Tams! Yes as I understand it barley malt syrup should be the same thing.
Robyn says
These look amazing Sally! I love how you have made them vegan so more people can enjoy a Tim Tam (and they look so much better than the shop bought ones! 🙂 )
Sally says
Thanks Robyn!
Gavin says
These are pretty AMAZING looking. My (vegan) little sis is visiting in a couple weeks from Ireland – these have made the list of things I am making for her
Sally says
How perfect! I’m sure she will love that 🙂
Sylvie says
Oh my goodness these look SO EPIC Sally! They seriously look 10 times more appealing than actual tim tams, and I LOVE that they are Vegan. I absolutely must try to make them asap!
Sally says
Thanks Sylvie! I am glad you like them and hope you do make them soon because they are soo good!
Alexandra @ It’s Not Complicated Recipes says
Tim Tams are such a favourite – this is a brilliant idea, Sally! I never would have thought to make my own and I love that they’re vegan.
Sally says
Thanks Alex! I can’t believe it’s taken me this long to make them!