
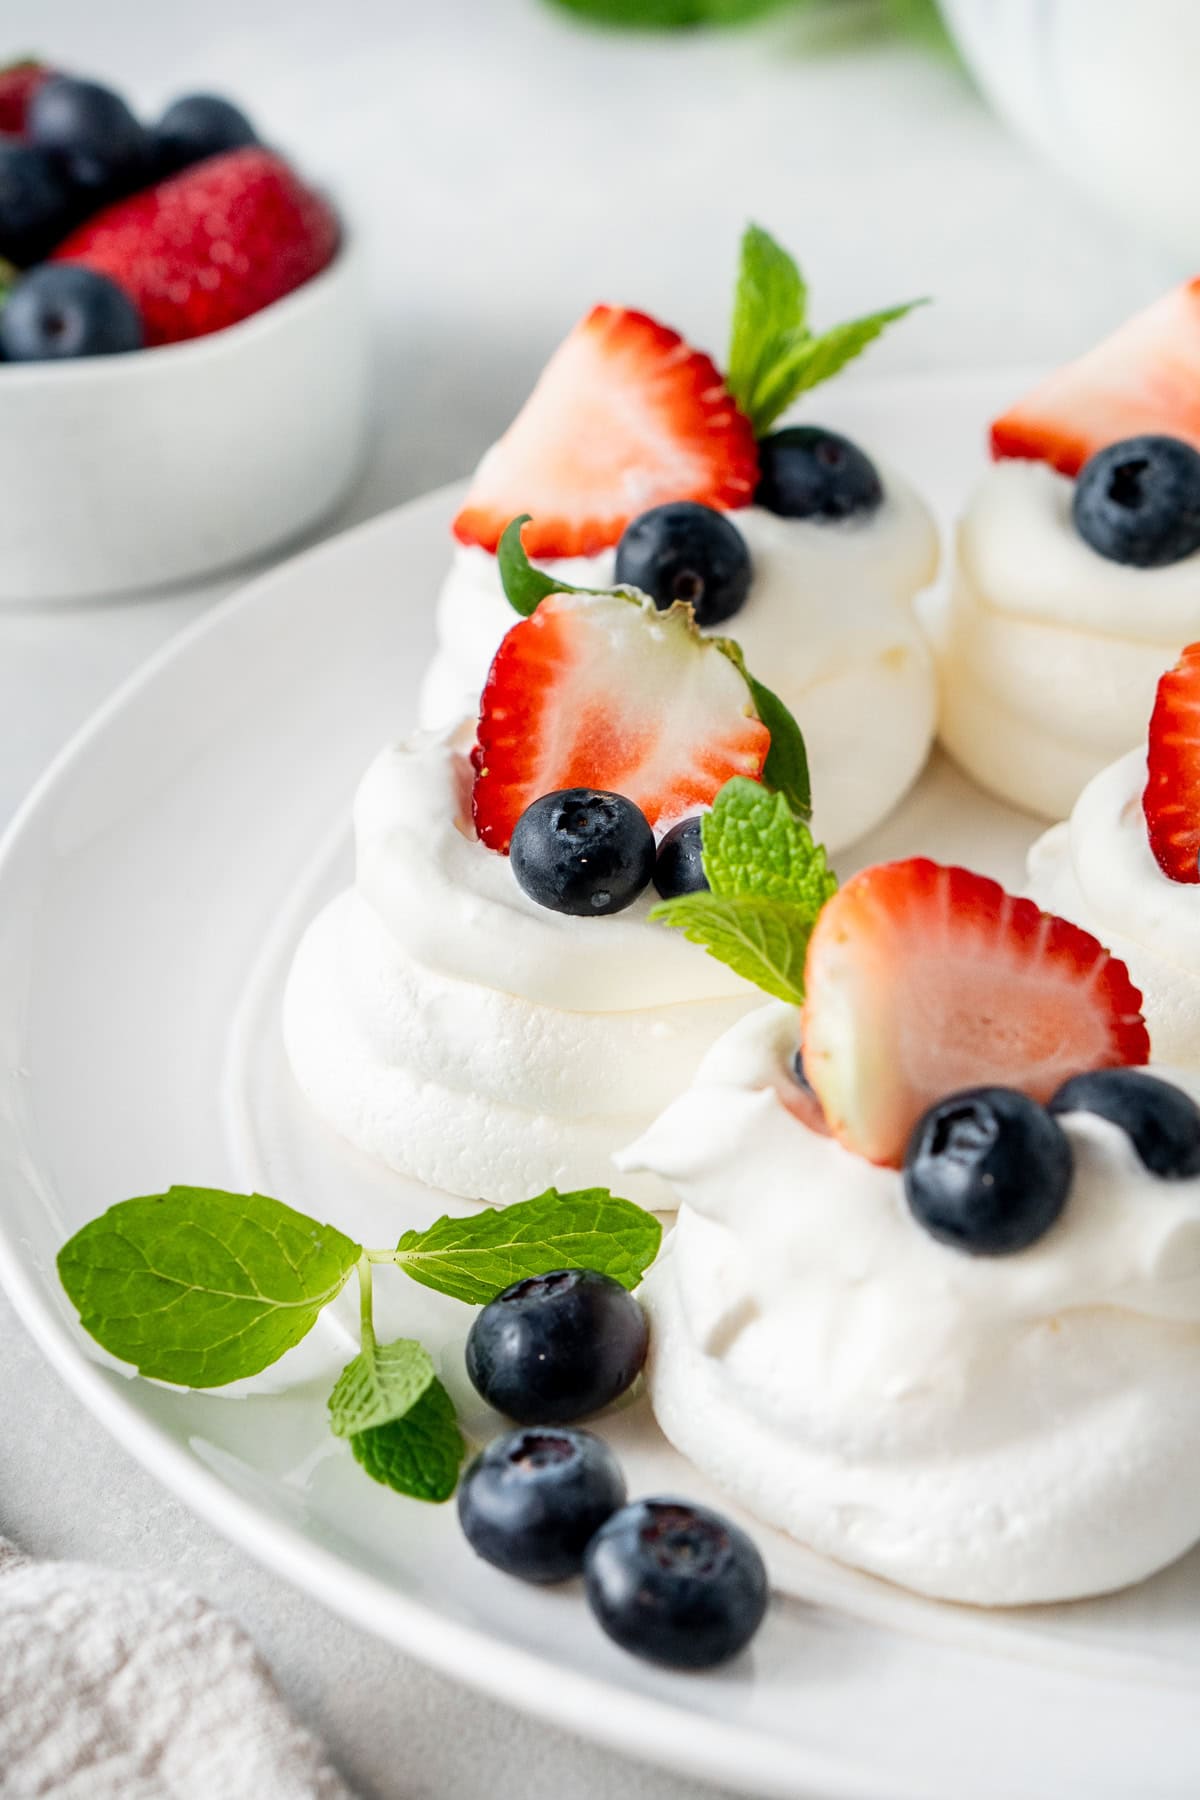
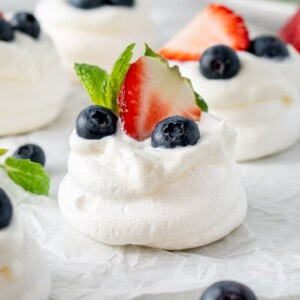
These mini pavlovas are a traditional Australian dessert in bite-sized form, perfect for entertaining. The meringues are perfectly crisp on the outside and marshmallowy on the inside. Finished with dairy free cream and fresh berries, these are a festive addition to holiday tables and are guaranteed to be popular!

If you grew up in Australia or New Zealand, not only did you grow up eating pavlova for every special occasion (especially Christmas), but you grew up with the great debate of which country it originated.
Now I don’t really need to get into that here, but what I do need to talk about is how incredible a pavlova (or pav as I’ll fondly refer to it as) is as a dessert. It’s light and it’s fresh. It’s absolutely perfect for summer!
This is my mini version. Because seriously how cute is serving everyone an individual pav! Or you can lay out a pavlova board with a bunch of toppings and let everyone customise their own.
However you choose to serve them, these crispy meringues with a soft and chewy marshmallow centre are the perfect addition to your holiday table and will be guaranteed to bring back childhood memories with each bite of dessert at Grandma’s.
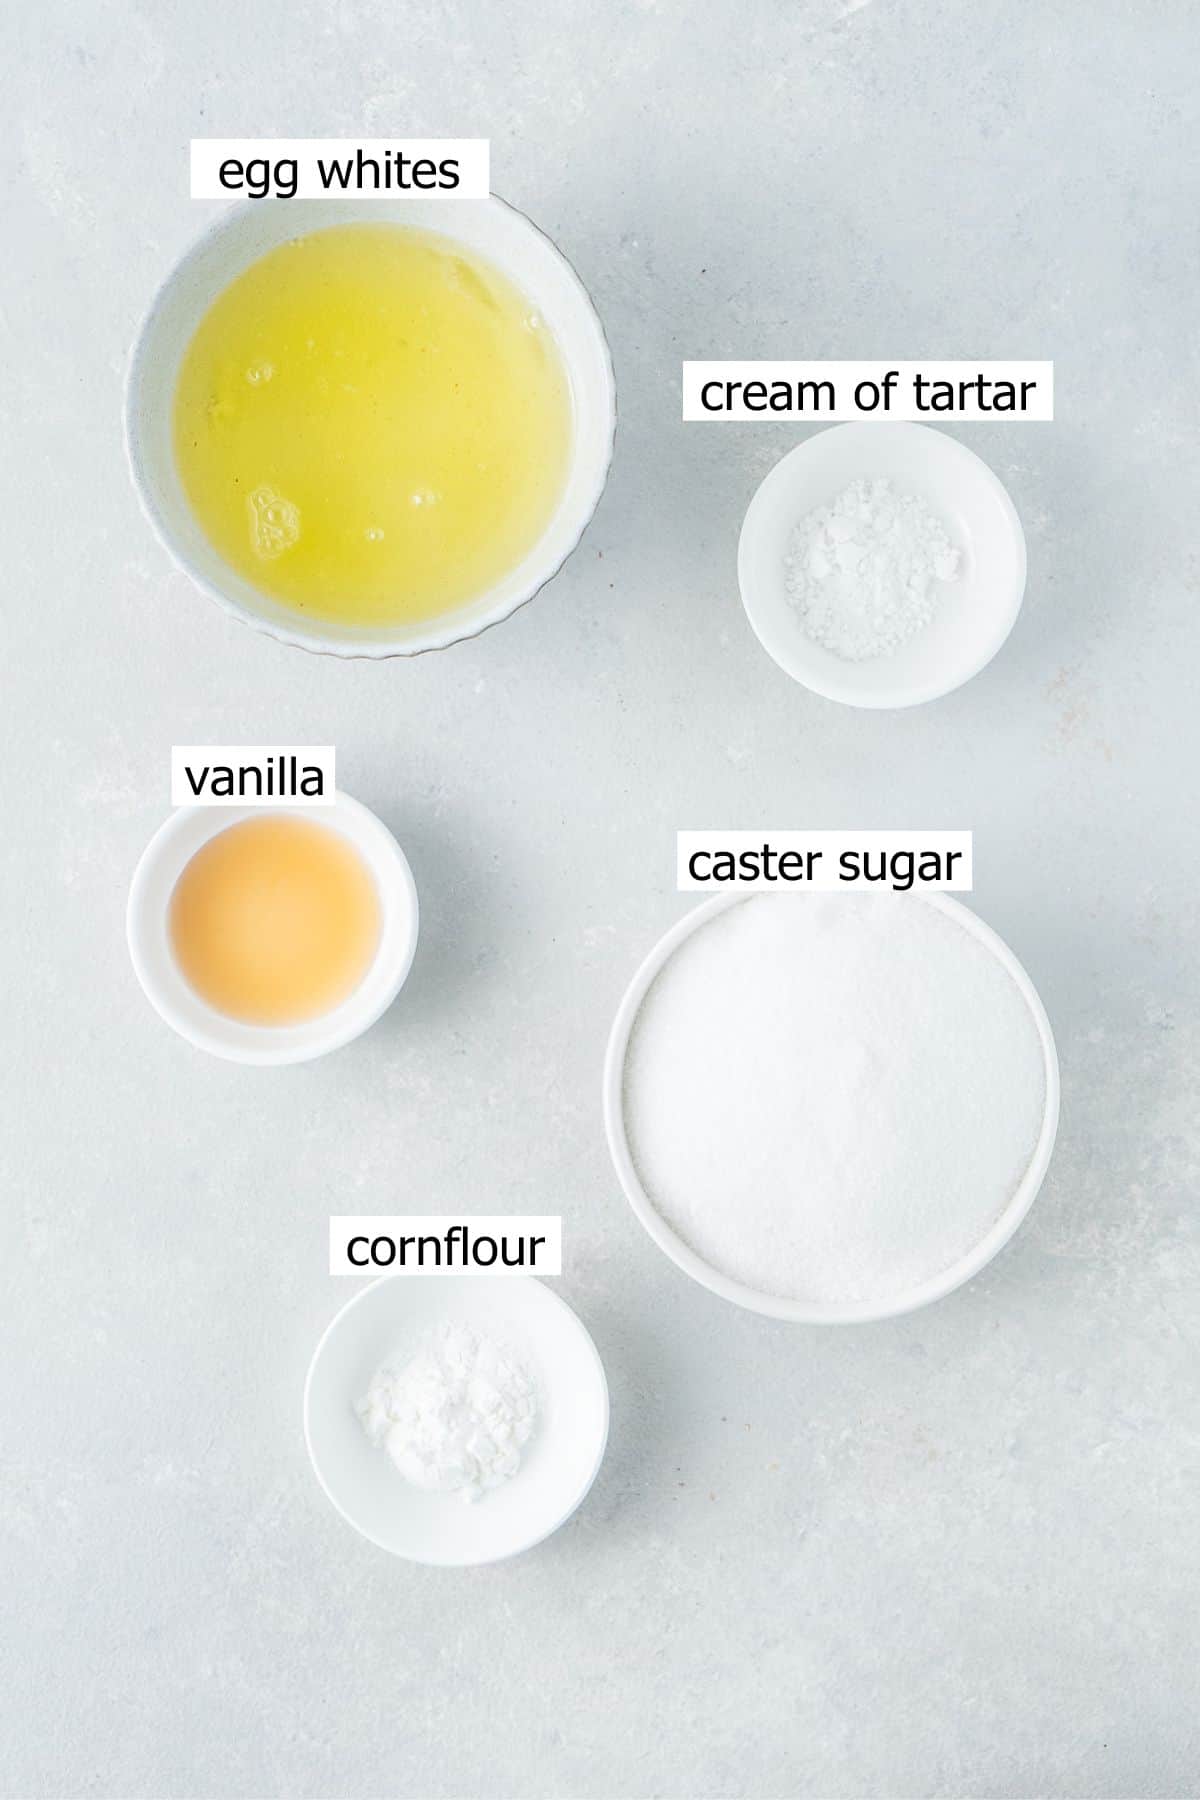
Key Ingredients
You don’t need much to make these mini pavlovas, just a few key ingredients to ensure the best results.
Note all ingredients and their quantities are laid out in the recipe card at the bottom of this post.
- Egg whites – for the best meringues you want to use room temperature egg whites, however eggs are easier to separate when they are cold. So separate first, then allow the whites to come to room temperature.
- Caster sugar/superfine sugar – you can use regular white sugar/granulated sugar but caster sugar will dissolve better into the meringue which is essential to prevent them from ‘weeping’.
- Vanilla extract – not always added in traditional recipes but I like the extra bit of flavour.
- Cream of tartar – is used to stabilise the egg whites and creates that perfect texture in the middle.
- Cornflour – also known as corn starch in the US. This works with the cream of tartar to ensure that soft, marshmallow centre for the pavlova.
Pavlova Toppings
And now for the best bit! Sure you can enjoy your mini pavlovas plain on their own, but they are best topped with whipped cream and fruit.
For the cream, I absolutely love the Flora Plant Based Thickened Cream because it’s the only dairy free cream I’ve found that actually whips into stiff peaks. My dairy eating family tell me it’s a little lighter in texture than regular cream, but tastes great. You can also use whipped coconut cream for topping.
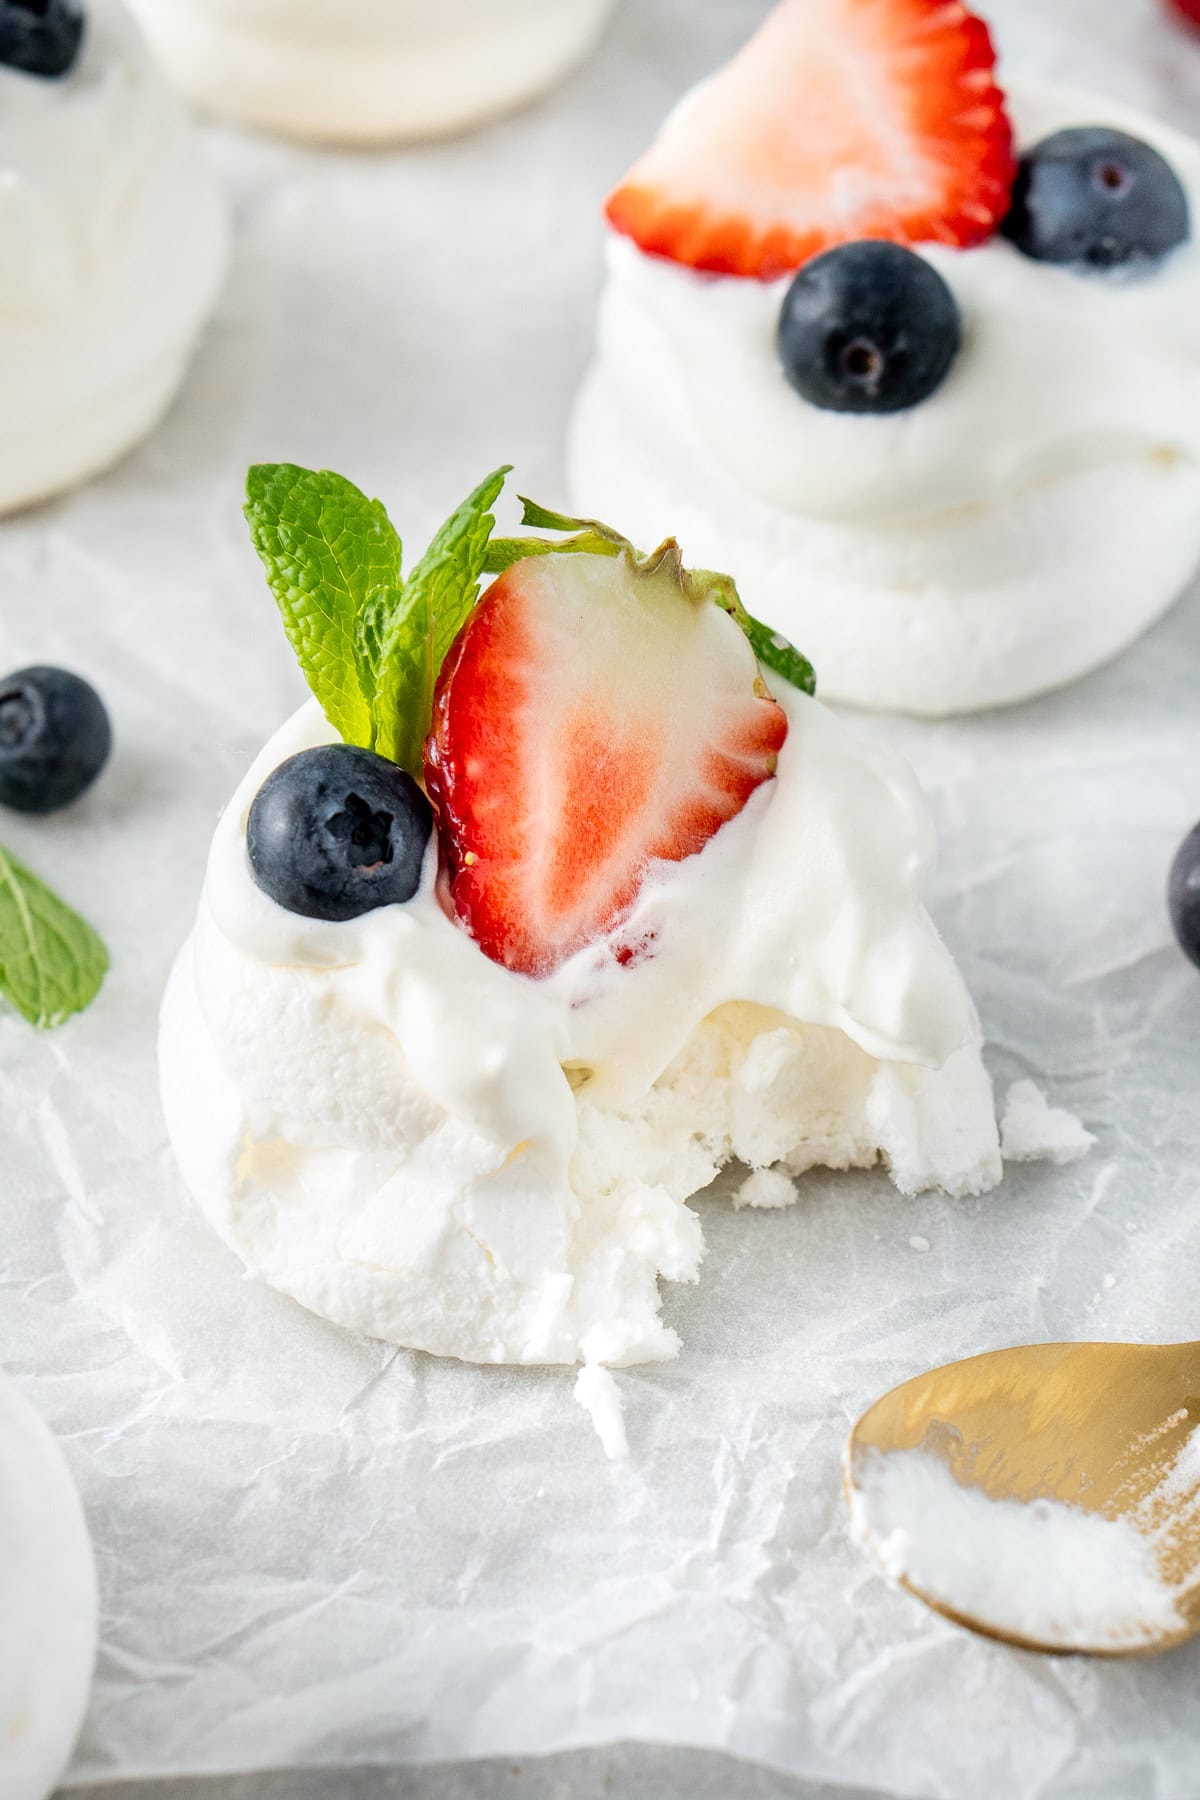
Top them with your favourite fruits. I am using a combination of fresh strawberries and blueberries but any fruit that is in season works well so just use what you like.
👉 You can also top your mini pavlovas with lemon curd – it’s very delicious!
Step-By-Step Instructions
Making meringues can feel a little intimidating, but they are really quite easy if you’re prepared and know what to expect!
To get started, it’s really important all of your equipment is dry as any moisture in your mixing bowl will prevent the egg whites from forming stiff peaks. I also recommend using a stand mixer to make it really easy, but you can use a hand held electric mixer if that is all you have.
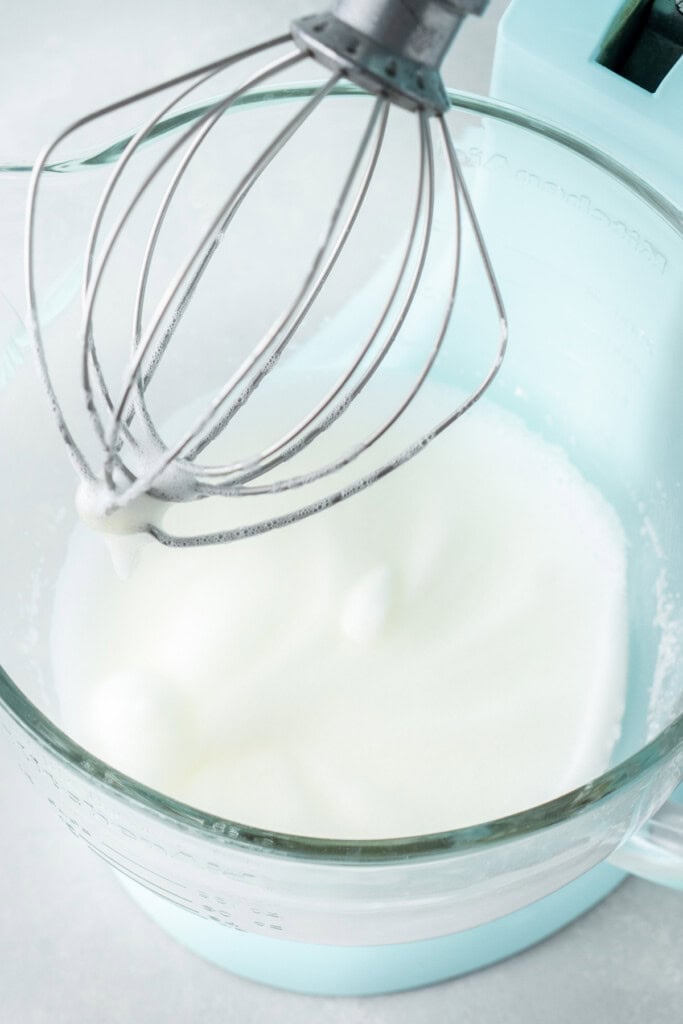
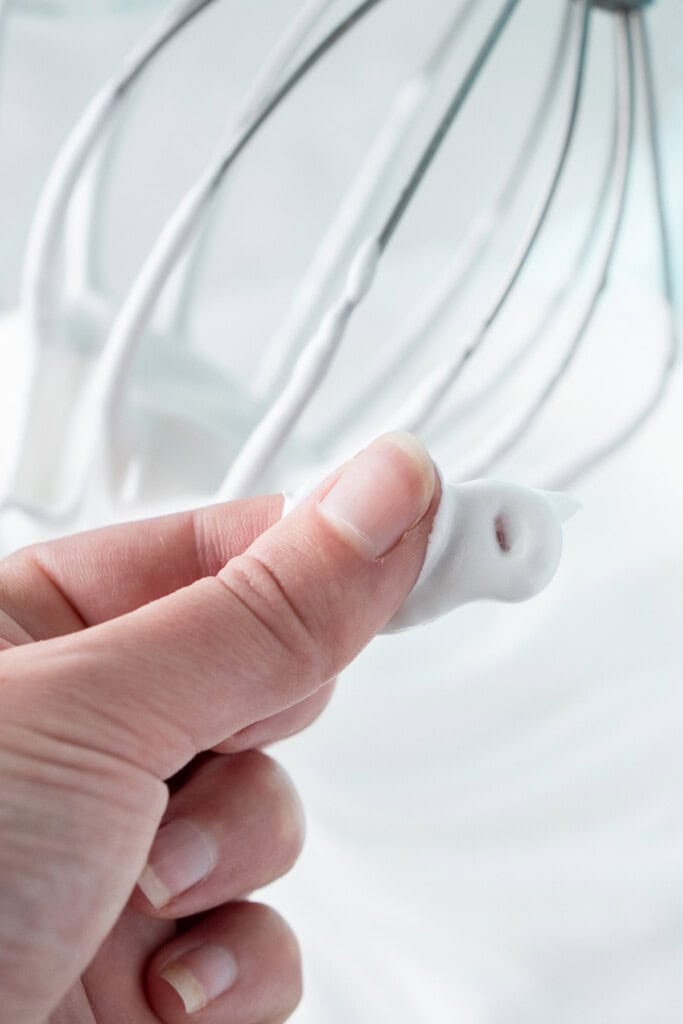
Step 1: Add the egg whites to the bowl of your stand mixer and beat them on medium-high speed until soft peaks form. This means the tips of the egg whites will loosely form peaks that gently fall rather than standing upright.
Step 2: Gradually add the caster sugar, one tablespoon at a time, then add the vanilla extract. Continue whisking until the meringue is glossy, stiff, and the peaks hold their shape.
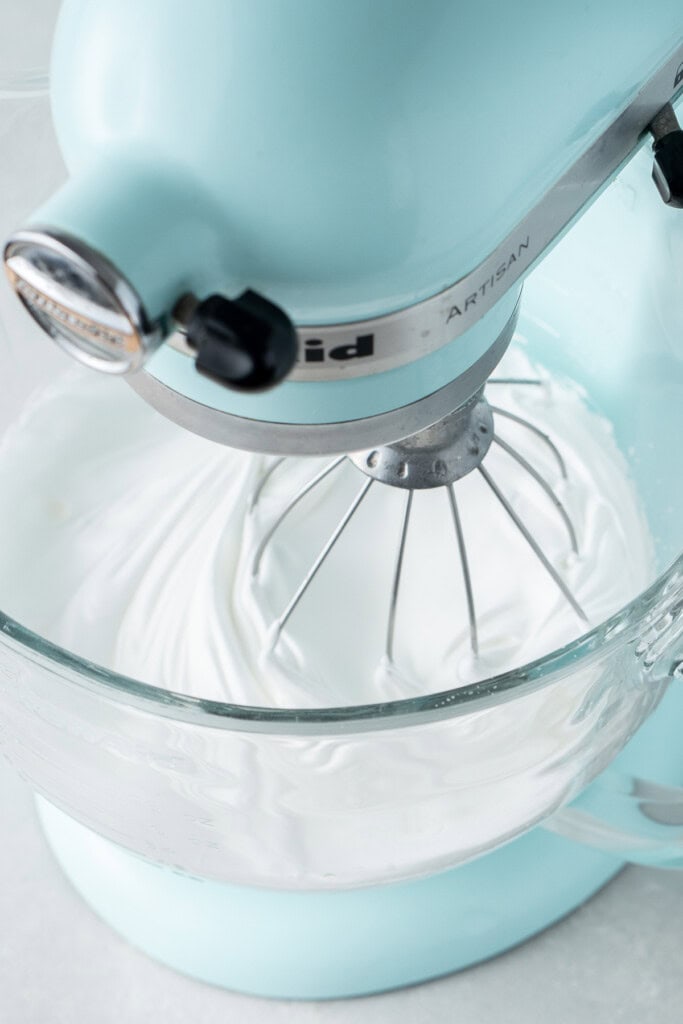
👉Tip! Take your time with this step and make sure the caster sugar has completely dissolved into the egg whites. Once you start adding the sugar, you really can’t overmix, so keep beating until the mixture is silky smooth. A good test is that you shouldn’t feel any grains of sugar when you rub a little between your fingertips.
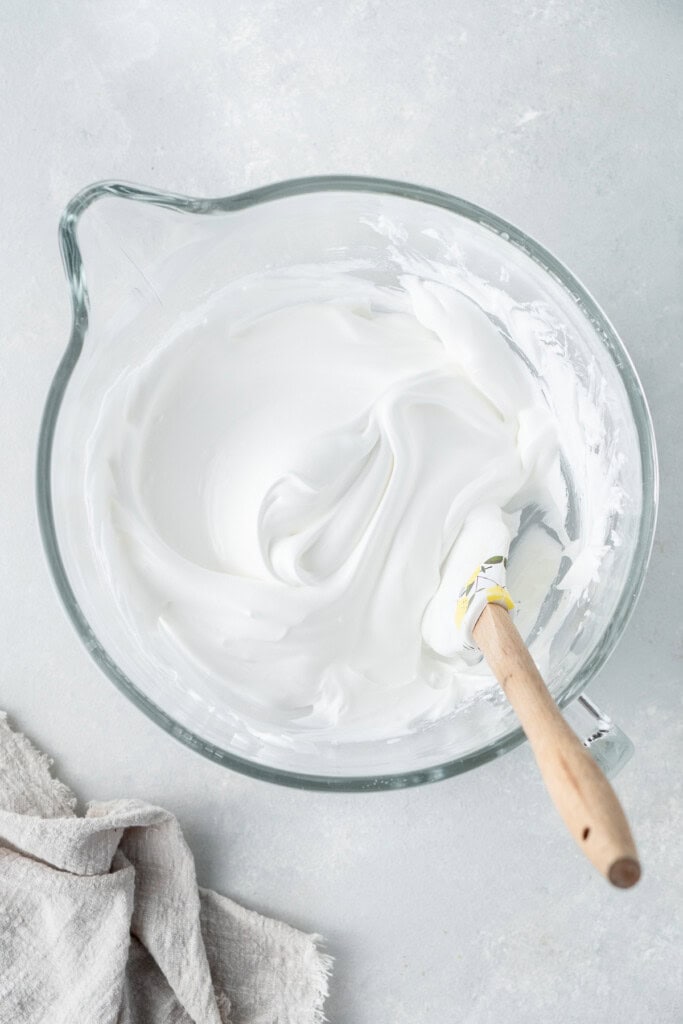
Step 3: Gently fold in the cream of tartar and cornflour with a rubber spatula until combined, being careful not to deflate the mixture.
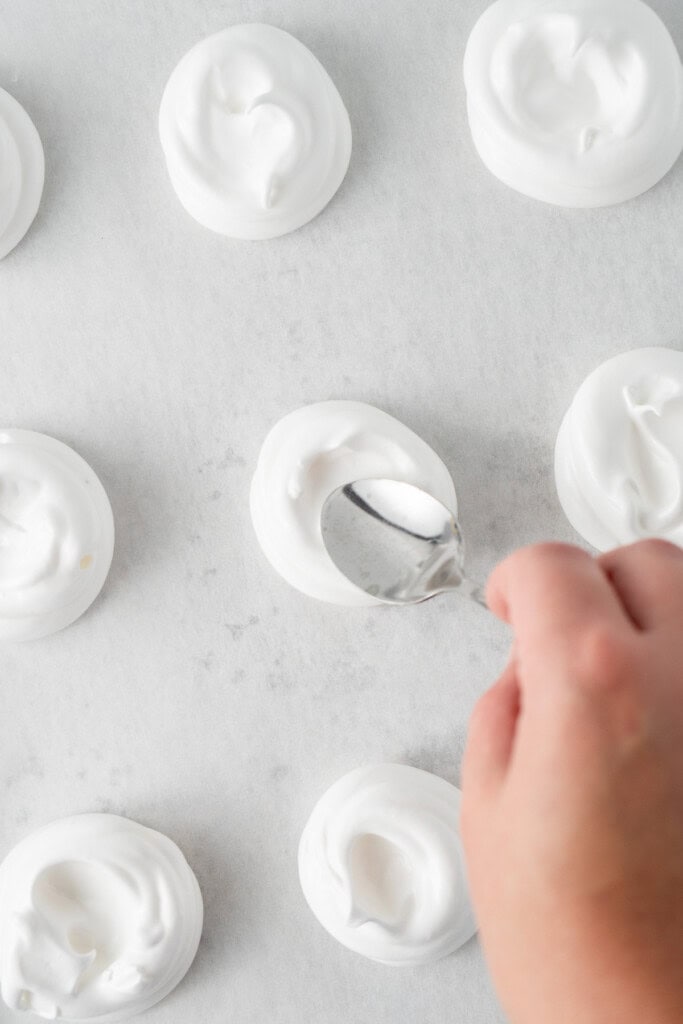
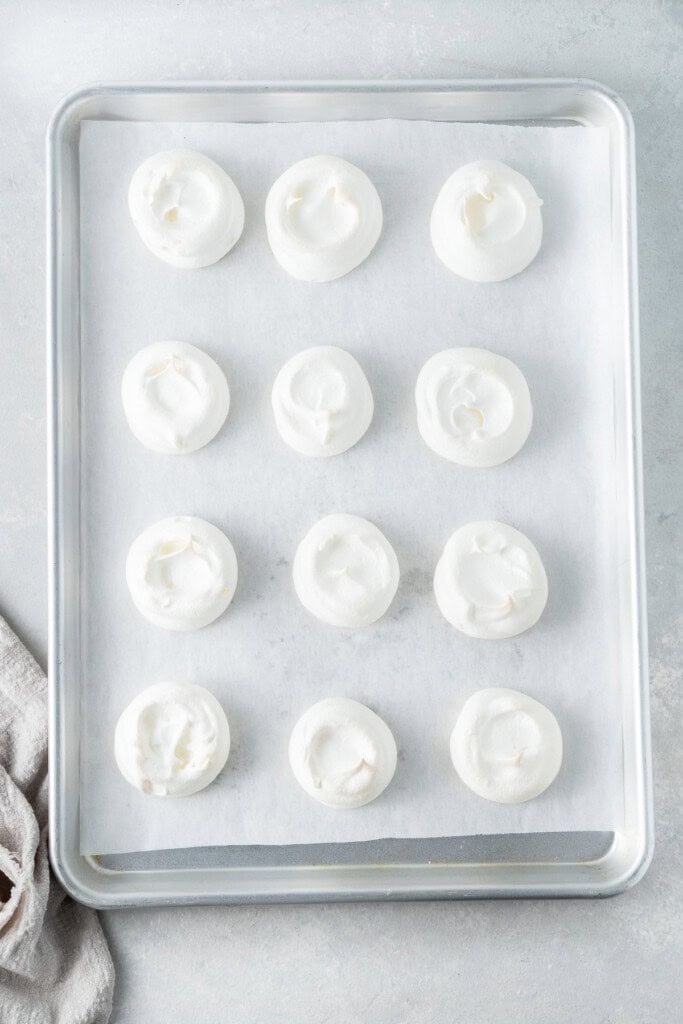
Step 4: Use a piping bag or spoon to place circles of meringue onto large baking trays lined with baking paper. Make a slight dip in the centre of each meringue with the spoon to hold the cream and fruit later. You should get around 15 mini pavlovas, depending on the size you make them.
Step 5: Place the trays into the preheated oven and immediately reduce oven temperature to 100°C (210°F). Bake for 40-45 minutes, or until the outside is firm and dry to the touch. Unlike with a meringue, for a pavlova we still want the centre to be soft rather that completely dry.
Turn off the oven and leave the meringues inside to cool completely, even overnight, to fully dry out.
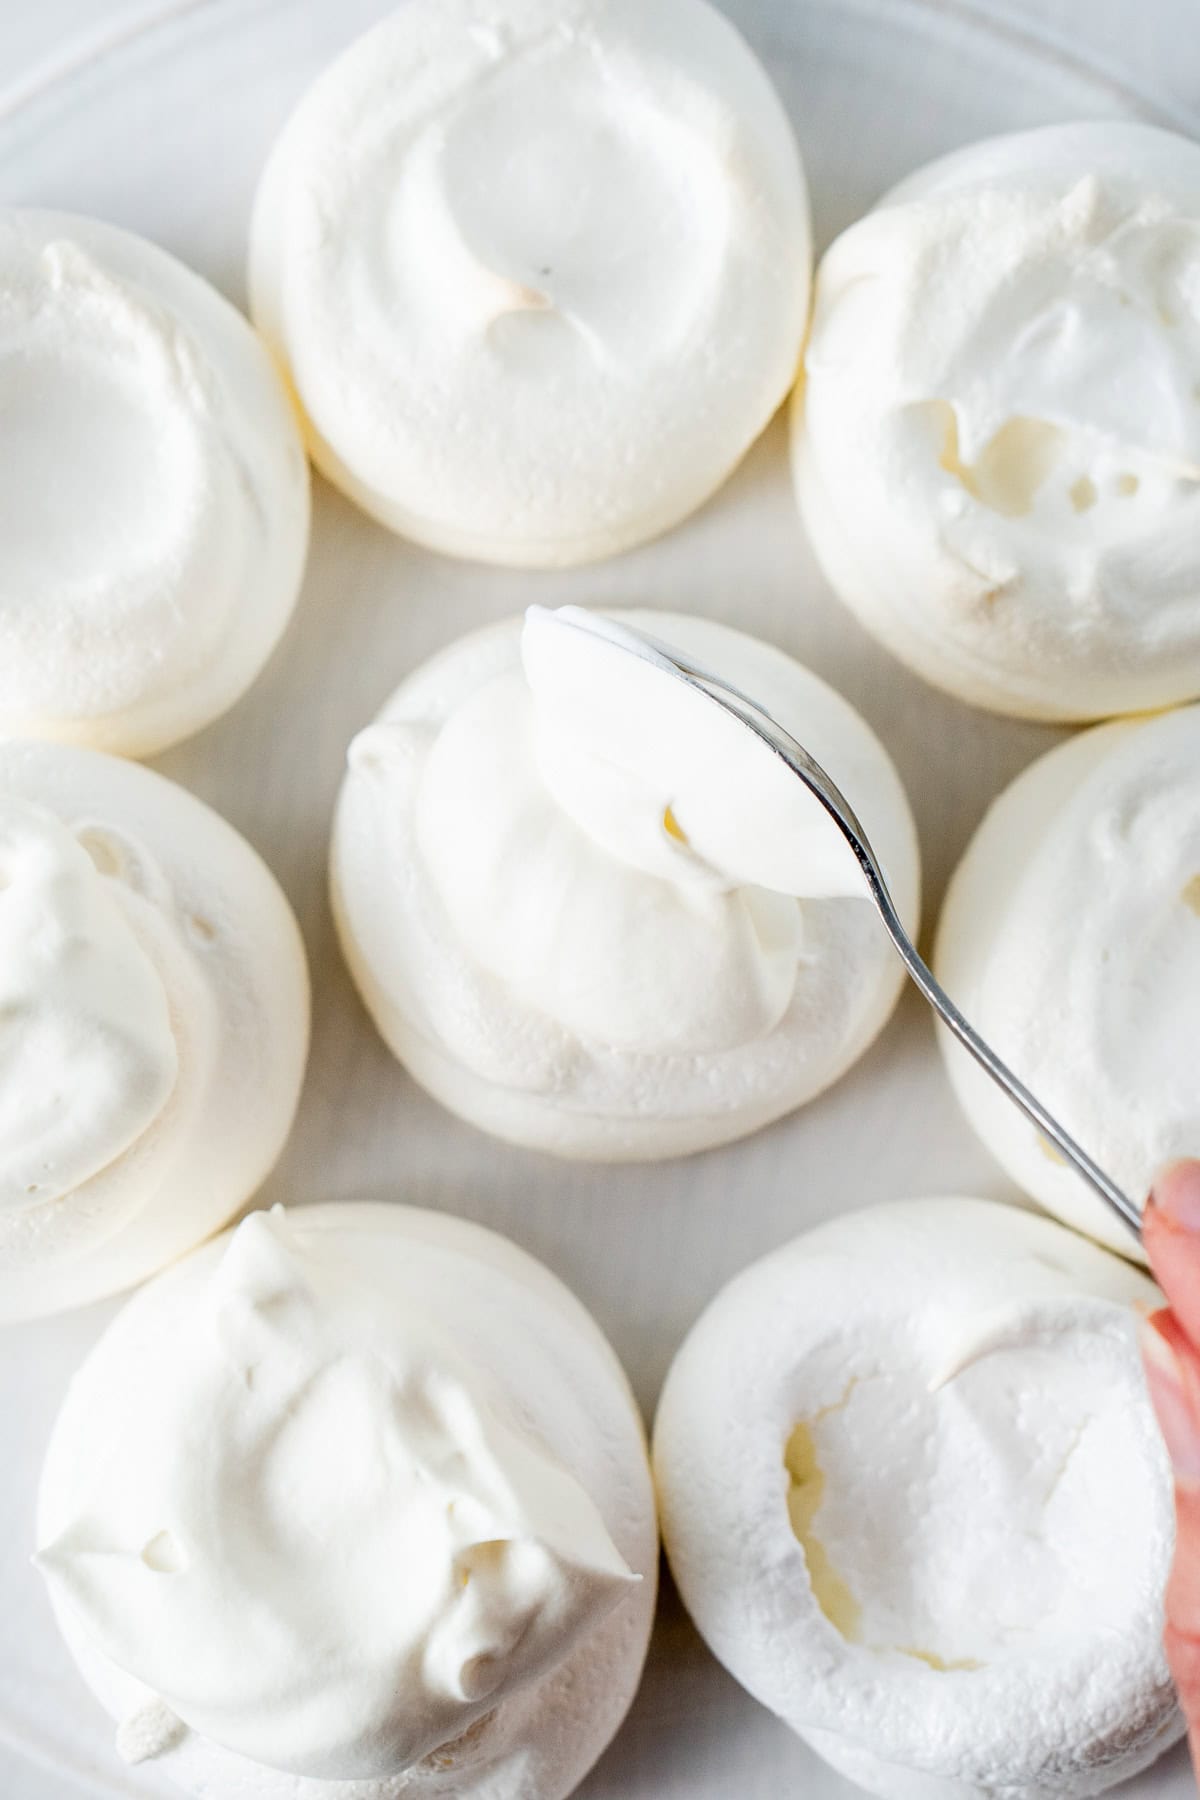
Step 6: Once the meringues are completely cold, spoon on the whipped dairy free cream into the centre of each cooled meringue and top with fresh fruit.
🌟 Sally’s Tips for the best pavlova!
I have made many a failed pavlova over the years, so learn from my mistakes and make sure to follow these tips to ensure the best result every time!
- Be patient and let them take their time. Bake them at a low temp and once done, let cool all the way in the oven. Don’t be tempted to take them out early!
- Meringues and humidity just do not mix. Any moisture or heat around the meringues after they are cooked will cause them to weep, where the sugar starts to seep out and get a bit sticky which ruins the texture. Turn the air conditioner on if you have to!
- Make sure all of your equipment is dry before beginning. If not, the egg whites will not form stiff peaks. For extra peace of mind, you can wipe the inside of your bowl with a little white vinegar before adding your egg whites.

Storage and Make Ahead Instructions
The mini pavlova meringues are best eaten fresh, but you can make them up to 3 days in advance. Store them in an airtight container at room temperature, keeping them in a cool, dry place.
Just make sure to only add the toppings just before serving!
Recipe FAQs
Yes! The meringues can be baked a day or two in advance and stored in an airtight container at room temperature. Add the cream and fruit just before serving to keep them crisp.
Of course! You can use regular whipped cream if you don’t need this recipe to be dairy free.
Berries like strawberries, raspberries, blueberries, and passionfruit are classic options, but you can also use kiwi or sliced peaches.
If you do make this recipe, please be sure to leave a comment and ⭐⭐⭐⭐⭐ rating below! And tag any of your creations on Instagram with @eightforestlane as I would love to see.
More summer desserts:
Dairy Free Rocky Road Ice Cream
Chocolate Pavlova
Vegan Pineapple Cupcakes
Dairy Free Lemon Sugar Cookies
Mini Pavlovas
Equipment
Ingredients
- 4 egg whites
- 1 cup (200 g) caster sugar/superfine sugar
- 1 teaspoon vanilla extract
- ½ teaspoon cream of tartar
- 1 teaspoon cornflour/cornstarch
- 1 cup (250 ml) dairy free cream whipped, for topping
- fresh fruit such as strawberries or blueberries, for topping
Instructions
- Preheat the oven to 180°C (350°F) and line two baking trays with baking paper.
- In a stand mixer fitted with the whisk attachment, beat the egg whites on medium-high speed until soft peaks form.
- Gradually add the caster sugar, one tablespoon at a time, then add the vanilla extract. Continue whisking until the meringue is glossy, stiff, and the peaks hold their shape.
- Gently fold in the cream of tartar and cornflour with a rubber spatula until combined, being careful not to deflate the mixture.
- Use a piping bag or spoon to place circles of meringue onto the prepared trays. Make a slight dip in the centre of each meringue to hold the cream and fruit later. You should get around 15 mini pavlovas, depending on size.
- Place the trays into the oven and immediately reduce oven temperature to 100°C (210°F). Bake for 40 minutes, or until the outside is firm and dry to the touch.
- Turn off the oven and leave the meringues inside to cool completely. This helps prevent cracks.
- Once the meringues are completely cold, spoon on the whipped dairy free cream into the centre of each cooled meringue. Top with fresh fruit.
- Serve immediately and enjoy!
Notes
Nutrition
Nutritional information is provided as a guide only and is calculated using automated online tools, therefore we cannot guarantee the accuracy. We encourage you to make your own calculations based on the actual ingredients used in your recipe.
This recipe was originally published in August 2018 and has been updated in 2025 with new photos and more helpful information.
Never wonder what's for dinner again
Get a brand new dairy free meal plan every week, plus members only recipes and the whole of Eight Forest Lane with no ads. The planning is done, you just shop and cook.
Start your 7 day free trial →