If you’re looking for a luxe dessert, then this super creamy no bake biscoff cheesecake is here to make all your dessert dreams come true. Plus it uses just 6 ingredients and is made in a loaf tin making it perfect for smaller families and couples. You’re going to love this one!
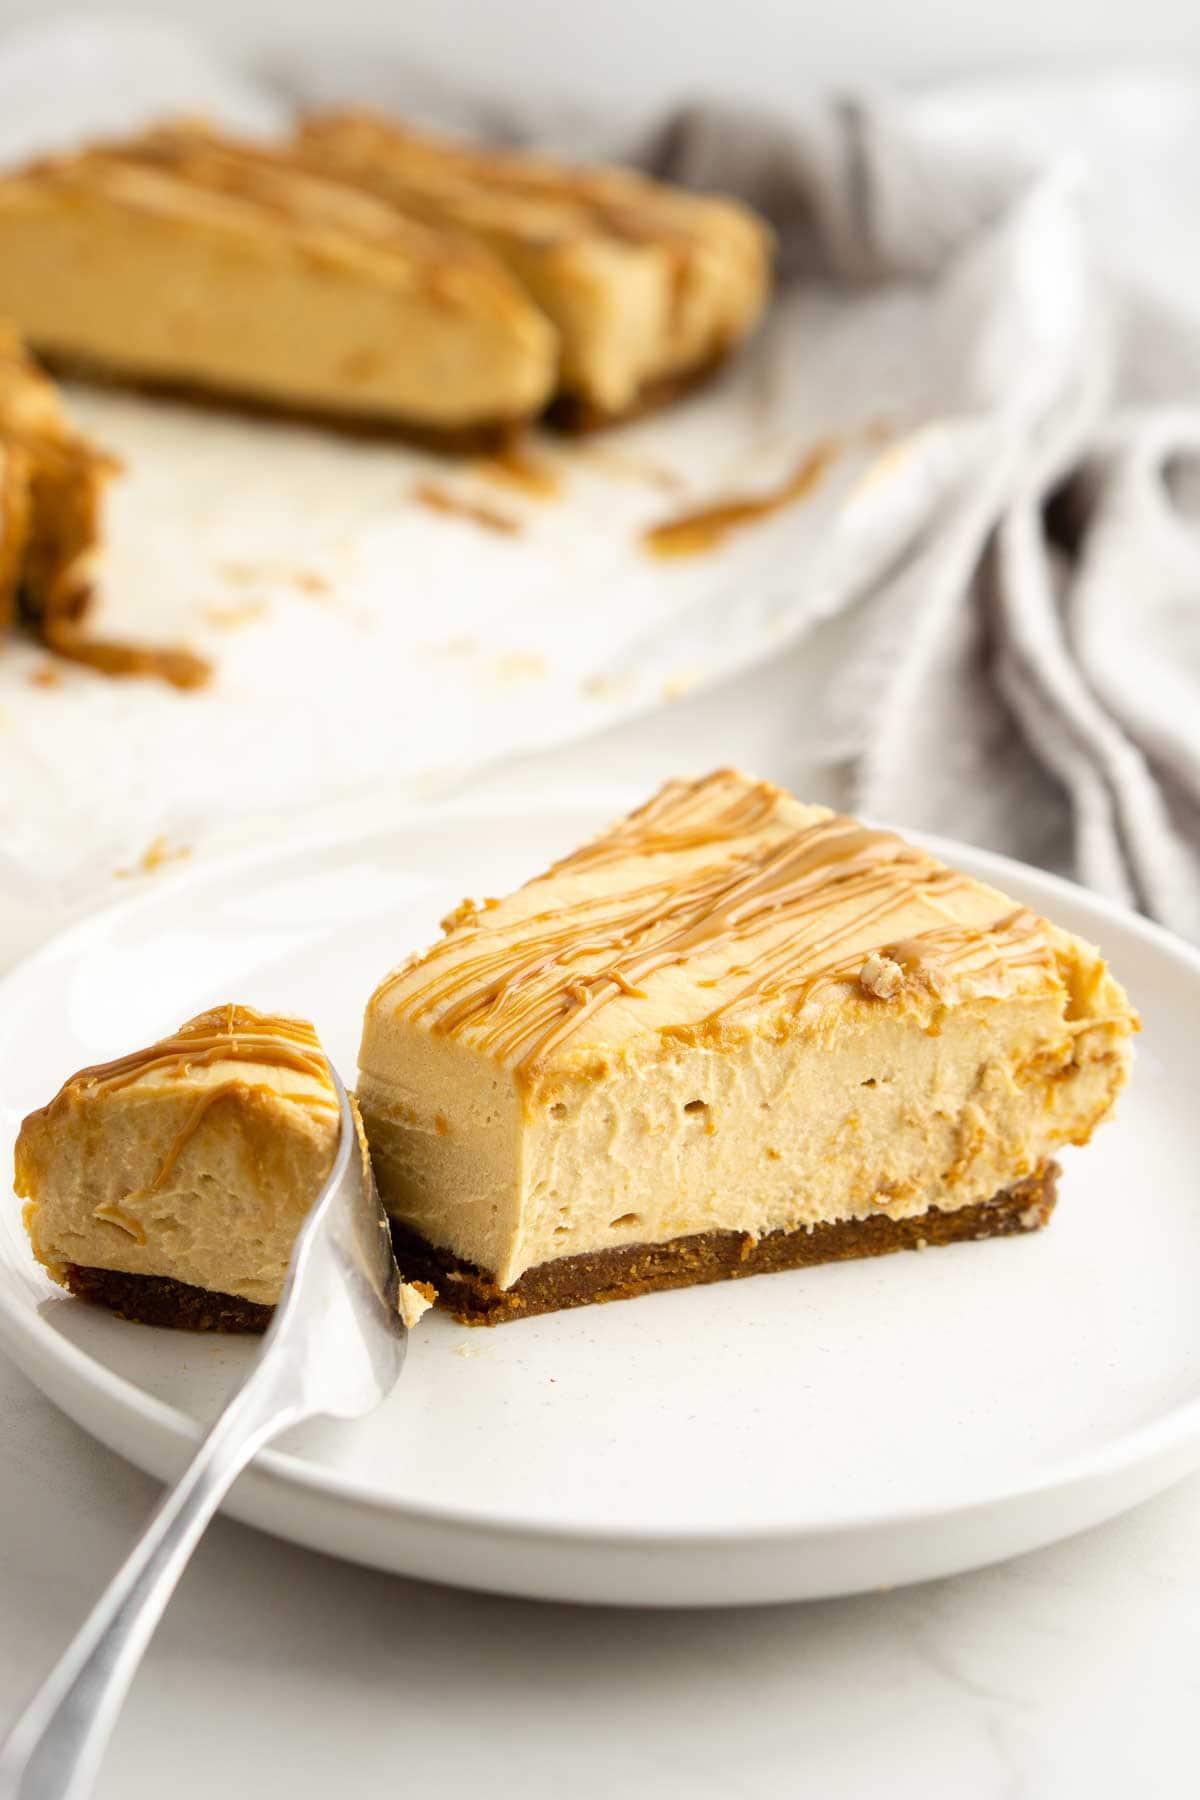
Cheesecake is probably my husband’s favourite dessert. It’s what he requests for his birthday every year and I even made one for our little at home Christmas celebration last year. But the problem I’ve always had with cheesecake is that a standard recipe makes enough to feed a small army.
I do a lot of baking and with just the two of us, sometimes it’s nice to have something that is the perfect amount to feed us both without the mountains of leftovers and the questions of, should we freeze this? How long will this last? Do I really need to eat more of this?
That’s why I love this recipe so much. Being made in a loaf pan it’s about half the size of a regular cheesecake yielding just 6 slices, which is perfect for 2 people to have an indulgent dessert for three nights. Or I guess you could share it with others if you really want to.
I also have a misconception that cheesecake is difficult to make but with just a few quality ingredients and the help of my kitchenaid stand mixer, it’s actually really really easy. Especially this no bake version. Just make sure to plan ahead as you’re going to need to chill the cheesecake overnight to make sure it sets – and trust me the waiting is the most difficult part!
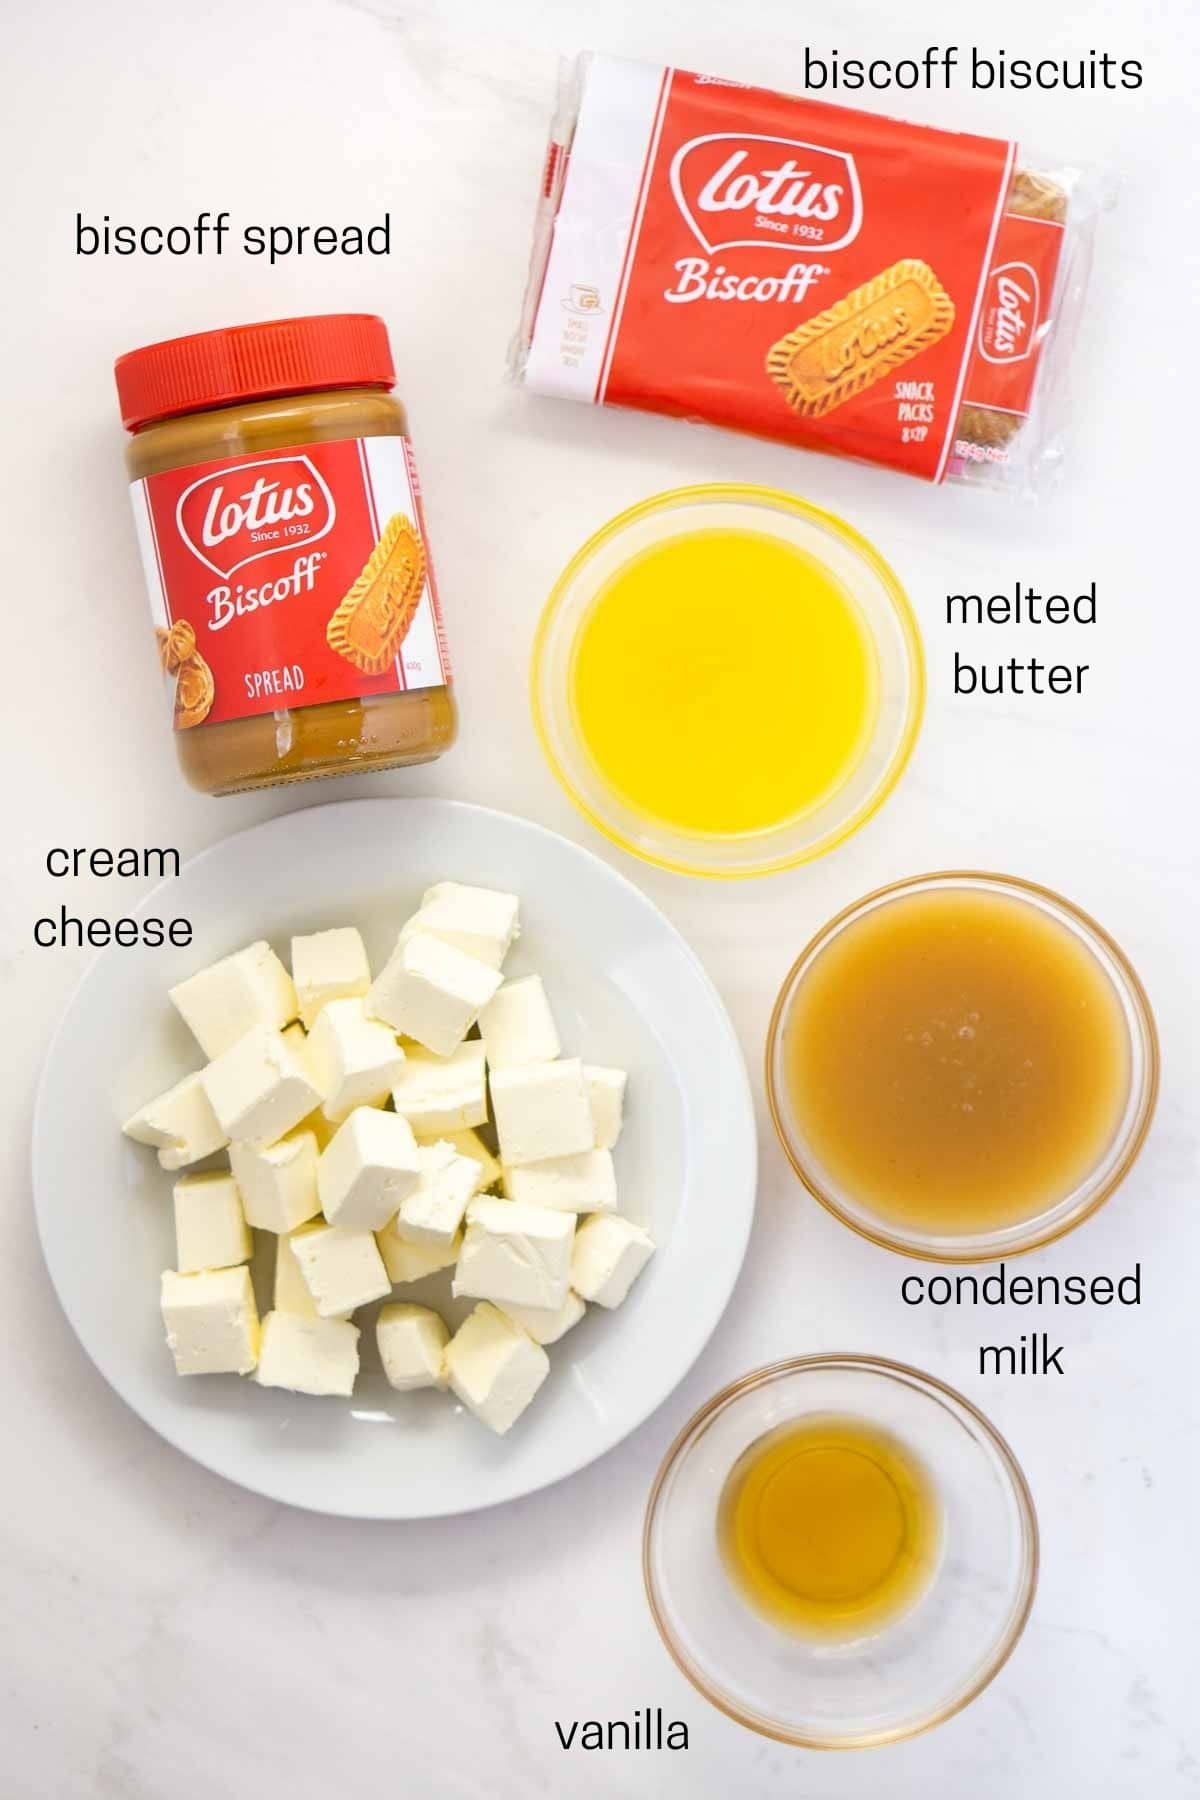
Ingredients for small batch biscoff cheesecake
You’ll need just six ingredients to make this cheesecake, all of which I can pick up at my local Woolworths supermarket.
When making this recipe, I always use products to reduce the amount of dairy that is involved. The cream cheese is the only dairy product in the recipe as written but I do use a lactose free version.
- Biscoff biscuits – these little spiced biscuits are going to form the base of the cheesecake. You can find them in the supermarket near the Oreos.
- Vegan butter – a little melted vegan butter is going to make the base deliciously buttery but also help hold it all together. If you don’t mind using dairy you can use regular butter here instead.
- Cream cheese – while I don’t usually eat dairy, I do make an exception for block cream cheese as this is essential for making this cheesecake set. I haven’t tried a spreadable non dairy alternative but I don’t think it would work the same. Instead, I buy the lactose free Philadelphia block cream cheese to make sure my tummy is able to handle it and I get a perfect cheesecake every time.
- Sweetened condensed milk – to reduce the amount of dairy in this cheesecake I like to use the new plant-based version which is made from rice and oat. I also find it’s not quite as sweet as the original which is perfect for my tastes but either plant based or original will work in this recipe.
- Biscoff spread – If you haven’t yet discovered the delicious, lightly spiced flavour of Lotus Biscoff spread (or cookie butter as it’s often called) then you’re in for a treat! Find this biscuit based spread next to the peanut butter at the shops. I like the smooth version to get a perfectly creamy cheesecake texture, but you can use the crunchy if you’d prefer.
- Vanilla – always vanilla for that little extra flavour boost.
How to make biscoff no bake cheesecake
Have I mentioned yet just how much I love the fact this recipe is no bake? It makes it so simple and easy to make. You will need a couple of tools that are going to make this recipe so much easier, which is a food processor and a stand mixer.
If you don’t have these you can still try this recipe, but it’s going to be a bit harder to get the desired consistency which is essential for this recipe to ensure the cheesecake sets.
This is one of those recipes where it matters how and when you add the ingredients therefore I recommend that you read the recipe in full all the way through before beginning.
You also will need to chill the cheesecake for at least 24 hours before serving so make sure you have plenty of time before you plan on serving this. If you rush this step again you may find that your cheesecake has not set.
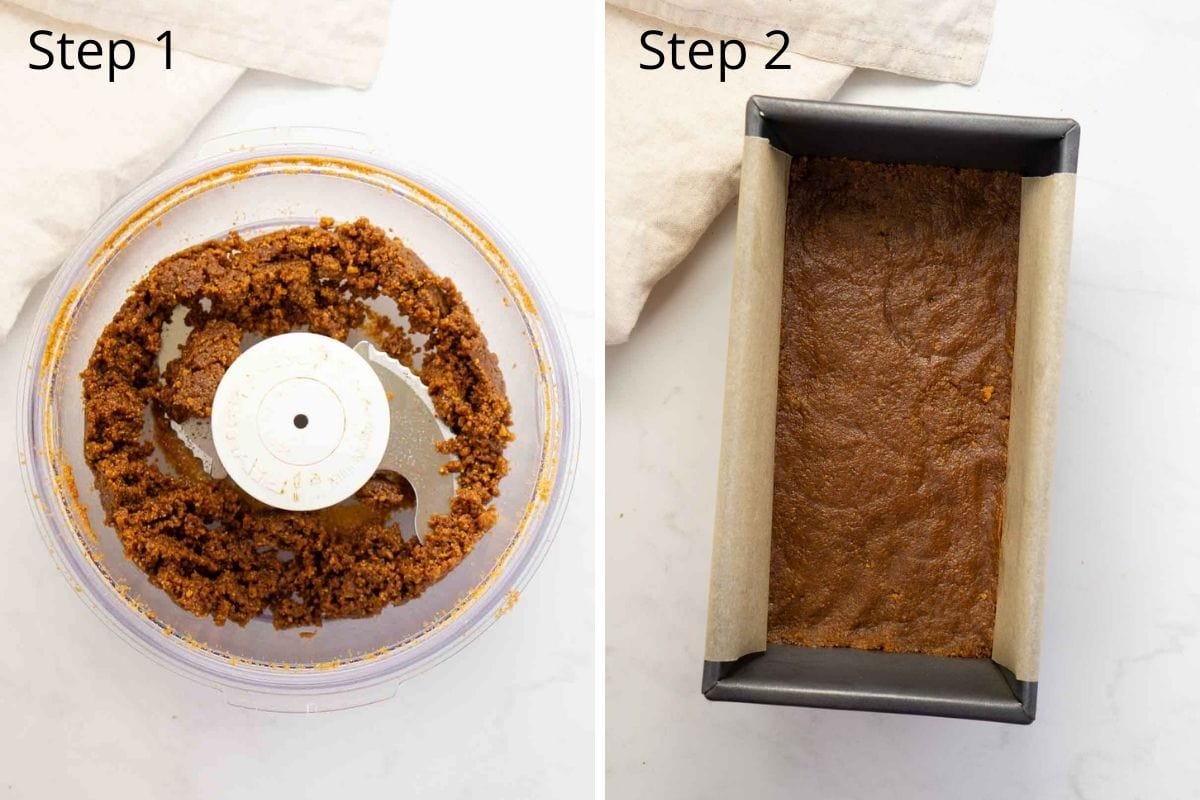
Start by making your base by placing the biscuits into the food processor and processing into a fine crumb. Add in the melted butter and mix to combine.
Line a 8 x 4 inch loaf pan with baking paper, leaving a little of the paper hanging out over the top to make it easy to lift out the cheesecake, then add the biscuit crumbs to the base and press down firmly with your hands or a spoon so that the base has an even covering. Set this aside in the fridge while you prepare the filling.
For the filling you want to make sure your ingredients are at room temperature – this is another important factor to ensuring the perfect texture when set. To do this easily with the cream cheese just cut it into cubes and let sit on a plate. It will come to room temp much quicker than if you just leave it in the solid block.
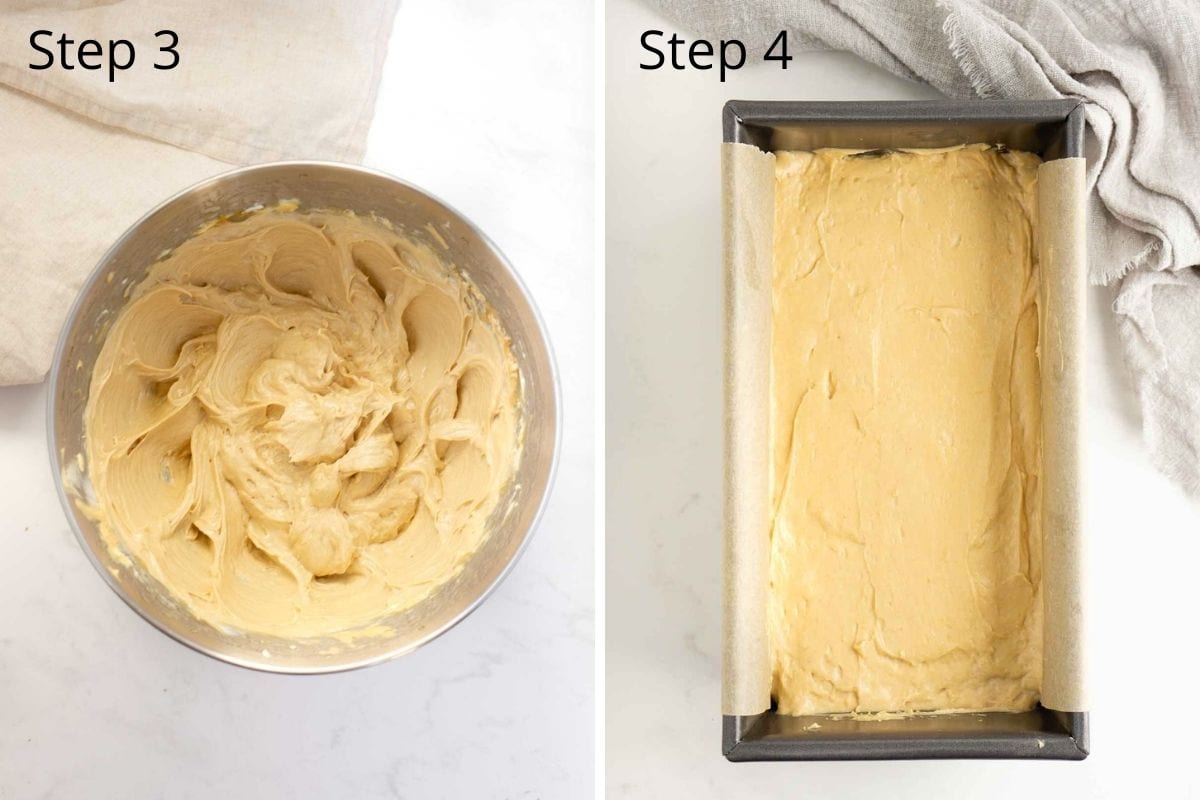
Place the cream cheese into the bowl of a stand mixer with the paddle attachment fitted and begin mixing, slowly before turning up to medium. You want to whip the cream cheese for AT LEAST 5 minutes or until it’s looking really really creamy.
Stop the mixer and add in the vanilla and biscoff spread. Continue to whip for another 5 minutes, scraping down the sides and bottom of the bowl to make sure the mixture is beating evenly.
Once this mixture is combined and really soft and creamy, with the mixer running on medium low, SLOWLY drizzle in the sweetened condensed milk a little at a time. I say this with capitals because this is the most important step in the recipe.
This slow process of combining the condensed milk with the cream cheese after the cream cheese has been beaten extremely well is what is going to make the cheesecake set and ensure you don’t end up with cheesecake soup.
Continue beating until all of the condensed milk has been added and the mixture is super smooth and creamy before pouring the mixture into the loaf tin. Smooth out evenly with a spoon or spatula before placing the cheesecake into the fridge to set overnight.
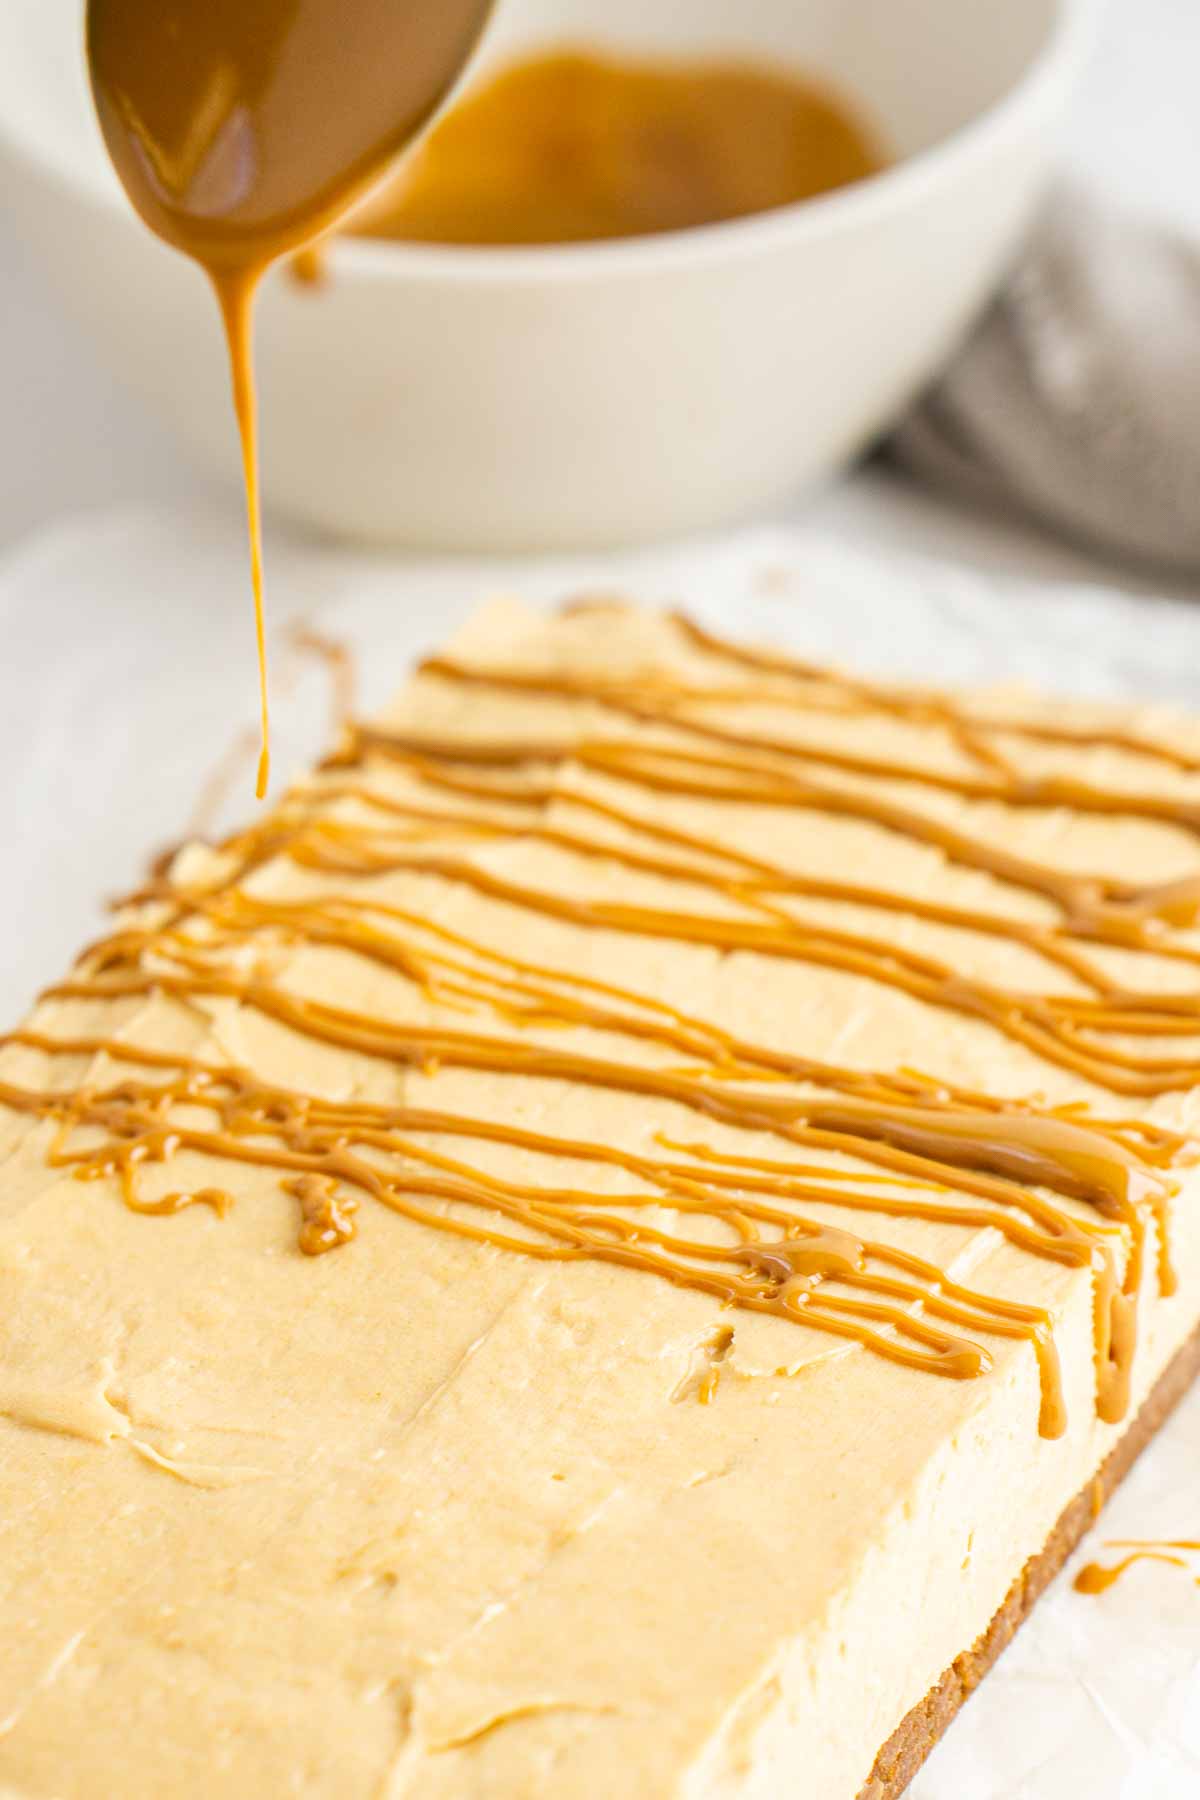
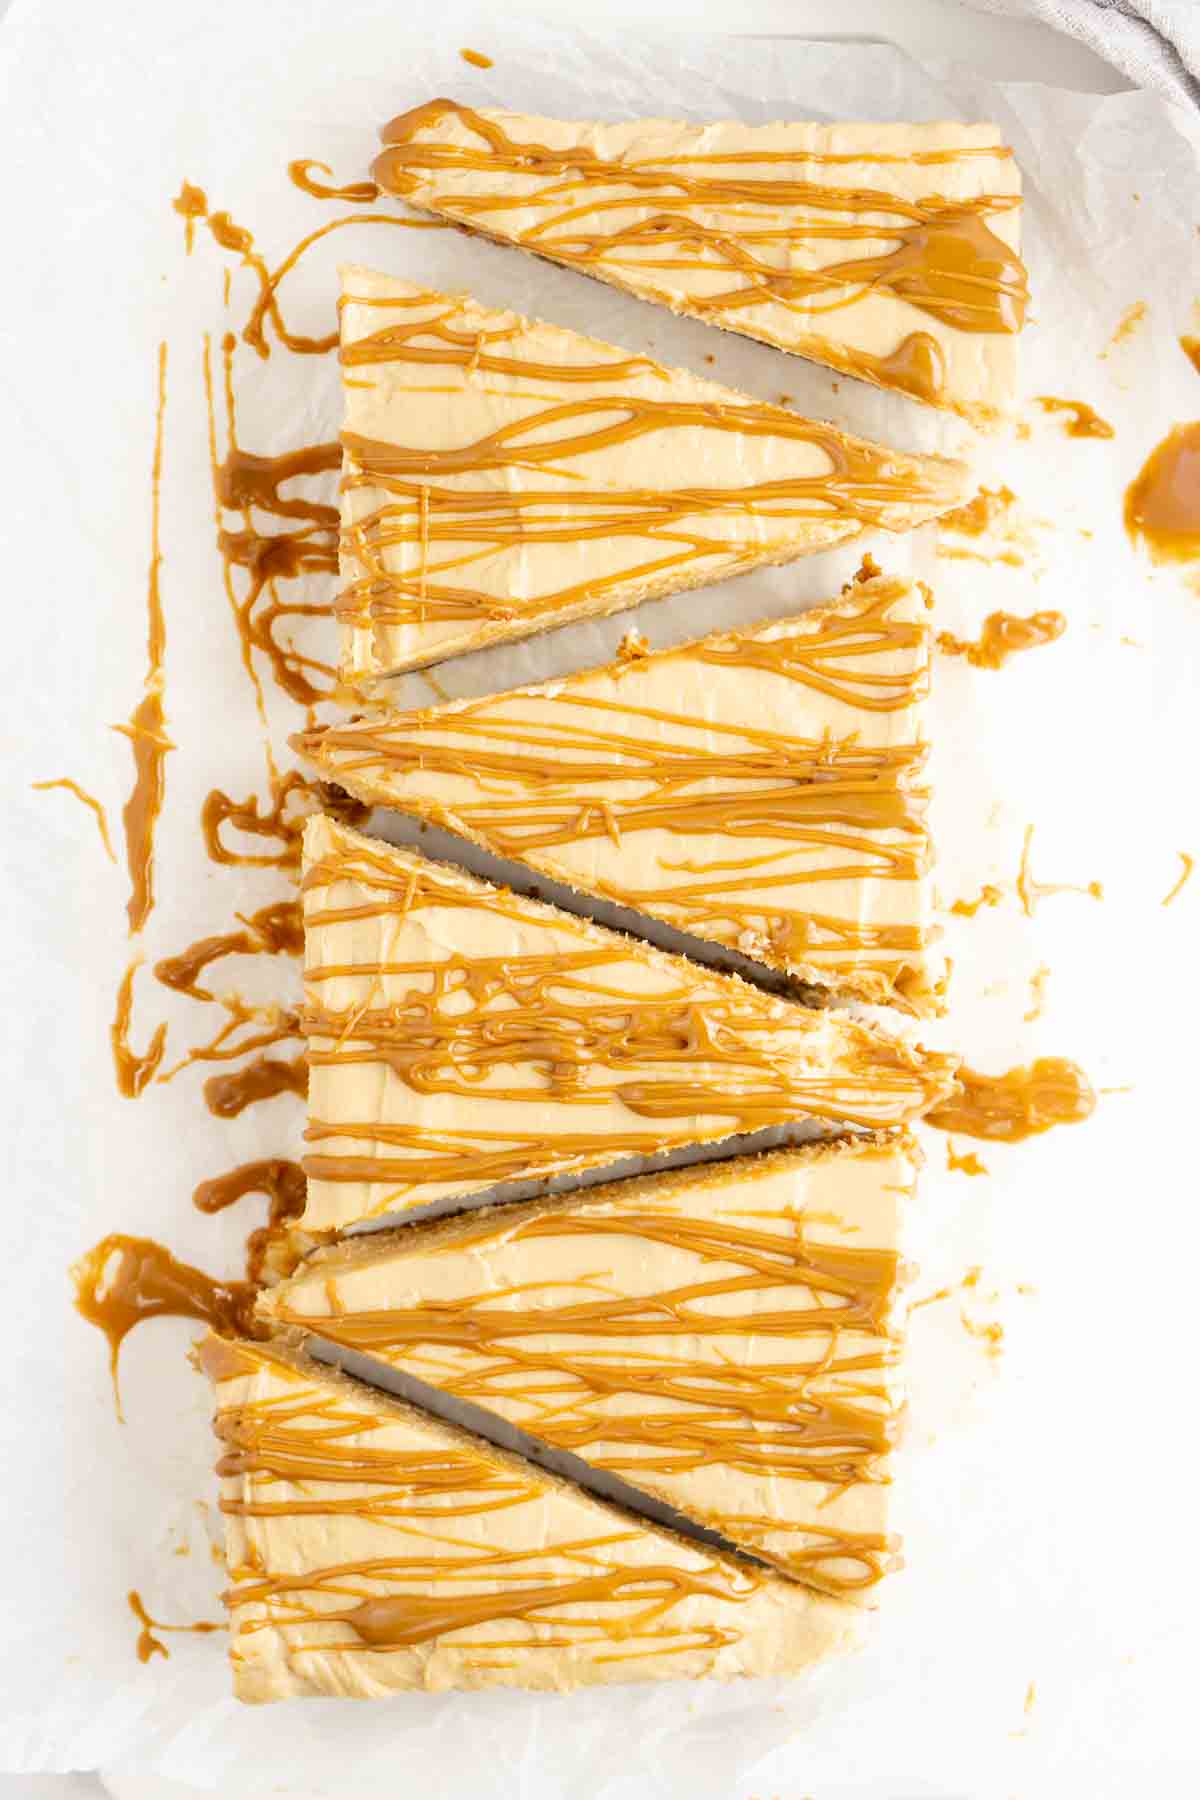
Once the cheesecake has set, remove from the tin by gently lifting the edges of the overhanging baking paper. Melt a little extra biscoff spread in the microwave to make it the perfect drizzle consistency and then spoon it over the top of the cheesecake before slicing into 6 pieces. Keep refrigerated for up to 4 days.
I have to be honest with you – I make a lot of desserts and some I do like more than others. But this one is quite simply one of the best things I’ve ever made. When I ate the first bite I knew I was onto a winner. The texture is outstanding. It’s smooth and creamy and totally indulgent.
I’ll quite happily make this over and over again, no matter what the occasion.
More biscoff recipes:
Biscoff Baked Doughnuts
Vegan Biscoff Cupcakes
Vegan Biscoff Fudge
Vegan Biscoff Brownies
Small Batch Biscoff Cheesecake (No-Bake)
Ingredients
For the base:
- 1 x 124 gram packet biscoff biscuits
- 3 tablespoons melted vegan butter
For the filling:
- 1 x 250 gram block cream cheese room temperature
- ½ cup sweetened condensed milk regular or plant-based
- ½ cup (approx 125 grams) biscoff spread
- 1 teaspoon vanilla
Instructions
- Line a 8 x 4 inch loaf pan with baking paper, leaving a little of the paper hanging out over the top to make it easy to lift out the cheesecake.
- In a food processor, add the biscoff biscuits and crush into fine crumbs. Add the melted butter and mix again until the crumbs are coated and starting to come together.
- Tip the crumbs into the loaf pan and using a spoon or your hand, press the crumbs down until an even layer covers the base. Press it down firmly and then set aside in the fridge.
- Place the cream cheese into the bowl of a stand mixer with the paddle attachment fitted and begin mixing, slowly before turning up to medium. Whip the cream cheese for at least 5 minutes or until it’s looking really creamy. Stop the mixer and add in the vanilla and biscoff spread and continue to whip for another 5 minutes scraping down the sides and bottom of the bowl to make sure the mixture is beating evenly.
- Once this mixture is combined, with the mixer running on medium low, slowly drizzle in the sweetened condensed milk a little at a time. Continue beating until all of the condensed milk has been added and the mixture is smooth.
- Pour the mixture into the loaf tin and smooth out evenly with a spoon or spatula. Place the cheesecake into the fridge to set overnight.
- To remove the cheesecake from the pan, gently pull the excess paper from the long edge and the cheesecake should come out clean. Melt a little extra biscoff spread in the microwave and drizzle over the top. Cut into 6 slices and enjoy!
Notes
Nutritional information is provided as a guide only and is calculated using automated online tools, therefore we cannot guarantee the accuracy. We encourage you to make your own calculations based on the actual ingredients used in your recipe.


Made this recipe? Leave a review!