
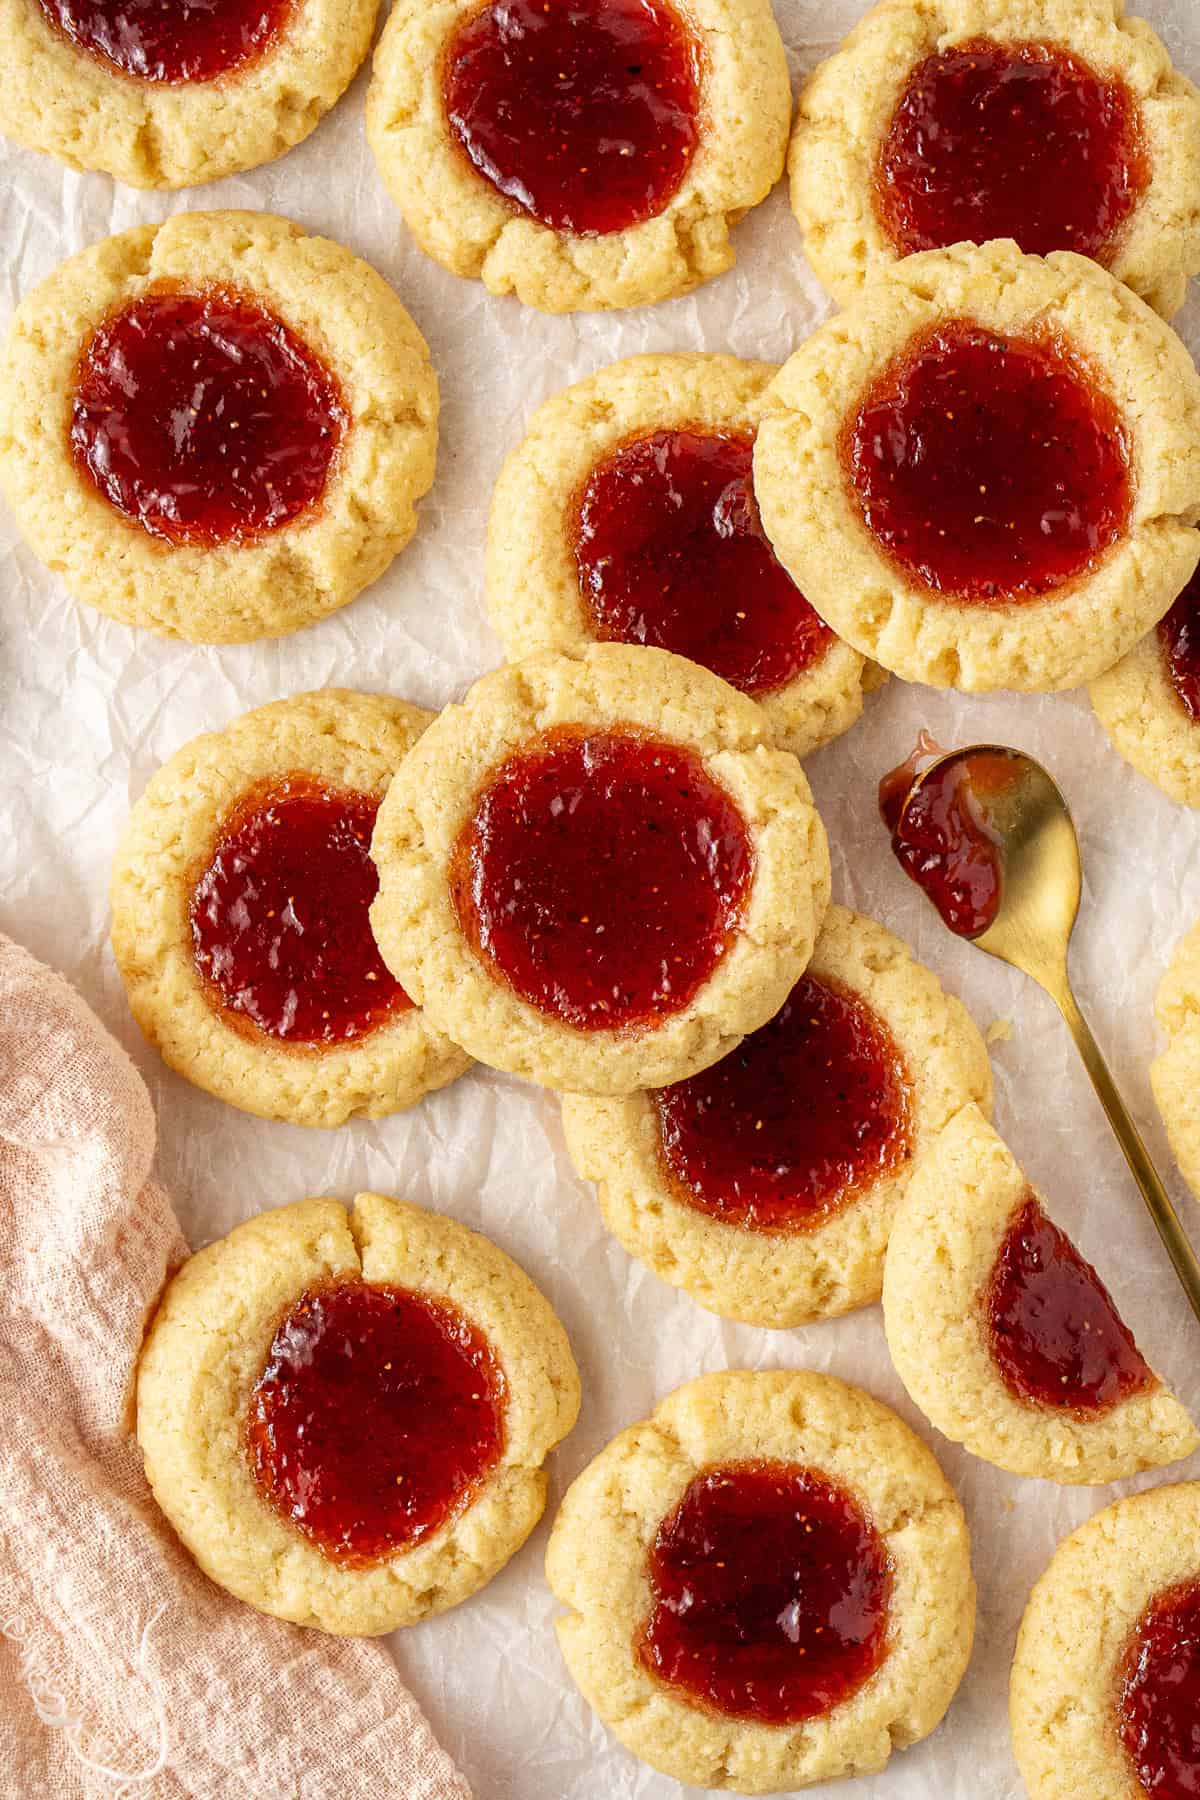
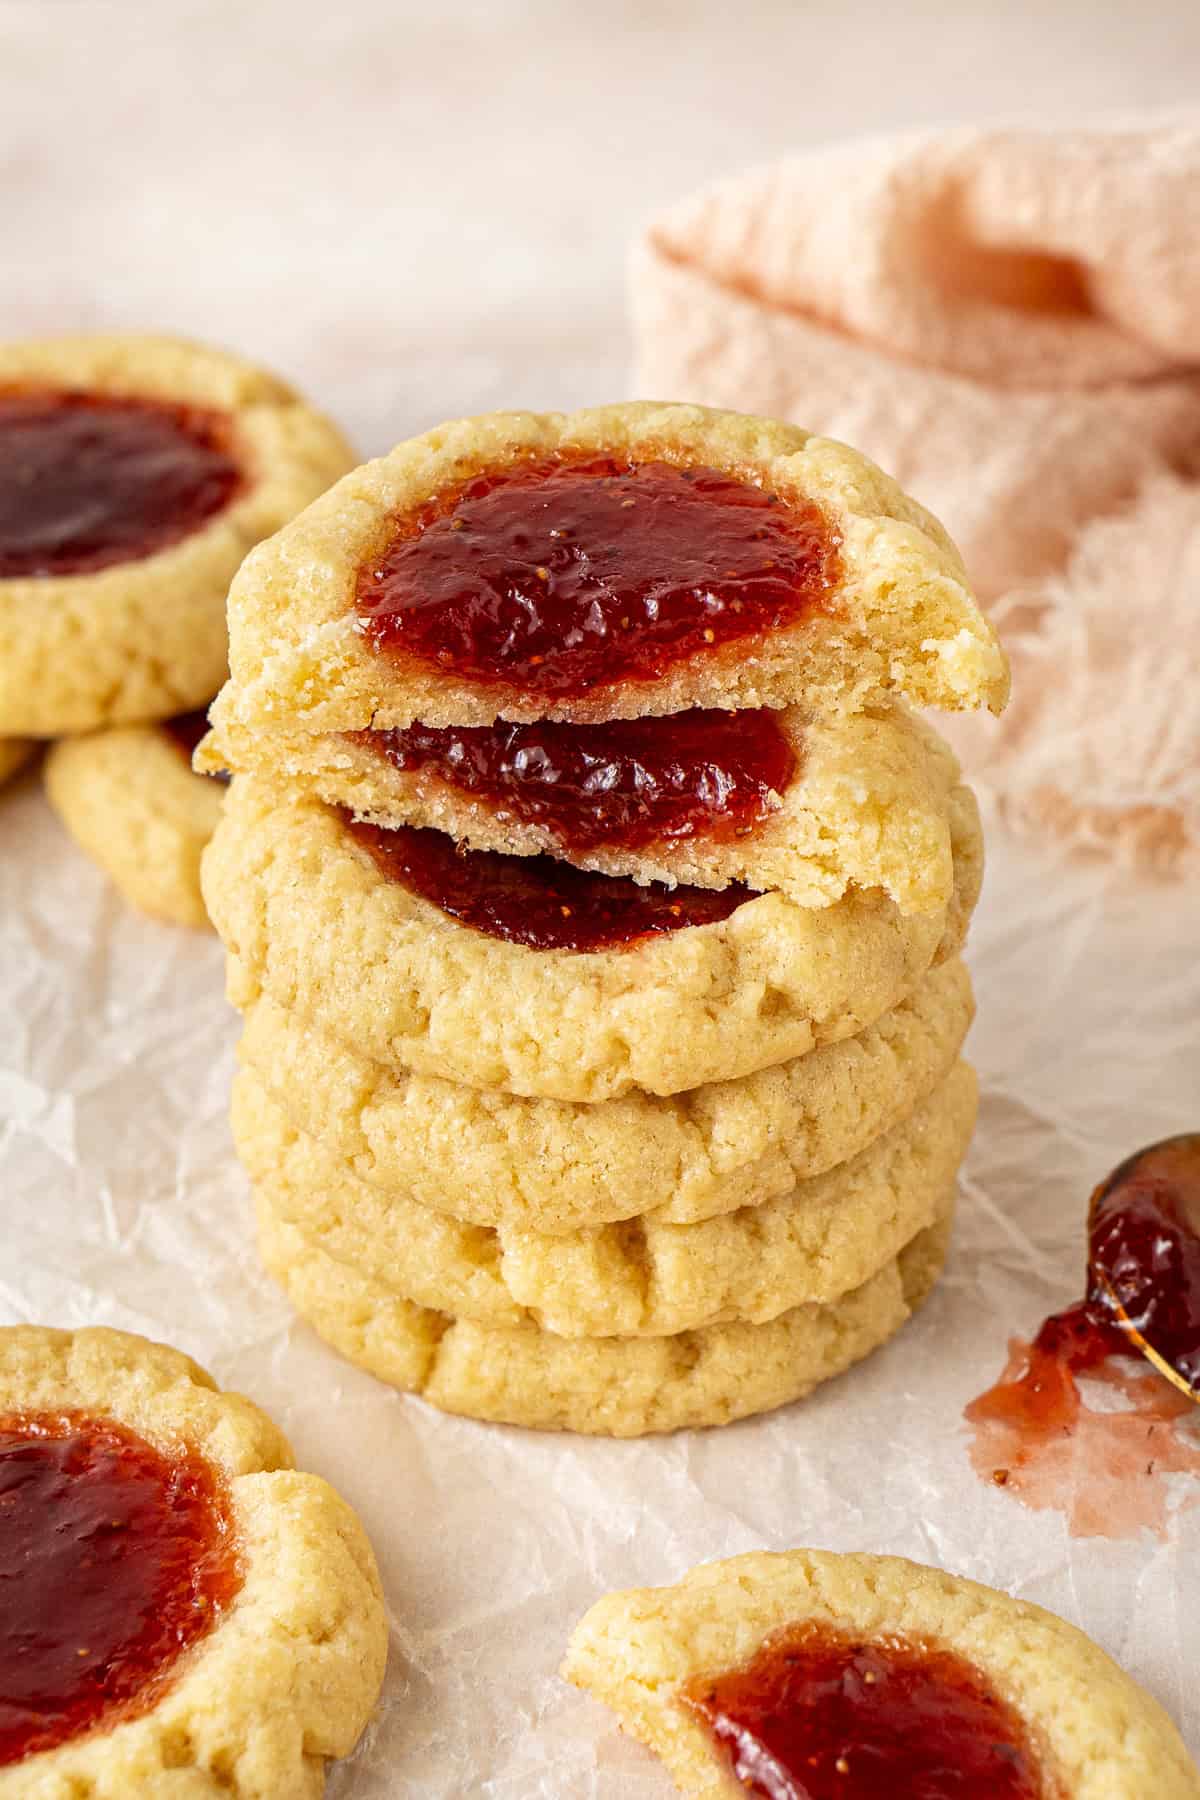
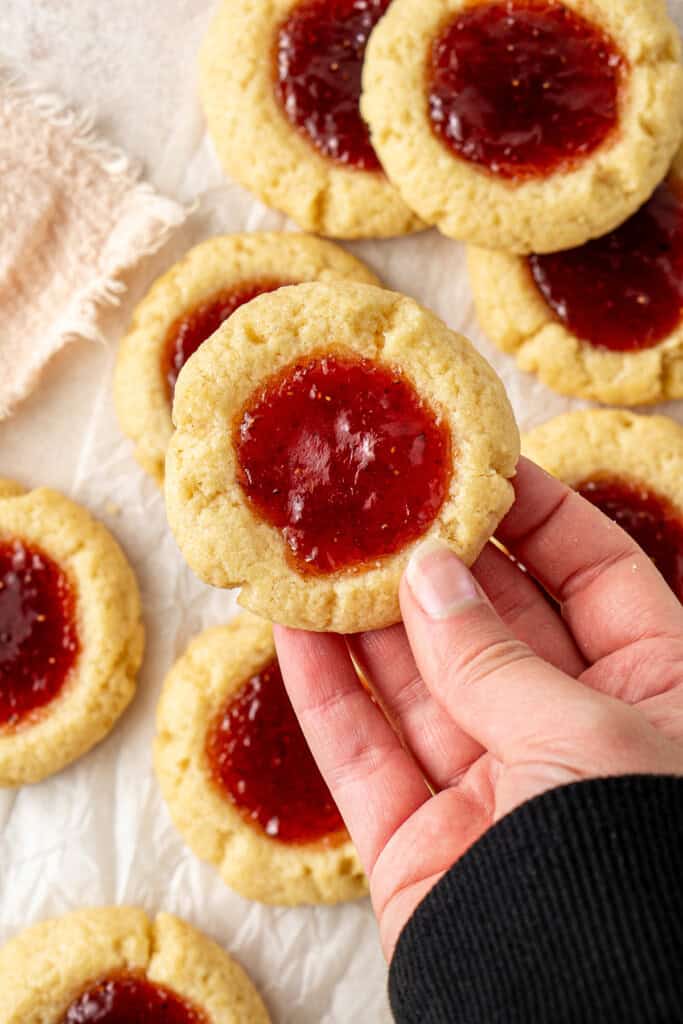
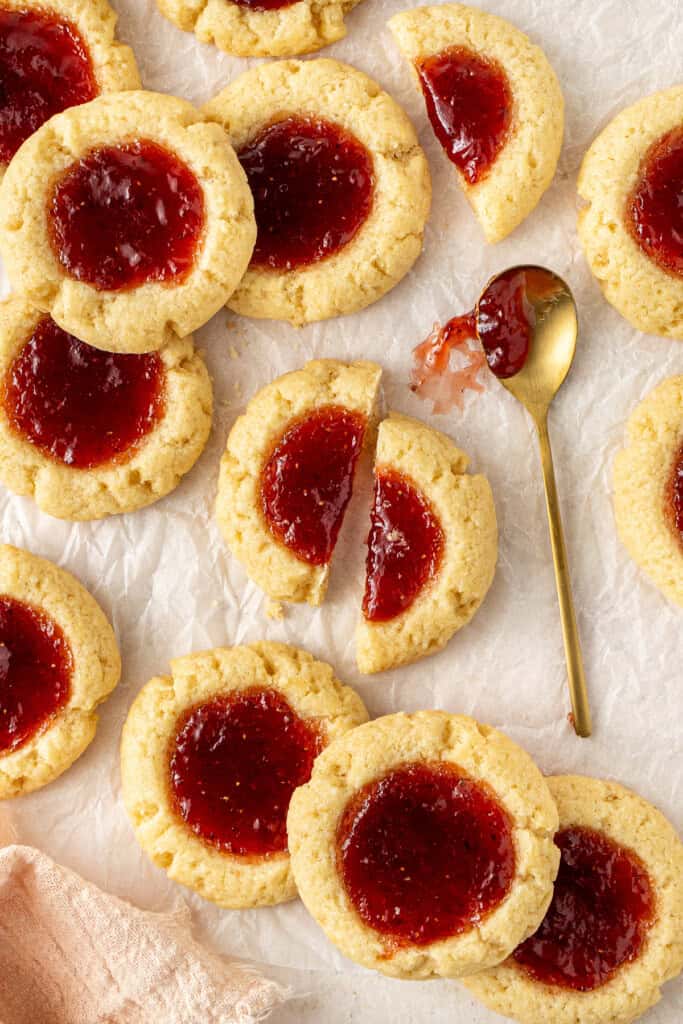
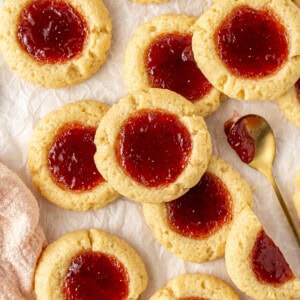
Jam drops were one of my favourite cookies growing up! These are a buttery shortbread style cookie with a sweet filling of strawberry or raspberry jam, just like the ones you would go searching for in grandma’s biscuit tin. Whether you call them jam drops or thumbprint cookies in your part of the world, one thing is certain, everyone loves them!
Featured Comment
⭐⭐⭐⭐⭐ AMAZING!!!! New family favourite. Thanks for a great recipe – Sandra
If you’re looking for that classic buttery jam drop that takes you straight back to school fêtes, church stalls, or community morning teas, this is going to be the recipe for you.
Alongside melting moments and ANZAC biscuits, I think these are a foundational cookie from my childhood and every mum and grandma probably has a hand written version of this recipe somewhere.
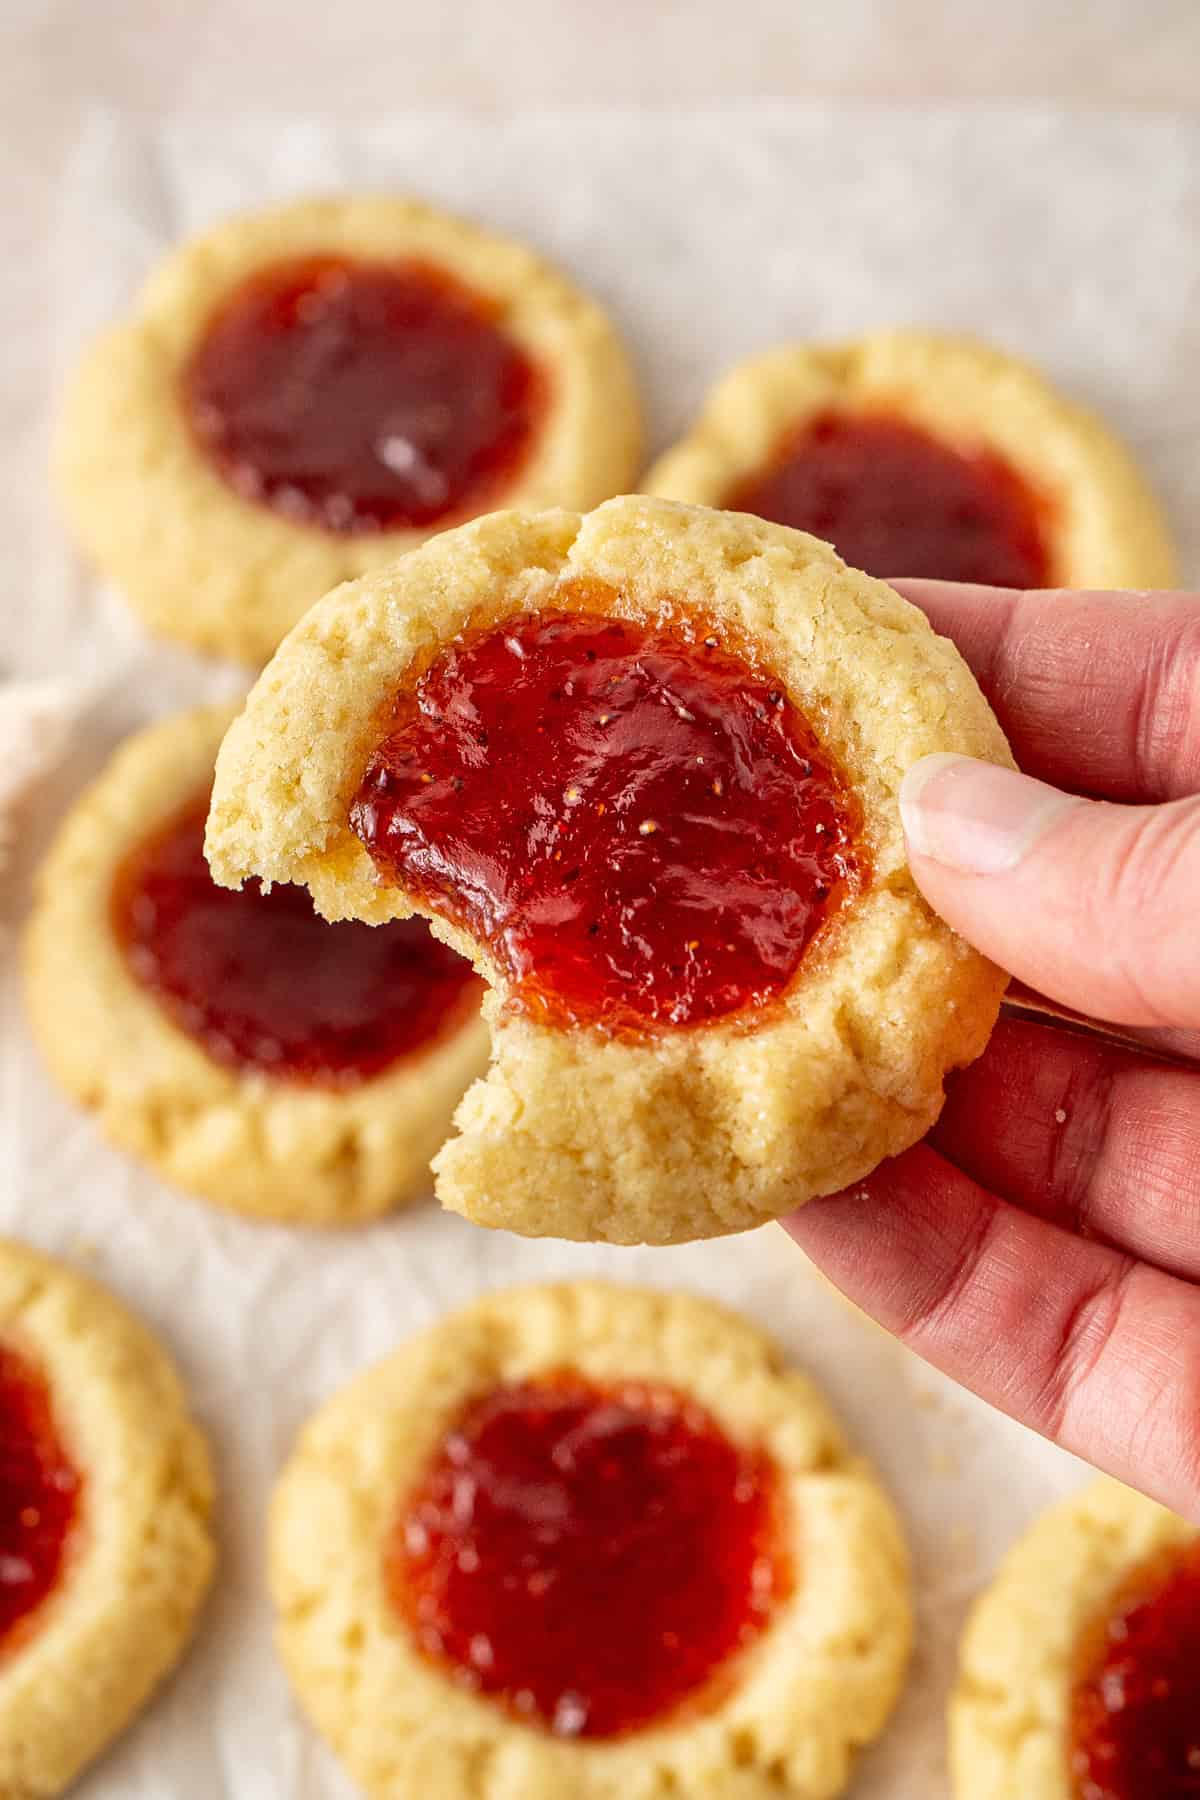
When making these jam drops, I really wanted to make sure the jam was the hero just like I remember. The best part of a jam drop is the thick, sweet and slightly chewy jam centre that is only achieved by baking the cookies with the jam already in the middle.
These cookies are a family favourite for a reason. They are nostalgic, quick to bake, and of course, completely dairy free (because yes, you can get that buttery taste without real butter!). Once you make a batch I promise you they won’t last long!
Key Ingredients
This recipe for jam drops is super simple, using basic pantry staple ingredients that you probably already have on hand.
Note all ingredients and their quantities are laid out in the recipe card at the bottom of this post.
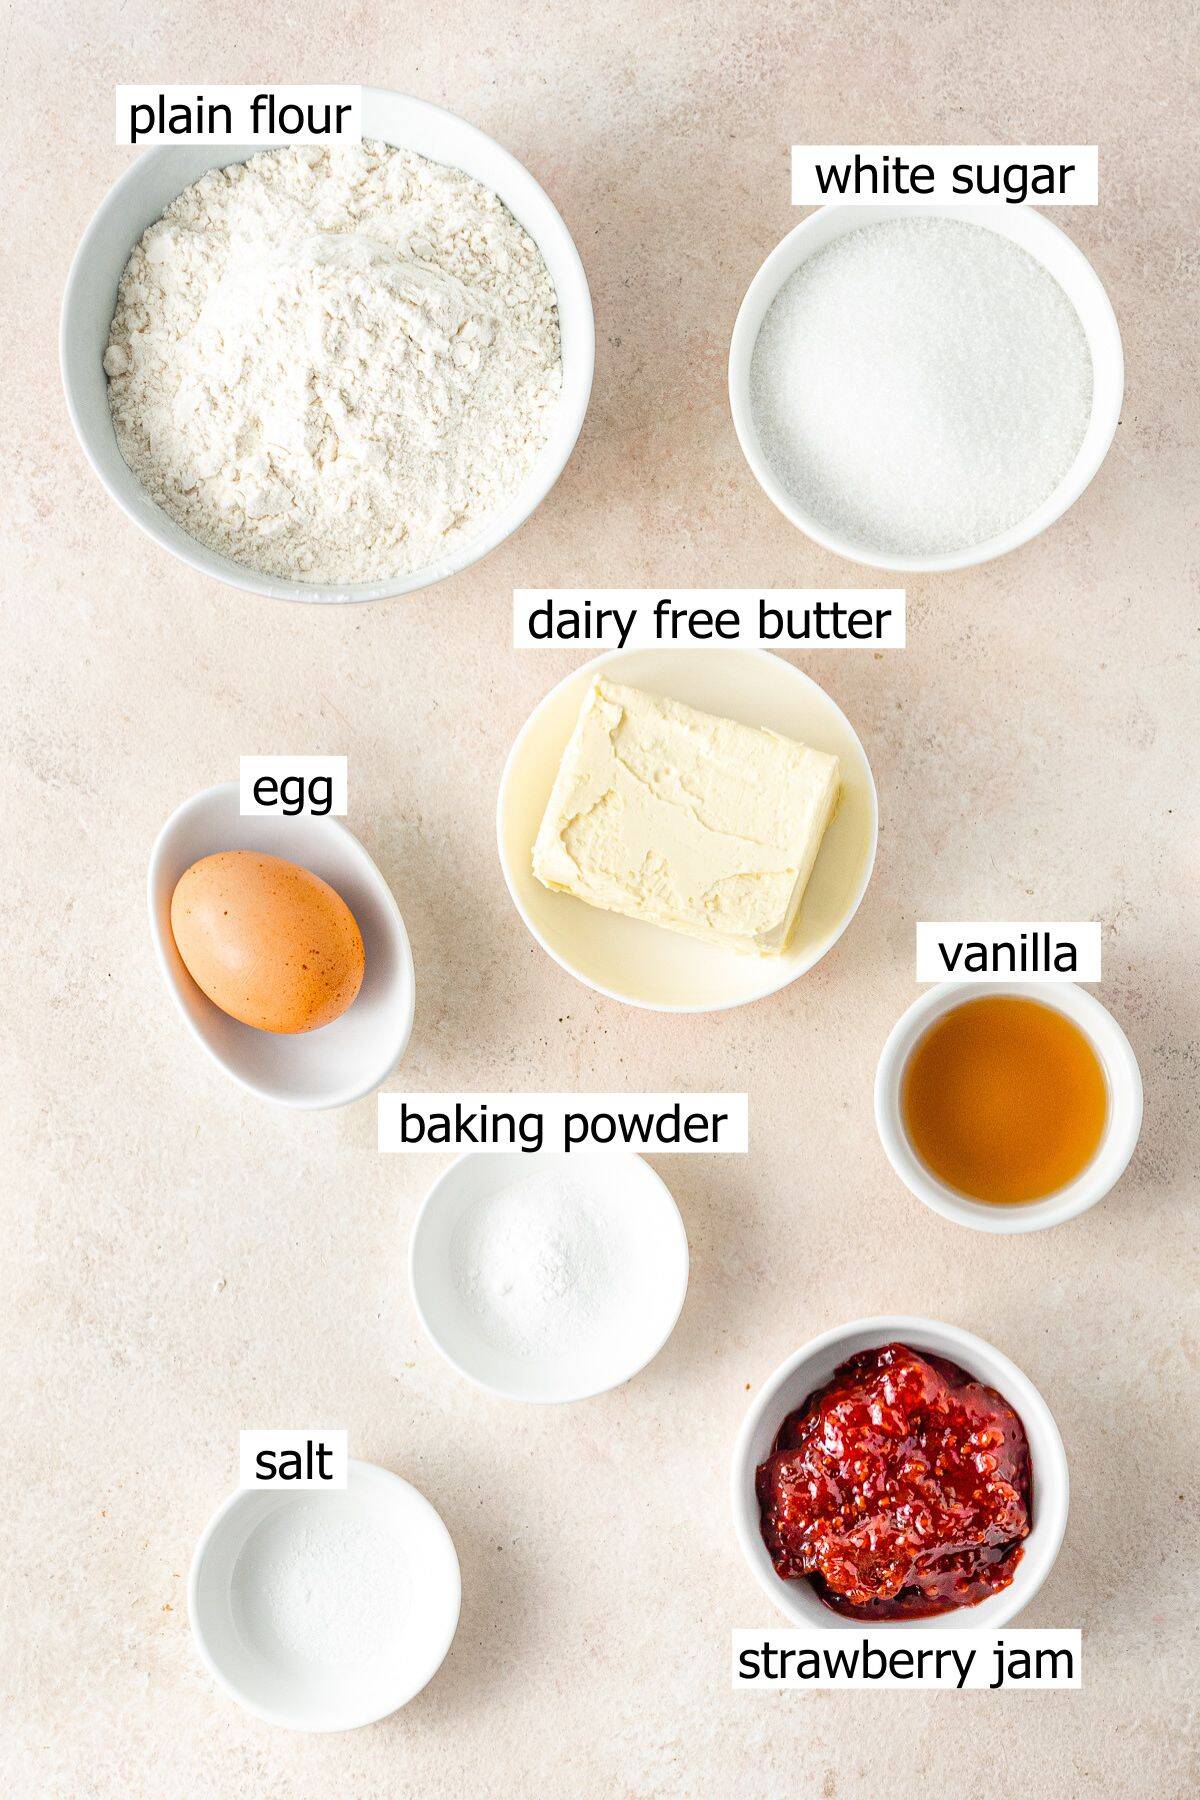
- Plain flour – also known as all purpose flour in the US.
- Baking powder – helps the cookies puff up as they bake so they are light and soft in texture.
- Dairy free butter – really the key ingredient in this cookie recipe. I find the stick version works much better than the standard dairy free spread and means there is no chilling of the dough required. In Australia I use the Flora Plant Based Salted Block which is with the standard butter in the major supermarkets.
- White sugar – I use regular granulated sugar for this recipe, but if you have it you can also use caster sugar which more traditional recipes will use for a slightly more tender cookie. I don’t really find much difference though for this recipe.
- Egg – essential for the structure of the cookies, I haven’t tried any egg replacers in this recipe.
- Vanilla – to give the cookies flavour. Make sure to use vanilla extract rather than imitation vanilla for the best taste.
- Jam – the hero of these cookies! I love using strawberry jam, but raspberry jam is also delicious. I also remember apricot jam being used a lot when I was a child, but really you can use any flavour you like. My favourite is the Beerenberg strawberry jam which is an Aussie made one.
You’ll Also Love: Dairy Free Lemon Thumbprint Cookies
Step-By-Step Instructions
To make these strawberry jam drops, you will need a large mixing bowl and an electric mixer, along with a couple of large baking sheets. I also like to use a cookie scoop but a tablespoon will do just fine.
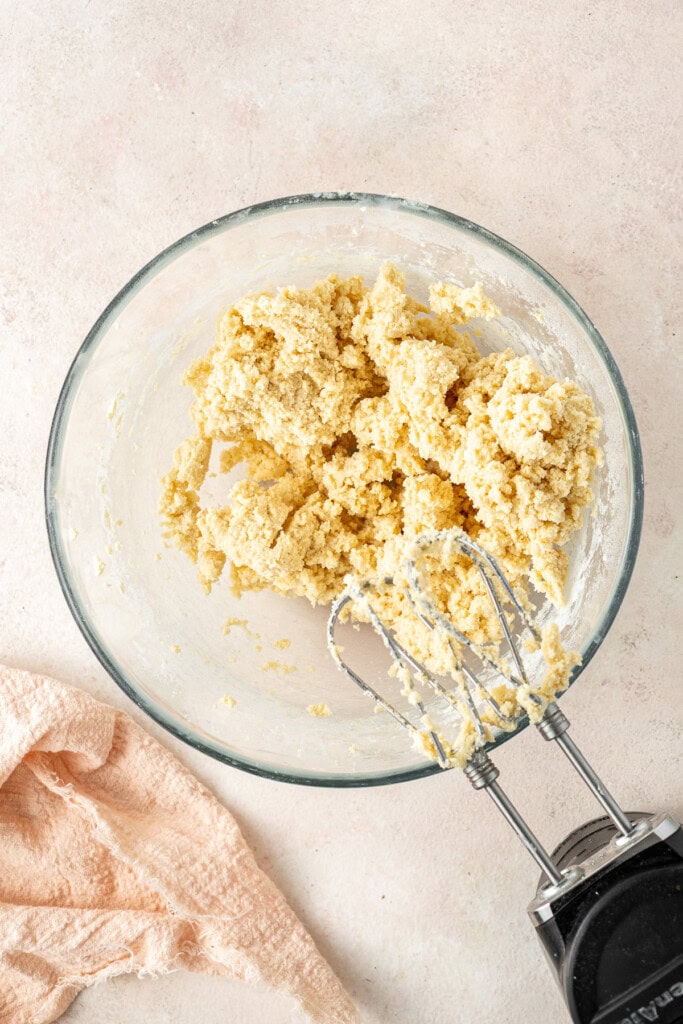
Step 1: Start by making your cookie dough. You’ll need to beat together the dairy free butter and the sugar first before adding in the egg and vanilla. I like to use a hand mixer for this recipe, but you can also use a stand mixer.
Step 2: Sift the flour, baking powder, and salt directly into the bowl. Mix on low speed until the dough starts to come together, scraping down the sides of the bowl as needed. The dough may look a little crumbly but should press together easily.
👉Tip! If your dough feels sticky and soft (which can happen depending on the dairy free butter you use, such as Nuttelex), pop it in the fridge for 30 minutes to 2 hours before baking. Chilling helps the dough firm up, making it easier to roll into balls and stopping the cookies from spreading too much in the oven. When I use block-style butter, I usually skip this step as the dough is already firm enough.
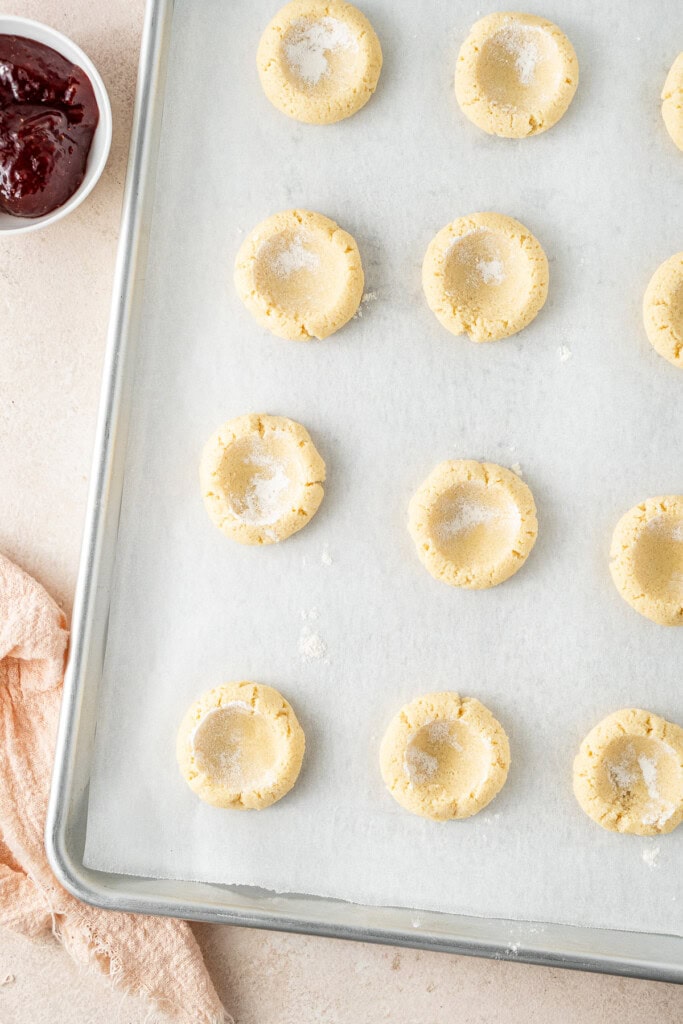
Step 3: Use a cookie scoop or tablespoon to portion the dough, rolling it into balls. Place evenly spaced on the prepared trays, leaving room for spreading.
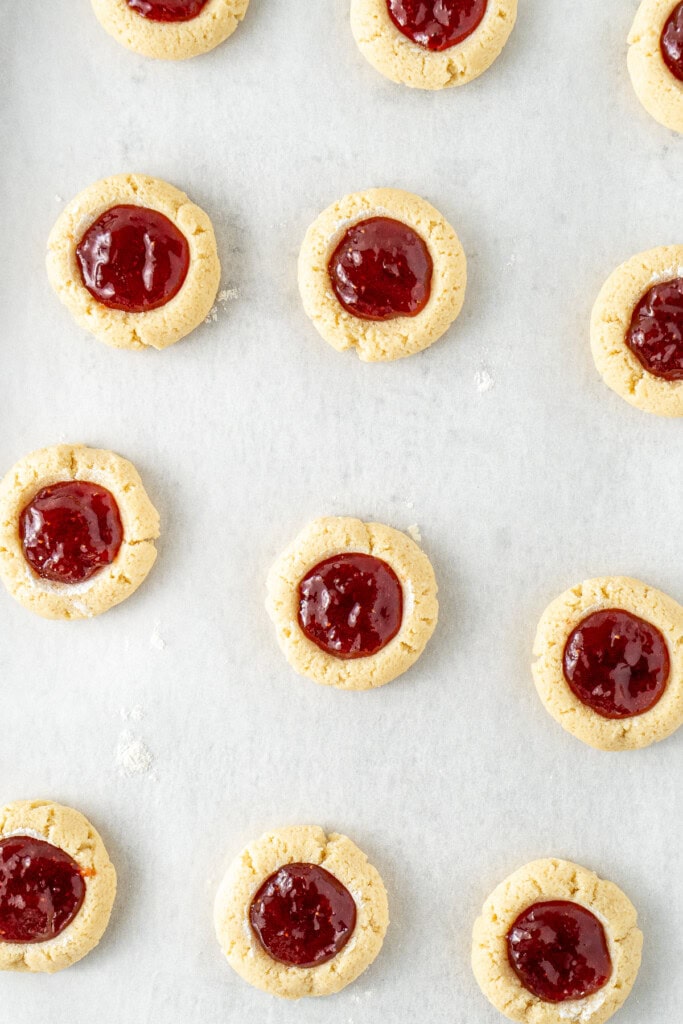
Step 4: Use your thumb (or I find the back of a ½ tablespoon measuring spoon to be the perfect size) to press an indent into the centre of each ball, pushing the edges out slightly. Spoon the strawberry jam (or your chosen flavour) into each indent so that it is full, but not overflowing.
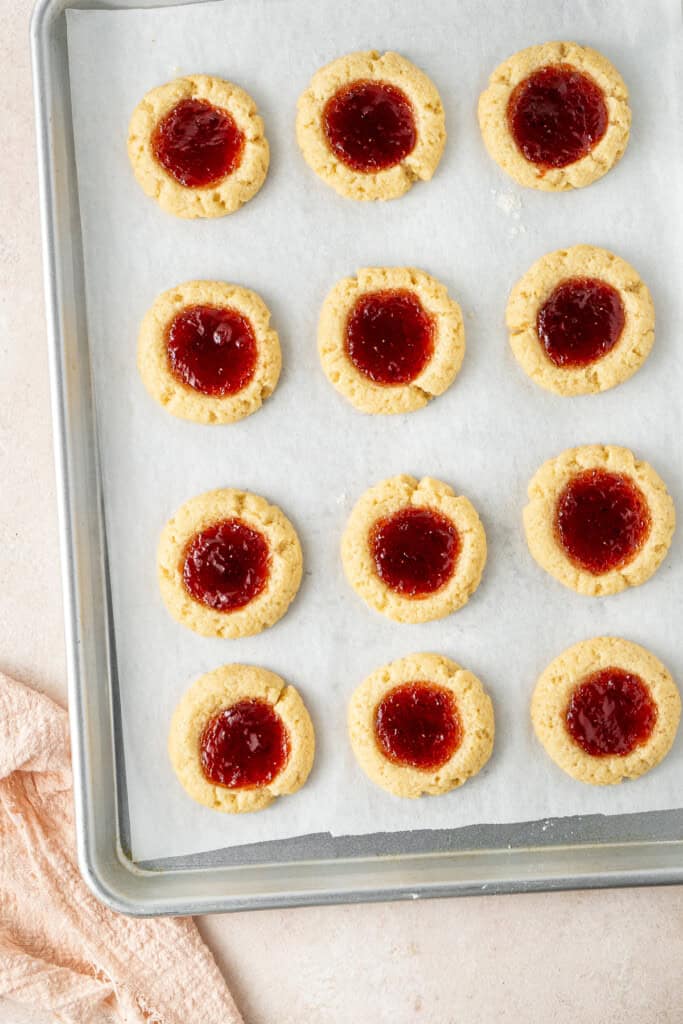
Step 5: Bake for 10-15 minutes, or until the edges are just turning golden. Leave the cookies on the tray for 10 minutes to firm up, then transfer to a wire rack to cool completely.
👉Tip! For perfect looking cookies, as soon as the cookies have been removed from the oven, use a spoon or a large round cookie cutter that fits over the cookie, to gently shape the cookie back into a circle. This only works if the cookies are still soft so needs to be done immediately before they start to cool.
Storage Instrcutions
Store jam drops in an airtight container at room temperature for up to 5 days. If you live somewhere warm, you can also keep them in the fridge.
These cookies also freeze really well. Place them into an airtight container or zip-lock bag for up to 3 months. Defrost at room temperature before enjoying.
Recipe FAQs
Yes of course! You can even make a batch with different jams for variation. Strawberry and raspberry are the classics, but any flavour you love will work. Apricot, blackberry, cherry or even plum jam are all delicious options.
This usually happens if the butter was too soft or if you’re using a spreadable dairy free butter. Dairy free butter is naturally softer straight from the fridge than regular butter.
If your dough feels sticky, chill it in the fridge for 30 minutes to 2 hours before rolling into balls.
Yes! The dough can be made up to 2 days in advance. Keep it wrapped in the fridge, then roll, fill, and bake when you’re ready.
Yes! If you’re not looking for a dairy free version and just want the classic recipe, then it’s a simple 1-1 swap of the dairy free butter for regular butter. Just make sure to allow it to soften from the fridge first before using.
If you do make this recipe, please be sure to leave a comment and ⭐⭐⭐⭐⭐ rating below! And tag any of your creations on Instagram with @eightforestlane as I would love to see.
More dairy free cookie recipes:
Dairy Free Lemon Sugar Cookies
Chocolate Peppermint Thumbprint Cookies
Vegan Peanut Butter Cookies
Dairy Free Sugar Cookies
Jam Drops (Thumbprint Cookies)
Ingredients
- 1 ¾ cups plain flour/all purpose flour
- ½ teaspoon baking powder
- ¼ teaspoon salt
- ¾ cup (170 grams) dairy free butter block style if possible
- ⅔ cup sugar
- 1 large egg
- 1 ½ teaspoons vanilla extract
- ⅓ cup strawberry jam approx
Instructions
- Preheat the oven to 180°C (350°F). Line 2 baking trays with baking paper.
- In a large mixing bowl (or in the bowl of a stand mixer) beat the dairy free butter and sugar with a handheld electric mixer until creamy. Add the egg and vanilla, then beat again until well combined.
- Sift the flour, baking powder, and salt into the bowl. Mix on low speed until the dough starts to come together, scraping down the sides of the bowl as needed. The dough may look a little crumbly but should press together easily.
- Use a cookie scoop or tablespoon to portion the dough, rolling it into balls. Place evenly spaced on the prepared trays, leaving room for spreading.
- Use your thumb (or the back of a ½ tablespoon measuring spoon) to press an indent into the centre of each ball, pushing the edges out slightly. Fill each indent with about ½ teaspoon of jam so that it is full, but not overflowing.
- Bake for 10-15 minutes, or until the edges are just turning golden. If the cookies spread unevenly, gently reshape them with a tablespoon as soon as they come out of the oven.
- Leave the cookies on the tray for 10 minutes to firm up, then transfer to a wire rack to cool completely.
Notes
Nutrition
Nutritional information is provided as a guide only and is calculated using automated online tools, therefore we cannot guarantee the accuracy. We encourage you to make your own calculations based on the actual ingredients used in your recipe.
This recipe was originally published in December 2020 and has been updated in 2025 to include a clearer, more detailed recipe, more helpful information and new photos.


Sandra says
AMAZING!!!! New family favourite. Thanks for a great recipe 😊
Sally says
Thanks so much Sandra! So glad you and your family enjoyed them 🙂
Sally says
Hey Sherry, of course I think that’s a great idea 🙂
sherry says
these do look very pretty. I have a recipe for santa’s thumbprints which is similar:-) well, he would have the best thumbprint at this time of year… tee hee…
cheers
sherry
Sally says
haha thanks Sherry!
Megs says
Hi from Aldinga Beach SA Sally!
We are not a dairy free household here, but these look way too good not to ask… would the equivalent quantity of butter be a successful swap, or would I need to adjust the recipe in some way?
P.S. I love the format of all your recipes… concise and informative, deliciously descriptive, so easy to follow, clear step by step instructions punctuated with beautiful images and helpful tips and options etc. – all tied together with your endearing anecdotes and conversational text. I look forward to continuing reading your posts!
Off now to print out your Snickerdoodle Cookies, Pork, Sage and Pancetta Sausage Rolls and Lazy Apple Turnovers recipes to make tomorrow!
Sally says
Hi Megs, what a wonderful comment, thank you so much and I’m so happy you enjoy my recipes and posts 🙂
As I don’t bake with real butter it’s hard for me to say with 100% certainty that it would yield the same results however in this recipe I think it would be fine as a direct swap. Just make sure to use softened butter. Let me know how your baking day goes!