
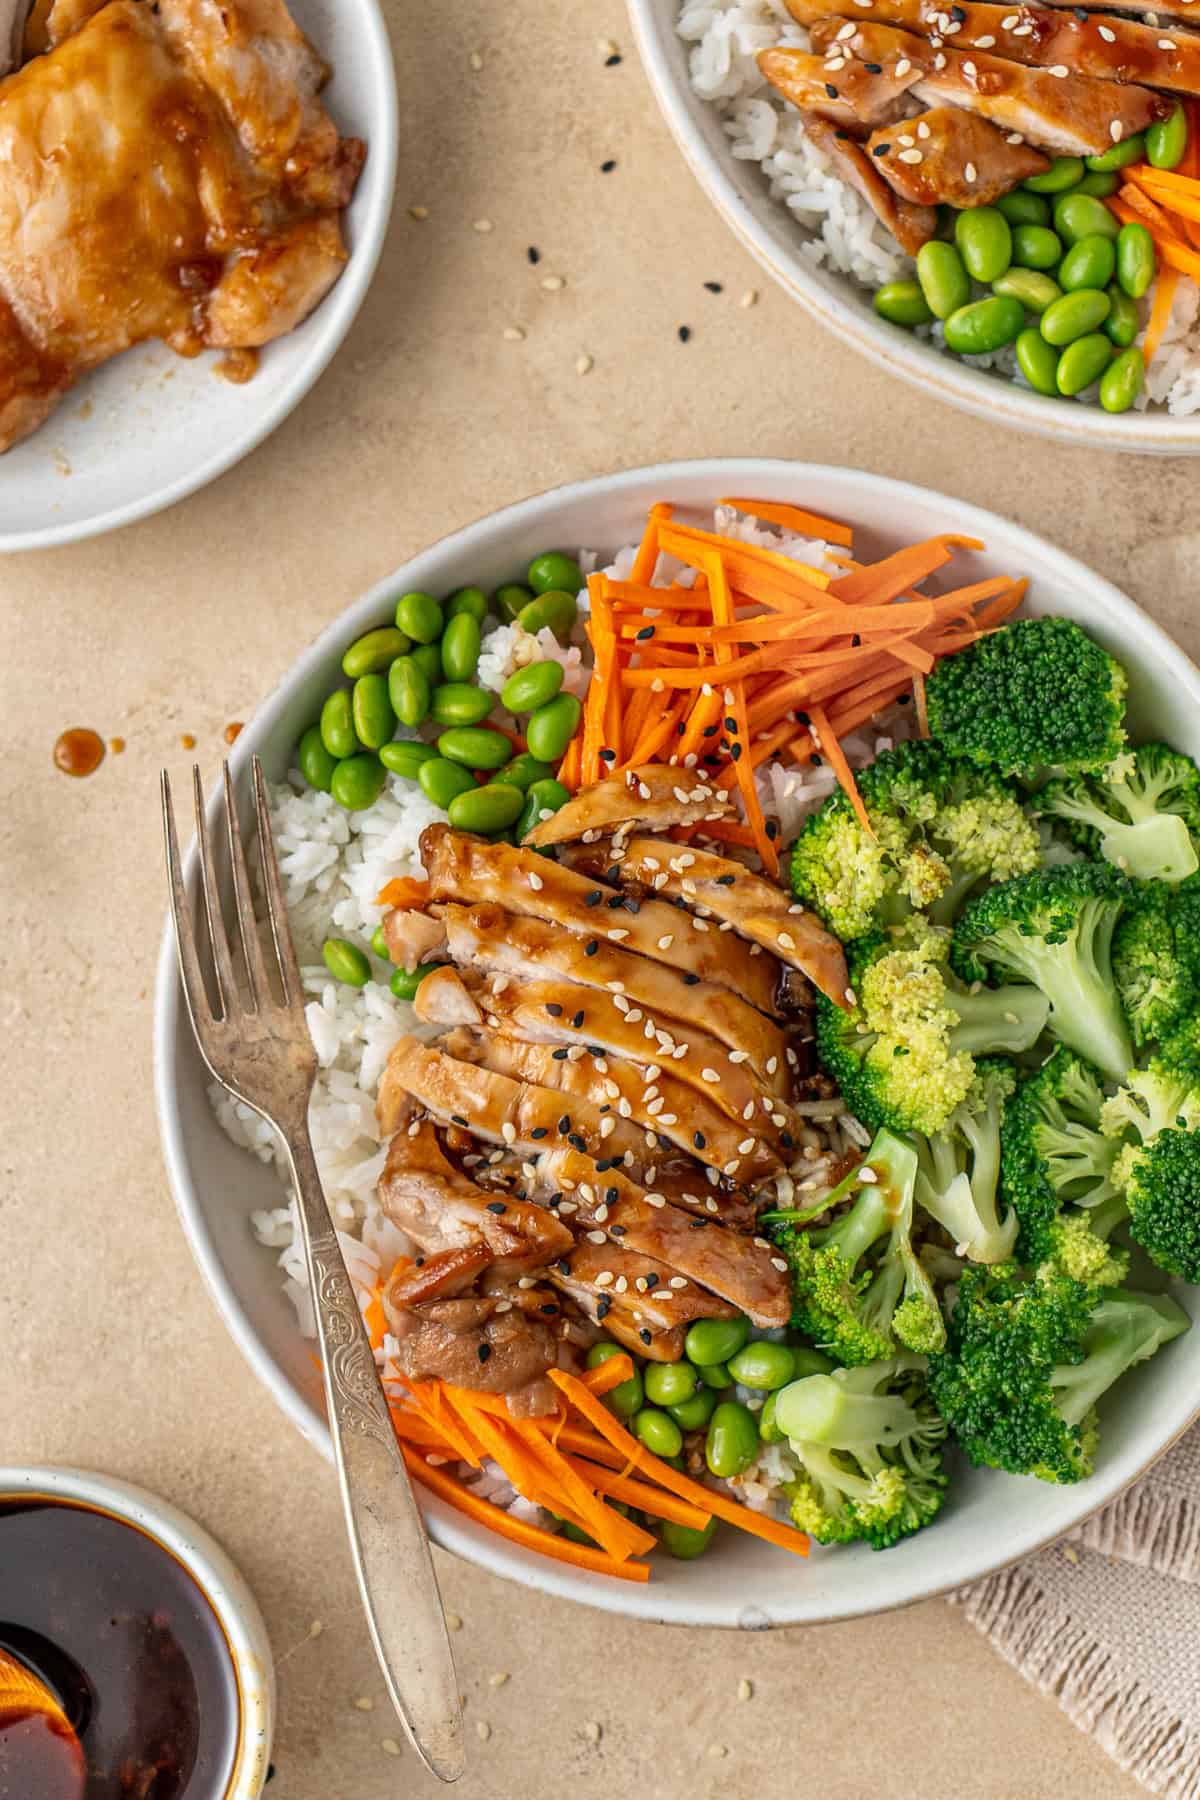
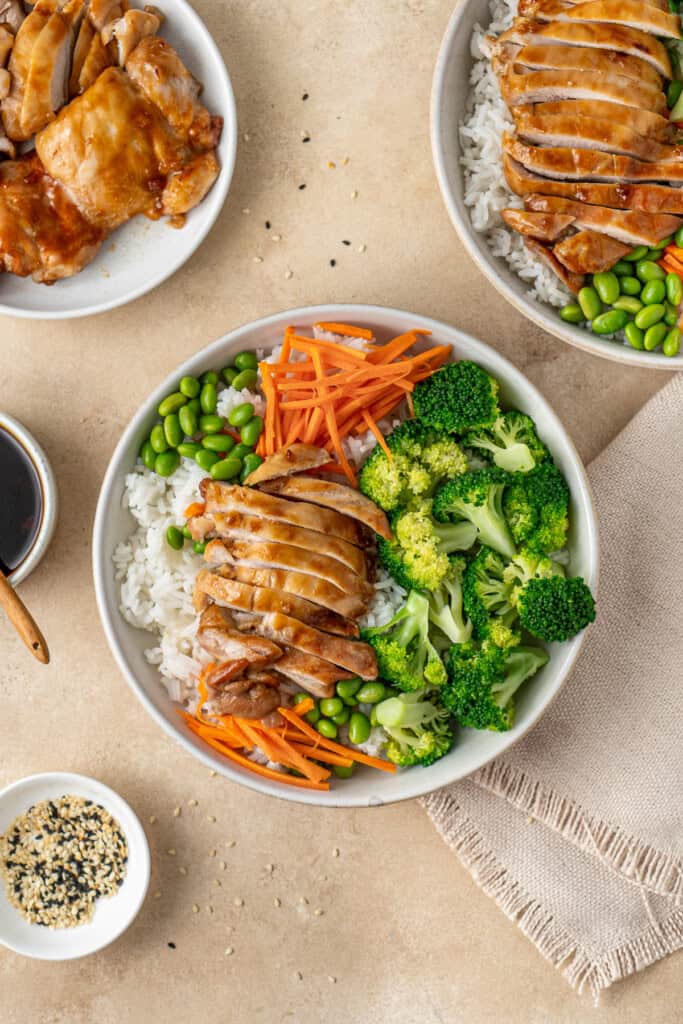
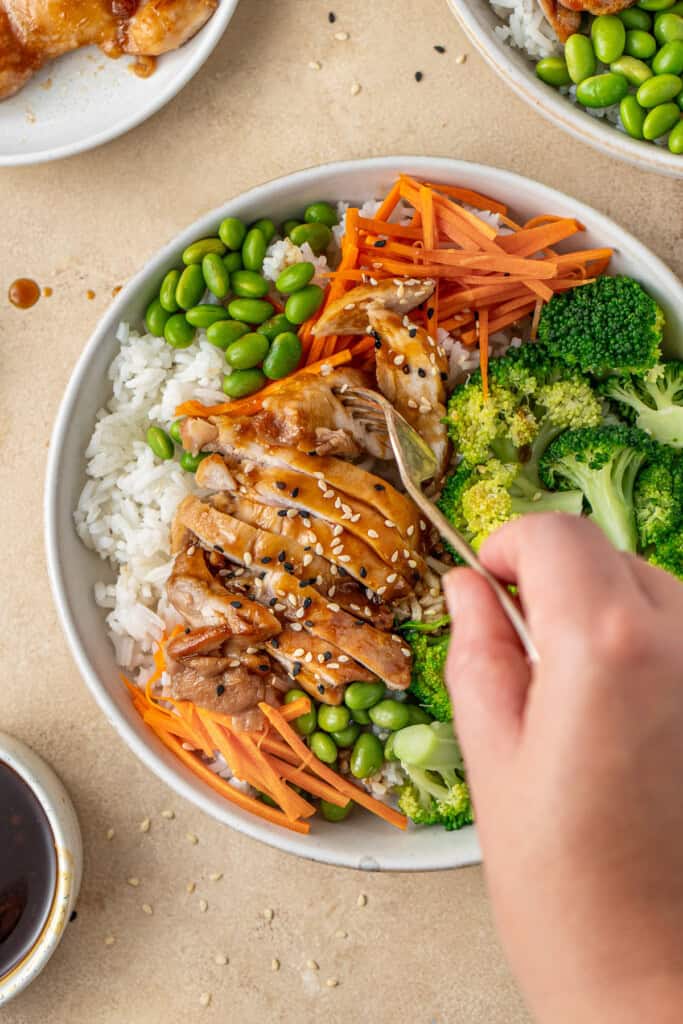
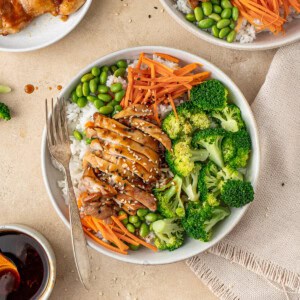
These easy teriyaki chicken bowls are made with a delicious, sweet and savoury homemade teriyaki sauce that has so much more flavour than anything store-bought! I like to serve these teriyaki bowls with broccoli, edamame and crunchy pickled carrot, for the perfect easy dinner or meal prep, all in under 30 minutes!
For more delicious chicken bowls, try these chipotle chicken bowls or these BBQ chicken bowls next!
I am simply obsessed with teriyaki anything! There is my favourite teriyaki salmon and avocado rice bowls, this simple teriyaki chicken meal prep, or this super easy air fryer teriyaki salmon. It’s a flavour that has so many applications and makes dinner time just so delicious.
This is the kind of quick dinner recipe that I love to keep on repeat when I don’t know what to make. It is made with my homemade teriyaki sauce as the hero, which is used to marinate some chicken thighs that are then baked in the oven. The chicken is sliced and served over some rice with some steamed broccoli and edamame. I also love adding a quick pickled carrot to add some tang and brightness that balances the rich, sticky sauce.
This teriyaki bowl is wonderfully balanced and makes the perfect easy, weeknight, dairy free dinner!
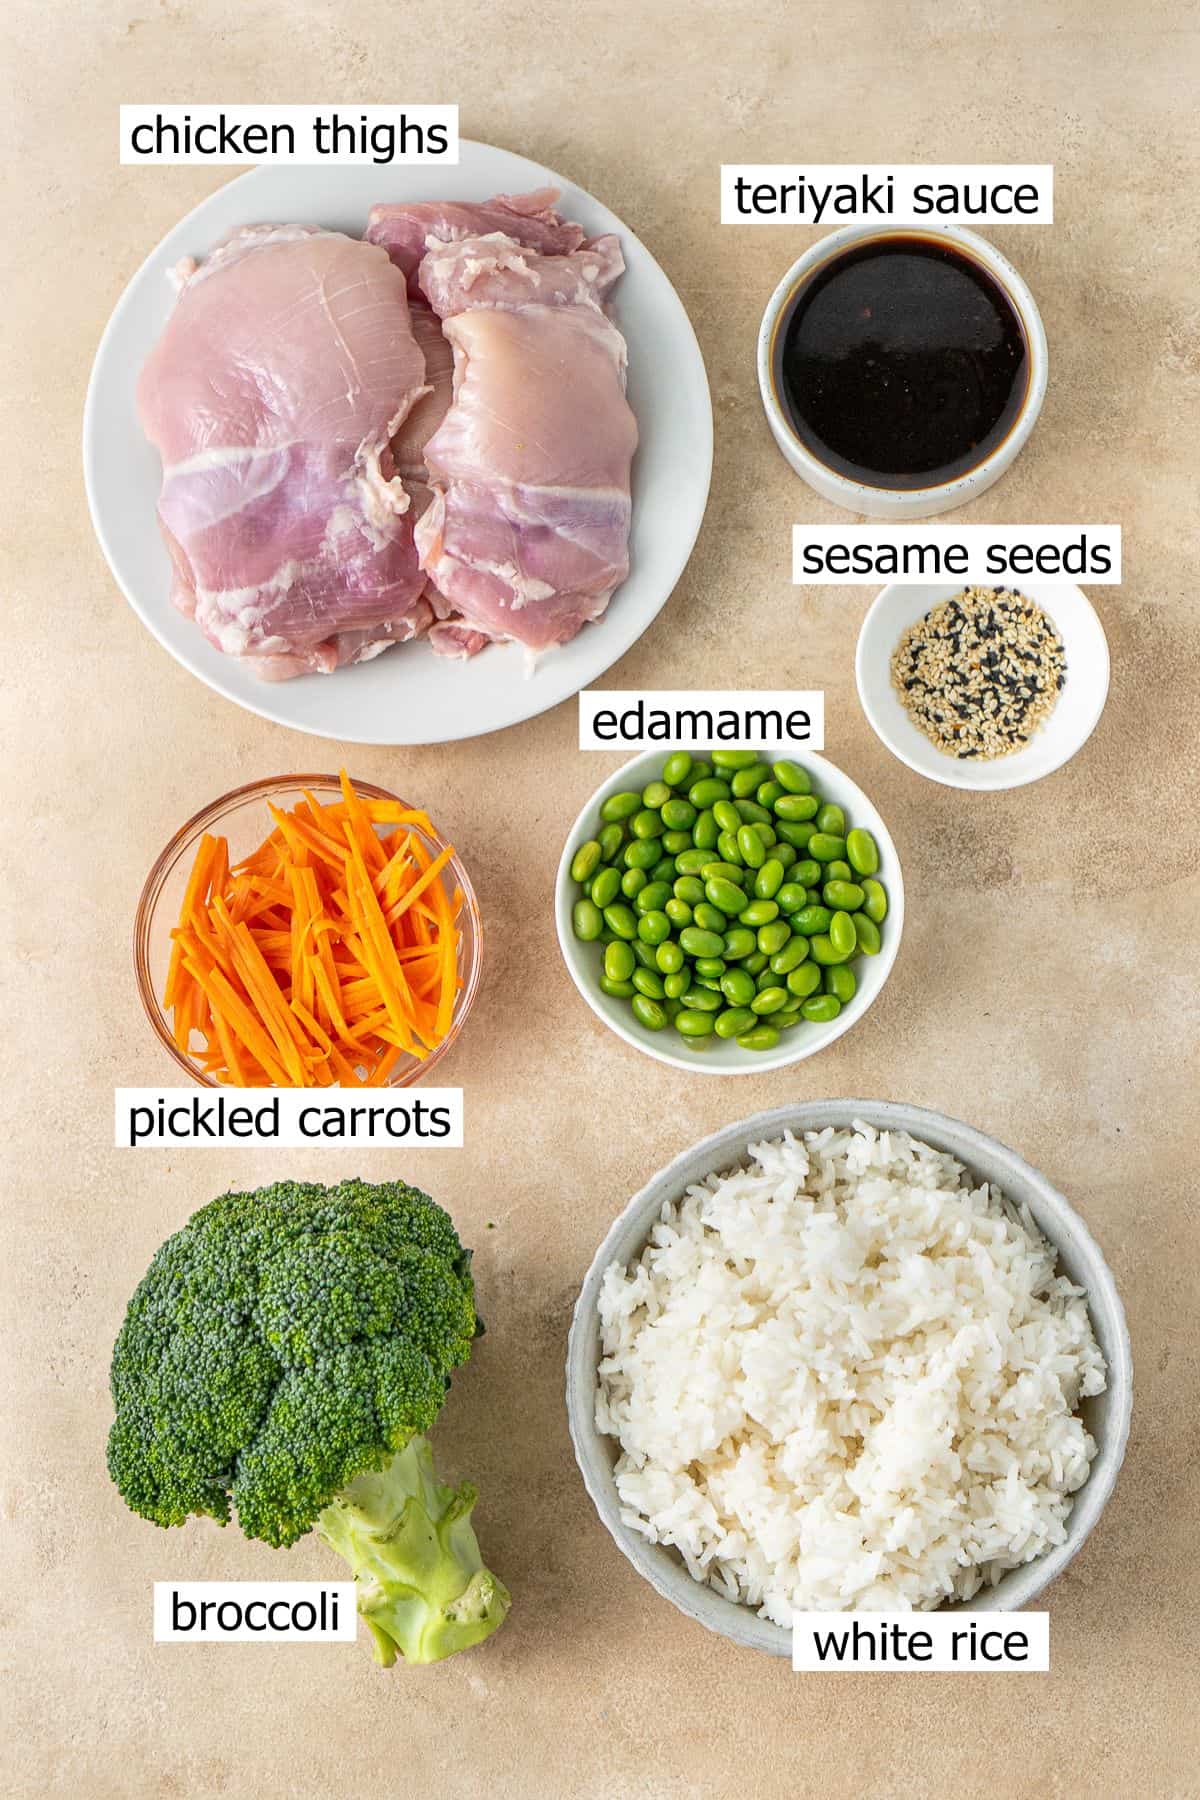
Key Ingredients
Like most bowl recipes, we have our protein, a base of carbs, a bunch of vegetables, and of course that delicious sauce to bring it all together!
Note all ingredients and their quantities are laid out in the recipe card at the bottom of this post.
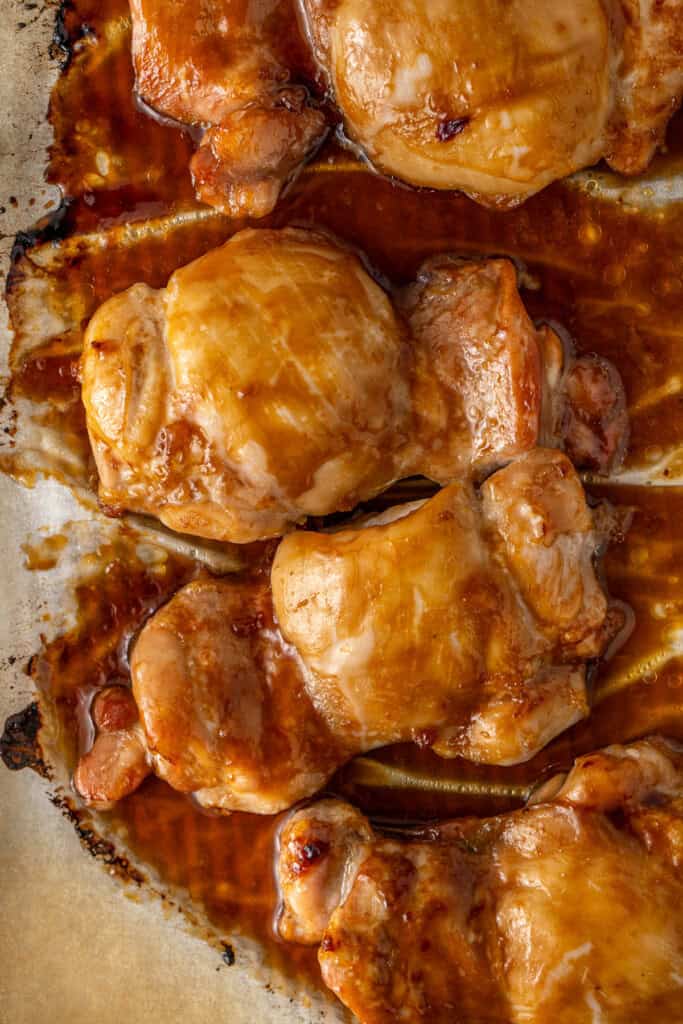
- Chicken thighs – I like to use boneless skinless chicken thighs for this recipe as they remain tender and juicy when baked with the sauce.
- Teriyaki sauce – for this recipe I recommend making my homemade teriyaki sauce for the best flavour, but if you have a store bought sauce you like, you can certainly use that to make this recipe even easier.
- White rice – I like to serve this teriyaki chicken over plain white rice, but you could use brown rice or even quinoa if you prefer.
- Broccoli – I like to cook the broccoli for a couple of minutes in boiling water until just tender, before serving.
- Edamame – I buy frozen, shelled edamame from the supermarket and allow it to defrost at room temperature while I prepare the rest of the meal.
- Pickled carrots – the carrot is shredded with a mandoline and then tossed with rice wine vinegar, sugar and salt and left to sit for just 10 minutes to create a tangy and crunchy side that goes so well with this bowl.
Equipment and Tools
This section may contain affiliate links which means I make a small commission on any purchase made with no extra cost to you. If you’re considering purchasing on Amazon I’d be so grateful if you would do so by first clicking one of these links. Thank you for your ongoing support.
Rice Cooker – I ALWAYS use a rice cooker to cook my rice. It’s just so simple to set it and forget it, so I’ll get started by putting the rice on and then beginning with the recipe. I simply use a 1:2 ratio of rice and water.
Step by Step Instructions
For a recipe like this, I always like to start with an order of operations so you know when things should happen so that you can maximise your time in the kitchen and ensure everything is ready at the same time.
- Marinate chicken
- Preheat oven
- Put the rice on
- Defrost edamame
- Bake chicken
- Make pickled carrots
- Cook the broccoli
- Slice chicken
- Assemble bowls!
All of these steps are super simple so you can easily work through and have dinner ready in under 30 minutes!
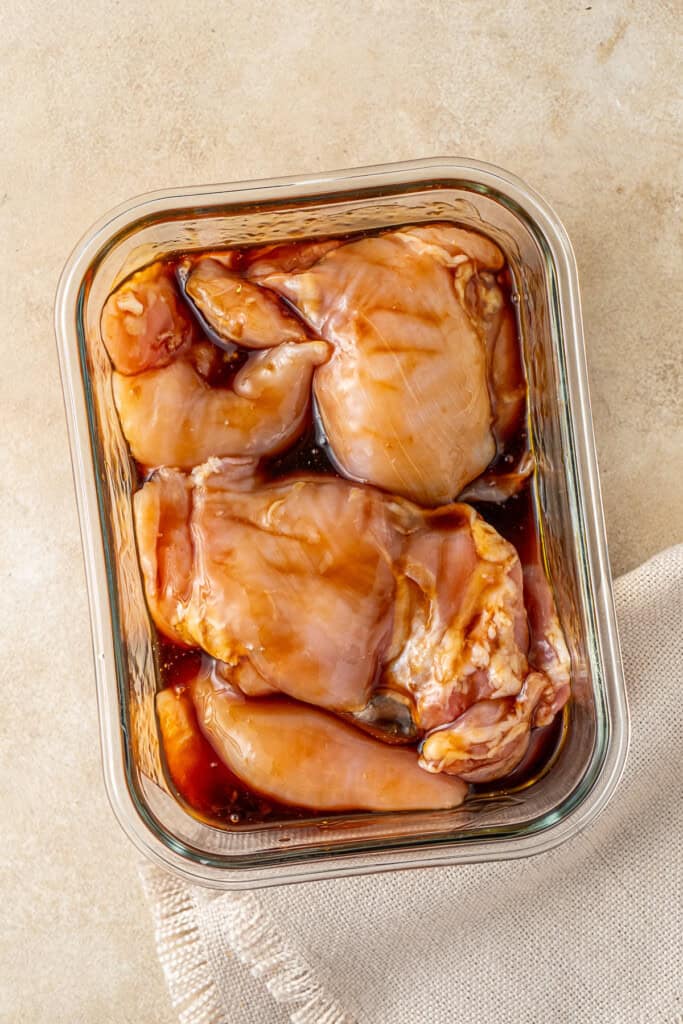
I usually like to make a meal like this when I haven’t had time to plan ahead, so I only marinate the chicken for 15 minutes while the oven preheats, but if you want to put it in the fridge for an hour or even overnight, you can do that as well.
Once the chicken has marinated in the sauce, you can place it on a baking tray lined with baking paper and bake in a preheated oven for 20 minutes or until cooked through. You can use a pastry brush if you like to baste the chicken a couple of times as it cooks.
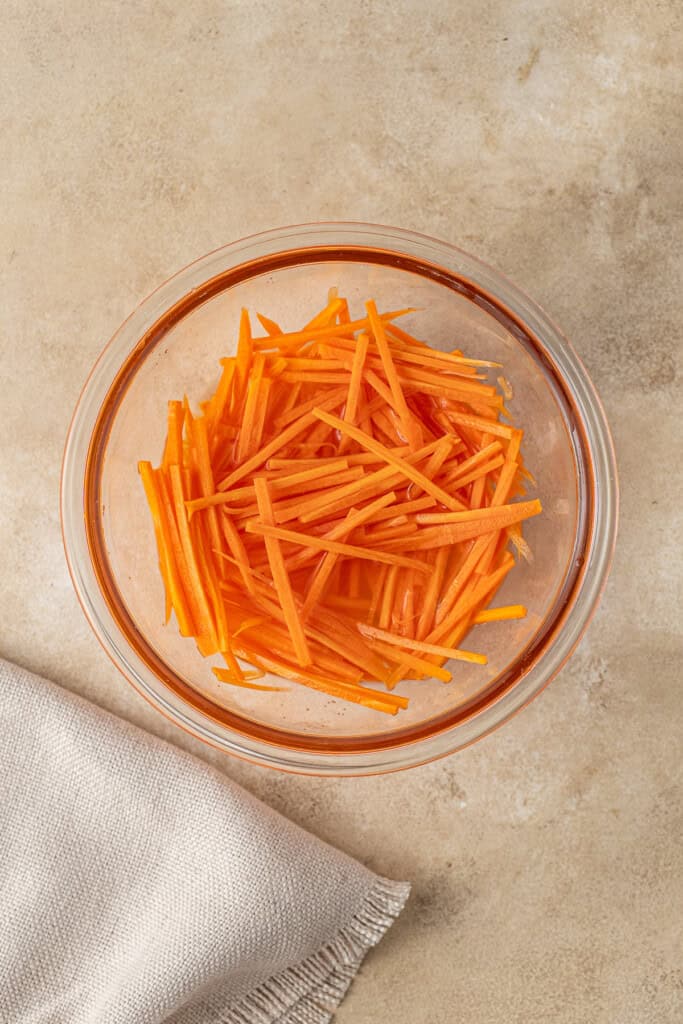

The pickled carrots are so easy, and while you could use plain carrots, the pickling just makes them so much more and adds a lot of extra flavour to the rice bowl. Use a mandoline to easily julienne the carrots if you have one, and then place into a bowl with some vinegar, sugar, salt, and water. Toss to combine and let sit for at least 10 minutes before serving.
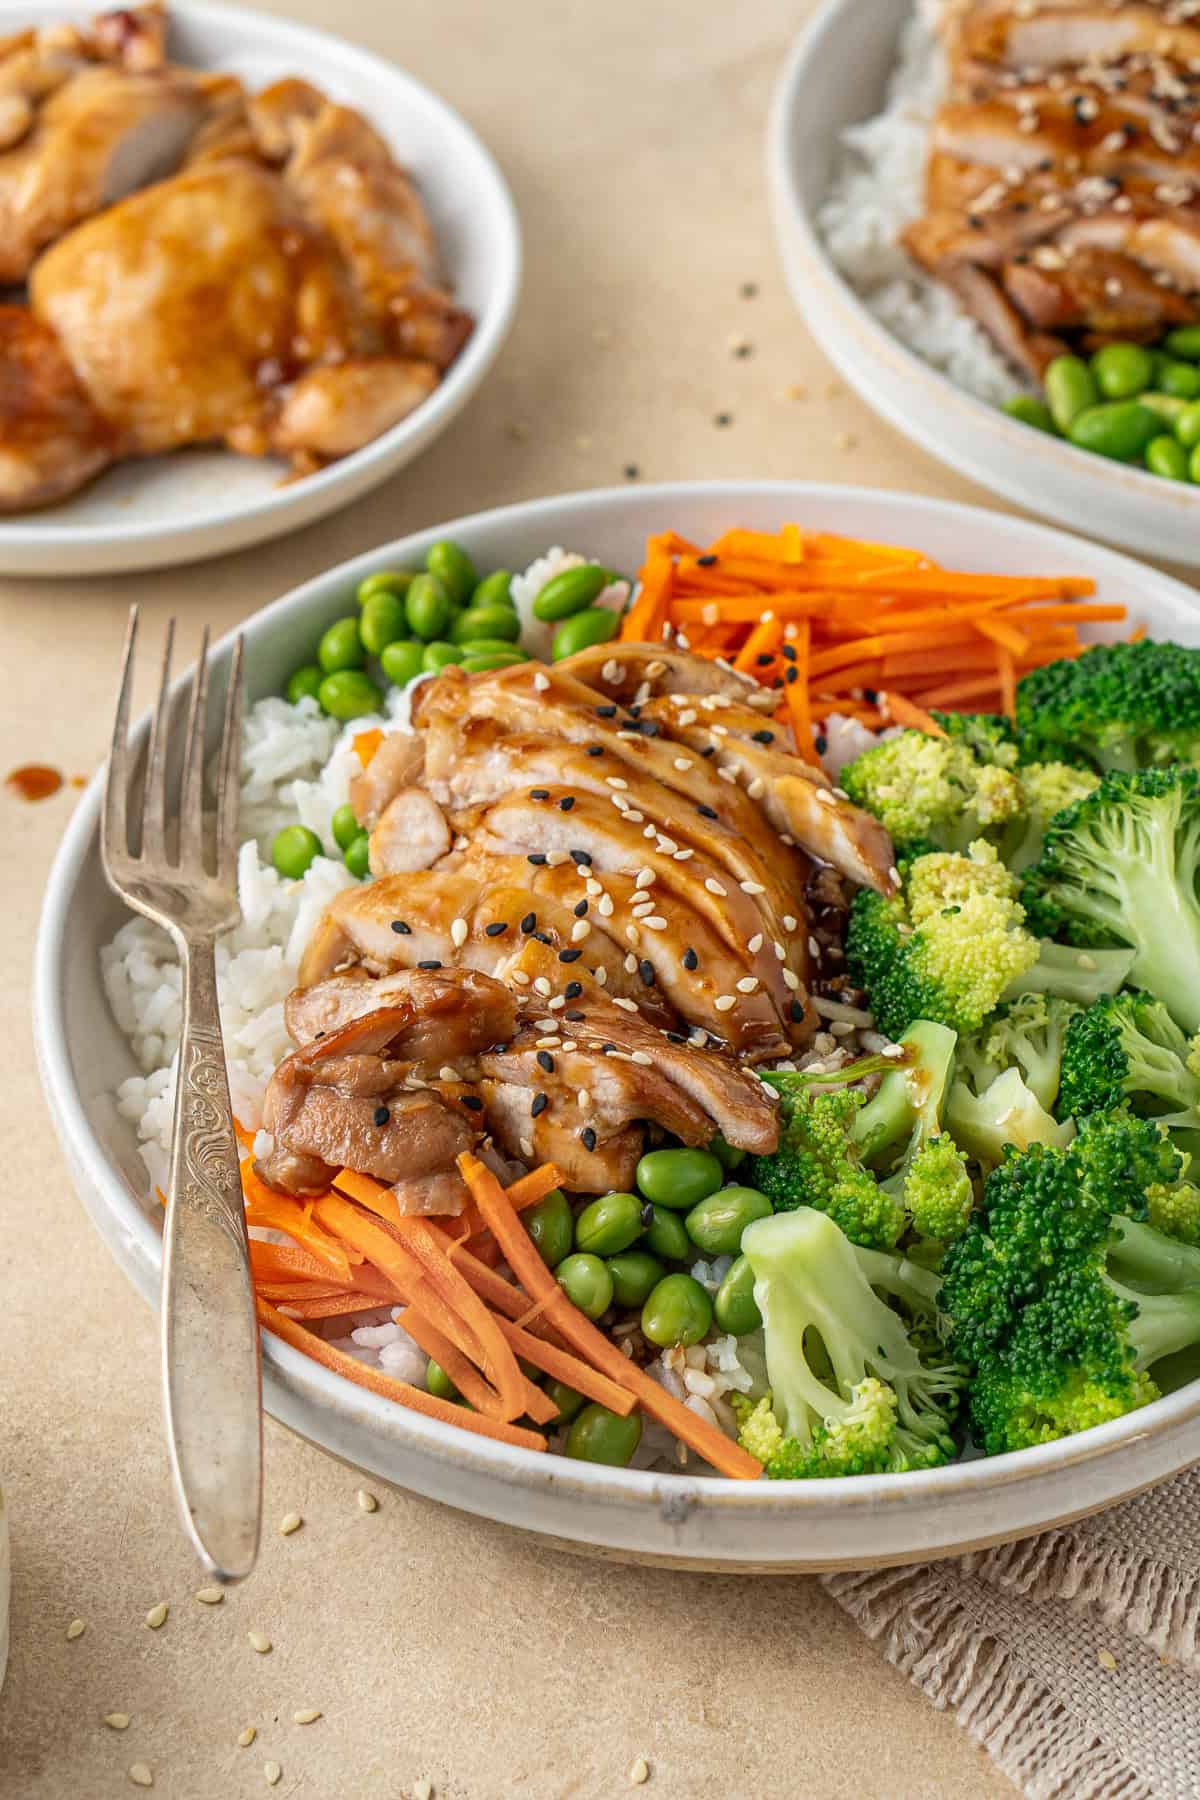
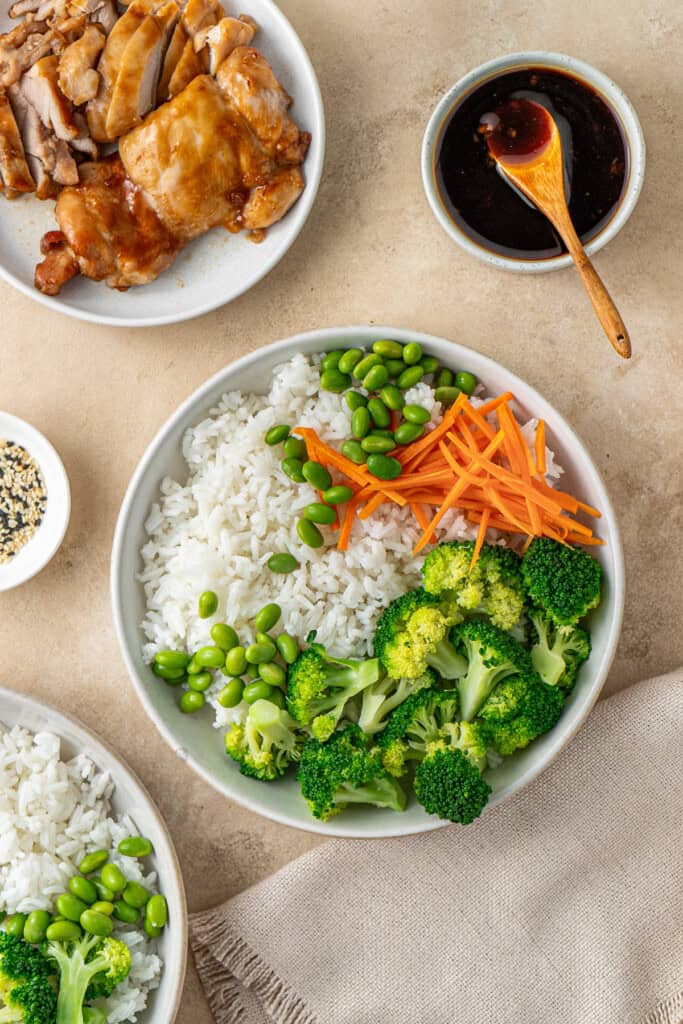
Finally, assemble the bowls with some rice, the cooked broccoli, edamame and the teriyaki chicken that’s been sliced. Top with sesame seeds and an extra drizzle of teriyaki sauce!
Meal prep instructions
Teriyaki chicken and rice bowls are perfect to make ahead of time, or to keep as leftovers for lunch the next day. You can also meal prep them to give you a head start on the week ahead.
After cooking, divide the rice, sliced teriyaki chicken, steamed broccoli, and edamame between four airtight meal prep containers. Keep the pickled carrots in a separate small container or compartment as it should be served cold.
Store the extra teriyaki sauce in a small container to drizzle over just before eating to keep everything fresh.
Store the assembled bowls in the fridge for up to 4 days, and keep the pickled carrots in a separate container in the fridge for up to 1 week.
Reheat the rice, chicken, broccoli, and edamame in the microwave for 2 to 3 minutes, or until hot. Add the pickled carrots and extra sauce before enjoying!
Recipe FAQs
You can. I find the choice between thigh and breast tends to be a personal preference and I personally think this recipe tastes better with thigh but you can certainly use chicken breast if you prefer! They are leaner, so they may dry out a bit more, so be sure to monitor the baking time and check the internal temperature (74°C / 165°F) to ensure they don’t overcook.
Yes, you can freeze the chicken and rice for up to 3 months. Store the chicken and rice in airtight containers. When ready to eat, defrost overnight in the fridge and reheat in the microwave. I recommend keeping the pickled carrots fresh and not freezing them.
You can! Marinating the chicken overnight will enhance the flavour even more, just be sure to store the marinated chicken in the fridge until you’re ready to cook it.
If you do make this recipe, please be sure to leave a comment and ⭐⭐⭐⭐⭐ rating below! And tag any of your creations on Instagram with @eightforestlane as I would love to see.
More bowl recipes:
Quick and Easy Spicy Prawn Rice Bowls
Beef Burrito Bowl
Hot Honey Sweet Potato Beef Bowl
Burger Bowls
Teriyaki Chicken Bowl
Ingredients
For the teriyaki chicken:
- 600 grams boneless skinless chicken thigh approximately 4 fillets
- ⅓ cup teriyaki sauce for marinating
For the pickled carrots:
- 1 large carrot julienned or grated
- ¼ cup rice wine vinegar or white vinegar
- 1 tablespoon white sugar/granulated sugar
- ½ teaspoon salt
- 2 tablespoons water
For the bowls:
- 2 cups cooked white rice
- 1 head broccoli cut into florets
- ½ cup shelled edamame
- 4 tablespoons teriyaki sauce to serve
- Sesame seeds optional
Instructions
- Place the chicken thighs in a shallow dish and pour over ⅓ cup of teriyaki sauce. Turn to coat well. Set aside to marinate for 15 minutes while you preheat the oven to 200°C (400°F).
- Transfer the marinated chicken to a lined baking tray and bake for 20–25 minutes or until the chicken is cooked through (internal temperature should reach 74°C / 165°F). Set aside to rest for 5 minutes, before slicing.
- While the chicken bakes, make the pickled carrots. Place the julienned carrot in a bowl and add vinegar, sugar, salt, and water. Toss to combine and let sit for at least 10 minutes, stirring occasionally. Drain before serving.
- While the chicken finishes cooking, steam the broccoli until just tender (about 3–4 minutes), or place in a pot of boiling salted water for 2 minutes.
- Divide the cooked rice between four bowls. Top with steamed broccoli, edamame, sliced teriyaki chicken, and pickled carrot. Drizzle each bowl with extra teriyaki sauce and garnish with sesame seeds.
Notes
Nutrition
Nutritional information is provided as a guide only and is calculated using automated online tools, therefore we cannot guarantee the accuracy. We encourage you to make your own calculations based on the actual ingredients used in your recipe.
A version of this recipe was originally published on August 15, 2018 but it has since been updated with an improved recipe, new photos, and better information and instructions.


Never wonder what's for dinner again
Get a brand new dairy free meal plan every week, plus members only recipes and the whole of Eight Forest Lane with no ads. The planning is done, you just shop and cook.
Start your 7 day free trial →