It’s nearly Easter and that can only mean 2 things….
Cute bunny shaped things and an extra long weekend.
Yes, I have my priorities sorted.

With Easter so close, I thought it would be fun to share some super cute cookies I made recently. Even though it’s technically not a new recipe as I have shared my favourite sugar cookie recipe on the blog before, I couldn’t resist showing you these decorated cookies. They really are so fun to make and are a perfect project for those extra days off.
I love making decorated sugar cookies. I think they are so adorable, and the process fills me with a real sense of accomplishment and joy. Plus they taste amazing so you get a delicious reward for your efforts. They also make great gifts!
Baking sugar cookies is something I have come to associate with special occasions as they are just a little more special than a regular cookie because they take a little time and effort. It is very common to make them for Christmas, but when I saw some Easter shaped cookie cutters in my supermarket, I decided that this would be the year to celebrate with some cute bunny cookies.
And because I knew that I wanted some colour, I decided to make decorated eggs as well. And these were SO MUCH FUN to make. I think they are the perfect weekend activity, getting friends and family and even the kids involved and having fun decorating.

I am by no means a skilled decorator which you can probably tell by looking at my photos, but still I am really happy with how these turned out. It’s all about giving it a go and seeing what you can do!
Making sugar cookies takes a few steps and I always find it is much easier when I plan ahead and make sure I have enough time to dedicate to the decorating process.
The first step is to make the sugar cookie dough. This is a simple recipe and I love the flavour from the vanilla and almond extracts. You can read more about the process of making the dough in my 100s and 1000s sugar cookie post, but one thing to remember is to make sure you roll out your dough and then let it chill in the fridge for around an hour. This step is so important as chilling the dough will stop the cut out shapes from spreading in the oven.
Once you dough is cold, cut out your shapes and bake the cookies in batches until all dough is used. You will need to let the cookies cool completely before starting the decorating. For this reason, I like to bake my cookies the day or night before I plan to decorate them.
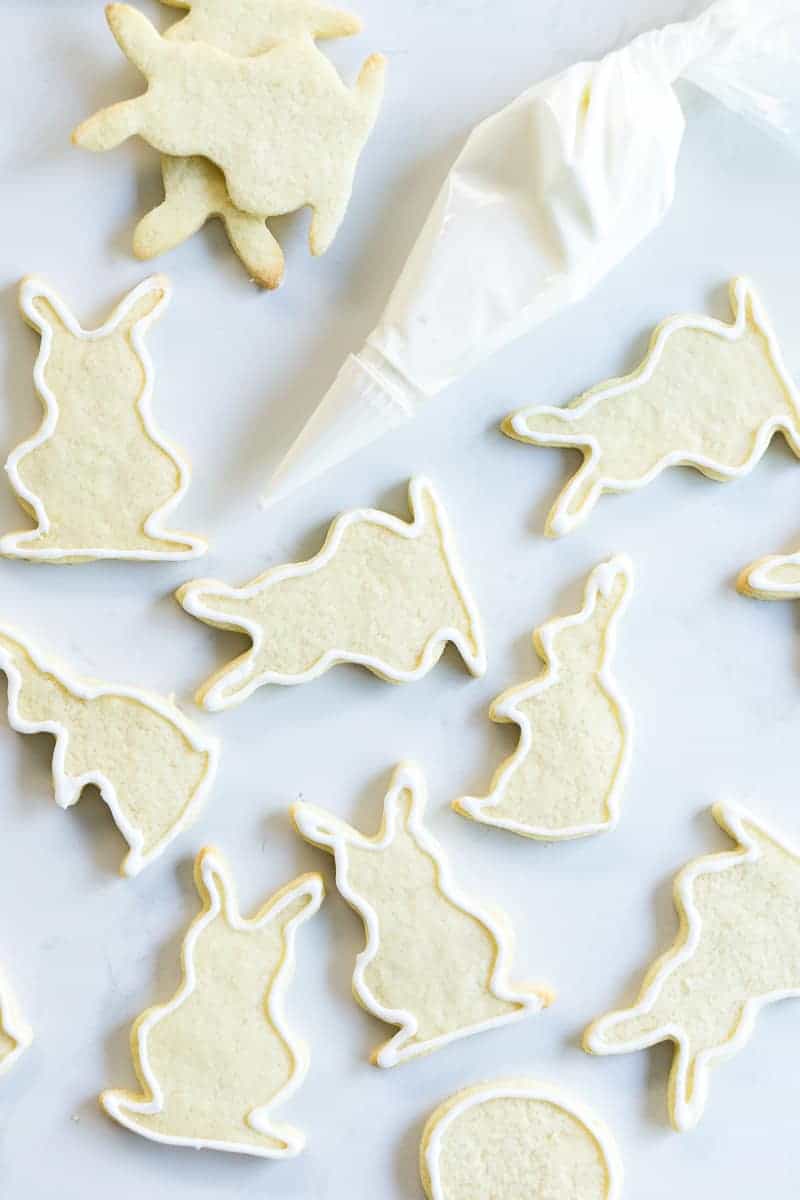
On decorating day, make your royal icing. I always use my homemade royal icing recipe that uses just three ingredients. This icing is super shiny, sets hard and is really easy to work with.
To decorate the adorable bunny cookies, I started with plain white icing. Using a thin round tip in my piping bag, I piped a fine line around the edge of each bunny. Once this was done, I set aside for about 30 minutes to an hour until a crust had formed.
Then I thinned a little of the white icing with a teaspoon or two extra of water and again filled my piping bag, this time ‘flooding’ the inside of the cookie with my icing, making sure that it was evenly covered and using a toothpick to smooth out any air bubbles that may have formed.

From here, again you will need to let the icing set for around an hour. This is best done in a cool, dry area as any moisture in the air will slow down the process. Once the icing is firm, start by again using your white icing with the same consistency as you used for the outline, to create bunny cheeks.
Tint some more icing a soft pink and use this to create your ears and cute bunny nose. Finally tint a very small amount of icing black. I used the Americolour gel colouring and let my icing set aside with the black colour for about 15 minutes to develop and I was super impressed just how black it got! I then used this to carefully bring my bunny to life, adding the eyes and whiskers.


For the easter egg cookies, I used a few different colours using the same technique of outlining the cookie first, waiting for that to crust and then flooding the mixture with a thinner consistency of the icing. Once this is dry, you can begin piping on your designs.
It is important to make sure you are doing your decorations with the firmer consistency icing that you use for the outlines rather than the flooding as otherwise you may end up with a runny mess.
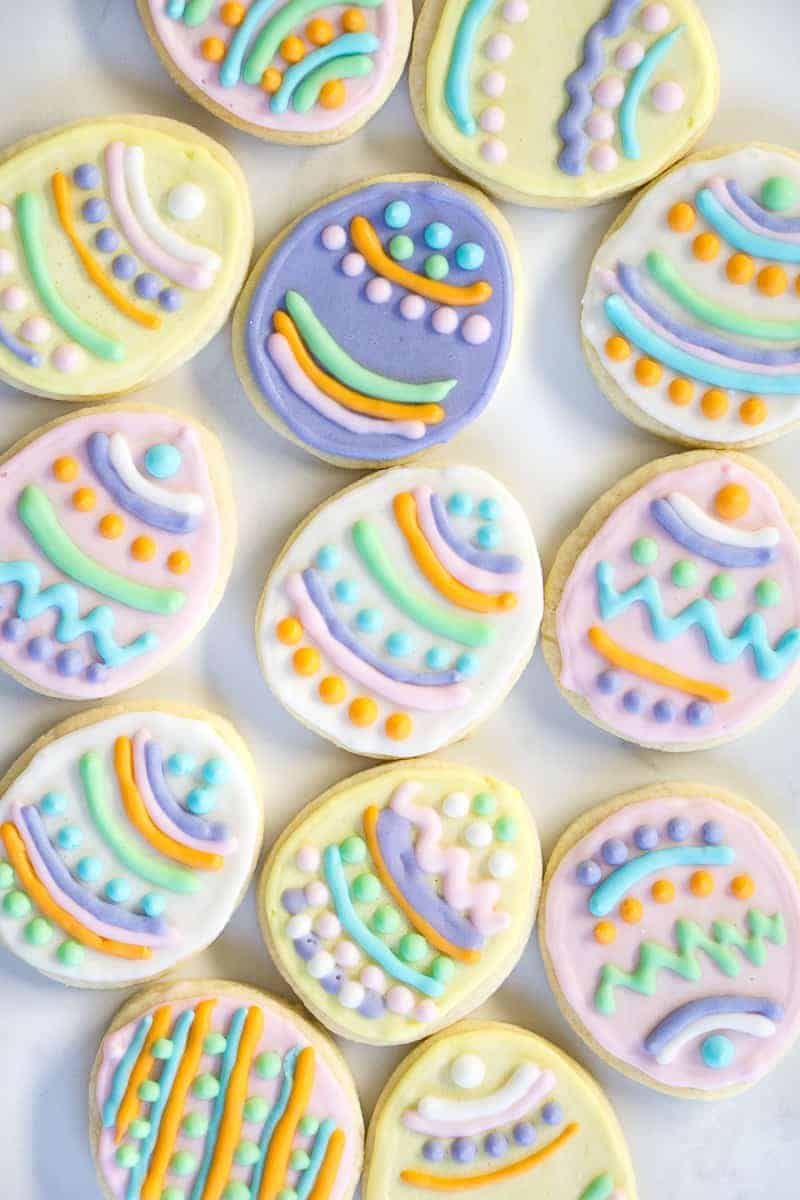
For this, I had so much fun looking through my Americolour Gel Starter Kit getting to play with colours I usually wouldn’t. I alternated background colours of white, yellow and pink, and then used smaller amounts of icing tinted bright colours like blue, purple, green and orange to create different and unique patterns on each egg.
There are no rules here. Pick your favourite colours and have fun!

One thing to note, as you will be working with a few bowls of coloured icing at a time, make sure any icing that you are not using is covered with a damp cloth to prevent drying out as royal icing sets like cement. Also a great tip is to sit your piping tip on a damp paper towel when you sit it down again, just to prevent the air from forming crusts around the edges.
With the cookies coming together really easily, there is no reason not to dedicate some time around the dining room table to have a bit of fun and make something that you can sit back and be proud of. It always surprises me how long they take to make vs how quickly they all get eaten! A certain crowd pleaser, these will be perfect for any Easter celebration.

If you do make this recipe, please be sure to leave a comment and rating below! And tag any of your creations on Instagram with #eightforestlane as I would love to see.

Easter Sugar Cookies
Ingredients
- ¾ cup dairy-free butter*
- ¾ cup sugar
- 1 egg
- 2 teaspoon vanilla extract
- ¼ teaspoon almond extract
- 2 ¼ cups plain flour
- ½ teaspoon baking powder
Royal Icing
- 1 batch
homemade royal icing - water
- food colouring
Instructions
- Preheat oven to 180°C and line 2 baking sheets with baking paper.
- Make the cookies. Using a handheld or stand mixer with the paddle attachment fitted, cream dairy-free butter* and sugar in a large bowl. Add egg, vanilla and almond extracts and continue mixing on high for 2-3 minutes until fully combined.
- Mix in sifted flour and baking powder slowly until the mixture just comes together. If the dough is too soft add a little more flour until it is a better consistency for rolling.
- Divide dough evenly into 2 parts and roll each out onto baking paper. Place into the fridge for at least 1 hour to chill. This step ensures the cookies hold their shape in the oven.
- Remove the dough from the fridge and use a cookie cutter to make shapes, rolling out again until all the dough is used. Anytime you are not actively using the cookie dough, such as while waiting for a batch to cook, cover dough with baking paper and place back in the fridge. You want to always be working with cold dough.
- Place cut out shapes onto the baking sheet and bake for 8 minutes or until cookies start to turn a light golden colour around the edges. They may still be a bit soft but will firm up as they cool. Let cool completely on a wire rack before icing.
- Make the icing. Follow the directions in the post to make your royal icing. This icing dries hard, so make sure to cover any left over icing with a wet paper towel.
- Decorate the cookies. Divide the icing into bowls and tint your desired colours. Pipe an outline around the edges of the cookies. Once complete let dry for 30-60 minutes until the outlines have formed a crust. Squeeze remaining icing back into the bowl and add about 2 tablespoons more water to thin out the mixture. Place icing back into the piping bag and fill in the outlines of the cookies. Set aside on a wire rack to dry and continue to pipe remaining cookies with different colours. Once the cookies have formed a crust, you can pipe on your designs and the features of the bunny. See the blog post for more details on creating the designs.
- Icing will crust after a couple of hours but needs to be left overnight to harden completely. The cookies themselves will remain soft and in the morning they will be fine to stack and store in an airtight container for up to 5 days.
Notes
Nutritional information is provided as a guide only and is calculated using automated online tools, therefore we cannot guarantee the accuracy. We encourage you to make your own calculations based on the actual ingredients used in your recipe.
Save it for later:





Robyn
These are so cute Sally!
Sally
Thanks Robyn 🙂
Alexandra @ It's Not Complicated Recipes
These are so beautiful, Sally! Your decorations are just lovely 🙂
Sally
Thanks so much!
Sylvie
Such an adorable collection of cookies! Thanks for all your tips and explanation – I have never attempted to make decorated sugar cookies but now I feel like I could try!
Sally
Thanks Sylvie! I hope you do, they are so much fun.
Jaimie @ Nosh
These are just adorable Sally! Happy Easter 🙂
Sally
Thanks! You too 🙂