Easy soft vegan sugar cookies flavoured with vanilla and cinnamon with crisp edges and decorated with the easiest icing, making these the perfect festive treat for the holidays.

Sugar cookies are one of my favourite special occasion treats. There is something extra special about biting into a cookie that has a sweet, crisp icing that cracks with each bite, knowing that so much time went into the decorations only to have them gone in a couple of swift bites.
Decorated sugar cookies are definitely a labour of love, and really the effort that goes into decorating is truly optional as the cookies are delicious either way, however isn’t it part of the fun?
These cookies really only come out of my kitchen once or maybe twice a year with the most common time being at Christmas (the other time this year was for Easter!). This year however is the first time I’ve tried a vegan alternative as while my other sugar cookie recipes are dairy-free, they usually contain egg in both the cookies and the royal icing.
Instead for this recipe we have used a few extra ingredients (but still nothing unusual and would have you searching stores for something you’ll never use again), which when mixed together with the magic of baking science leave us with a soft cookie with crispy edges and the perfect texture that you would expect.
The icing remains super simple being just a combination of water and icing sugar. Unlike traditional royal icing which contains egg whites, this version will not quite have the same level of shine and will be slightly softer, however the icing will still dry hard enough to allow for stacking.

How to make vegan sugar cookies
Start by making your cookie dough in a stand mixer with the paddle attachment fitted. If you don’t have a stand mixer you can start with a handheld mixer to cream the dairy-free butter and sugar together. When you start adding in the flour and the dough starts to form you may need to swap to using a wooden spoon to finish mixing depending on how powerful the mixer is.
Once your dough has formed, turn it out onto a lightly floured surface and carefully shape the dough into 2 disks. Using a floured rolling pin roll out each disk onto a sheet of baking paper until about 5 millimeters thick.
Place another sheet of paper over the top and place the dough into the fridge on a baking tray to chill for at least 2 hours and up to overnight. This step is essential to ensure that when you bake the cookies that they hold their shape.
Once the dough has chilled, preheat the oven to 180°C and line two trays with baking paper. Cut out shapes from the dough, lightly flouring the cookie cutter if it’s getting stuck at all. Carefully place the shapes on the tray and bake for 8 minutes. You want the edges to just be turning golden and the middles still looking soft. Let the cookies cool for 5-10 minutes on the tray to firm up before transferring to a wire rack to cool completely.
You’ll want to keep rolling up the extra dough to roll out and cut more shapes until all the dough is used. If at any point the dough gets warm from being worked with your hands or being on the bench, make sure to put it back into the fridge as you want to make sure you are always working with cold dough.
This process may take a little bit of time as you work in batches with cookies in the oven and dough chilling, but once all of the dough has been used and the cookies have been baked the next step is usually the one that takes the most patience from me!
The cookies must be COMPLETELY cool before you ice them, meaning no heat at all left in them. To be sure I usually bake in the morning and frost in the afternoon.

How to decorate sugar cookies
When you cookies are finally cool, it’s time for the fun bit!
Start by making a batch of the icing by slowly mixing the water into the icing sugar until a thick paste forms. From here you can add in your food colouring.
I always use Americolor gel colouring because it’s vegan and the gel consistency means that the smallest amount gives the most vibrant colour and the gel doesn’t change the texture of the icing.
Depending on how many colour variations you want, split out your icing into smaller bowls but remember to keep them covered with plastic wrap as they will start to firm up otherwise.
Once you have your chosen colour, fill a piping bag with a small round tip fitted and use this to carefully outline your cookies. This is going to give the cookies a nice edge that will act like a dam wall so we can fill the middle in later with more icing. Sit the cookies aside to dry.
Squeeze out the remaining icing from the piping bag and mix with a little more water to thin the mixture out slightly. Add the icing back to the piping bag and carefully fill inside the edges with icing. This process is called flooding. Set the cookies aside to allow the icing to dry at room temperature.
Finally, once the icing has set, you can fill the piping bag with more icing, the same consistency as you had for the outline, and draw decorations and patterns on the cookies. Finish off with sprinkles.
This icing will take a bit longer than traditional royal icing to get completely firm so I recommend leaving the cookies at room temperature overnight before stacking and storing them.

How to store vegan sugar cookies
Another thing I love about these cookies is that while they take a little bit of time to make, they also store really well. That is if you don’t happen to eat them all at once which is a real possibility in my house!
These cookies will last a week in an airtight container at room temperature and still taste fresh. You can also freeze them frosted or unfrosted for up to 3 months and then just let defrost at room temperature.
A container of sugar cookies in the kitchen over Christmas or a plate at a party never goes untouched for long so this is the perfect thing to bring when you don’t really know what you should.
Sugar cookies also make the best gifts, plus you can personalise the decoration for the event or the receivers tastes. So place a few in a box or bag with a nice ribbon and gift tag and watch your family and friends light up when you hand these out.

More Christmas Cookies:
Raspberry Thumbprint Cookies
Vegan Gingerbread Men
Red Velvet Crinkle Cookies
Classic Ginger Snap Biscuits
Vegan Chocolate Sugar Cookies

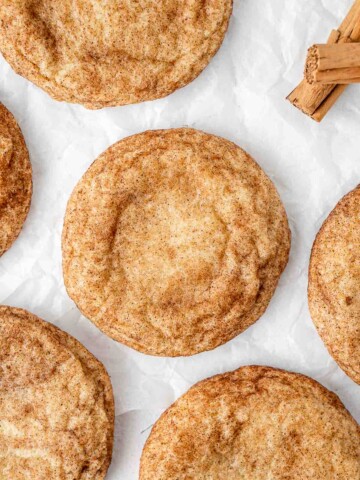
Vegan Cinnamon Sugar Cookies
Ingredients
- 2 ¼ cups plain flour
- ½ teaspoon baking powder
- ½ teaspoon ground cinnamon
- ¾ cup (185grams) dairy-free butter
- ¾ cup caster sugar
- 2 teaspoons vanilla
- ¼ teaspoon almond extract optional
- 1 tablespoon melted coconut oil
- 1 tablespoon milk
Easy Icing
- 1 cup icing sugar
- ½ teaspoon vanilla
- 1 tablespoon water
- Gel food colouring optional
Instructions
- Make the cookies. In a medium size bowl, sift together the plain flour, baking powder and cinnamon and set aside. Using a handheld or stand mixer with the paddle attachment fitted, beat dairy-free butter and caster sugar in a large bowl. Add vanilla, almond extract, coconut oil and milk and continue mixing on high for 2-3 minutes until fully combined.
- Mix in sifted flour mixture slowly until the mixture just comes together.
- Divide dough evenly into 2 parts and roll each out to 5m thickness onto lightly floured baking paper with a little more flour if the dough is too sticky. Cover with another sheet of baking paper and place into the fridge for at least 3 hours or overnight to chill. This step ensures the cookies hold their shape in the oven.
- Preheat the oven to 180°C and line 2 baking sheets with baking paper. Remove the dough from the fridge and use a cookie cutter to make shapes, rolling out again until all the dough is used. Anytime you are not actively using the cookie dough, such as while waiting for a batch to cook, cover dough with baking paper and place back in the fridge. You want to always be working with cold dough.
- Place cut out shapes onto the baking sheet and bake for 8 minutes or until cookies start to turn a light golden colour around the edges. They may still be a bit soft but will firm up as they cool. Let cool completely on a wire rack before icing.
- Make the icing. In a small bowl, sift the icing sugar to ensure there are no lumps. Make a well in the centre of the icing sugar and add the vanilla and ½ a tablespoon of water. Using a metal spoon, stir the icing sugar from the edges into the centre until the icing starts to come together. Add in a little more water until the icing is smooth but still quite thick. If you add too much water, just add a little more icing sugar. Divide the icing into bowls (depending on how many colours you want to use) and tint the icing with a few drops of gel food colouring until it reaches your desired colour.
- Decorate the cookies. Place the icing into a piping bag with a thin round tip and carefully pipe around the edges of the cookies to outline them. Once complete let dry for 30-60 minutes until the outlines have formed a crust. Squeeze remaining icing back into the bowl and add a small amount of water to thin out the mixture. Place icing back into the piping bag and fill in the outlines of the cookies. Set aside on a wire rack to dry for another hour or 2. Once the cookies have formed a crust, you can pipe on your designs.
- The icing will crust after a couple of hours but they need to be left at least overnight to harden completely. The cookies themselves will remain soft and in the morning they will be fine to stack and store in an airtight container for up to 5 days.
Notes
Nutritional information is provided as a guide only and is calculated using automated online tools, therefore we cannot guarantee the accuracy. We encourage you to make your own calculations based on the actual ingredients used in your recipe.
Save it for later:





Made this recipe? Leave a review!