This chocolate puff pastry Christmas tree uses just 3 ingredients making it the perfect last minute festive dessert! This crispy, pull apart pastry is so easy and fun to make, plus this version uses a dairy free chocolate hazelnut spread and can easily be made vegan if needed!
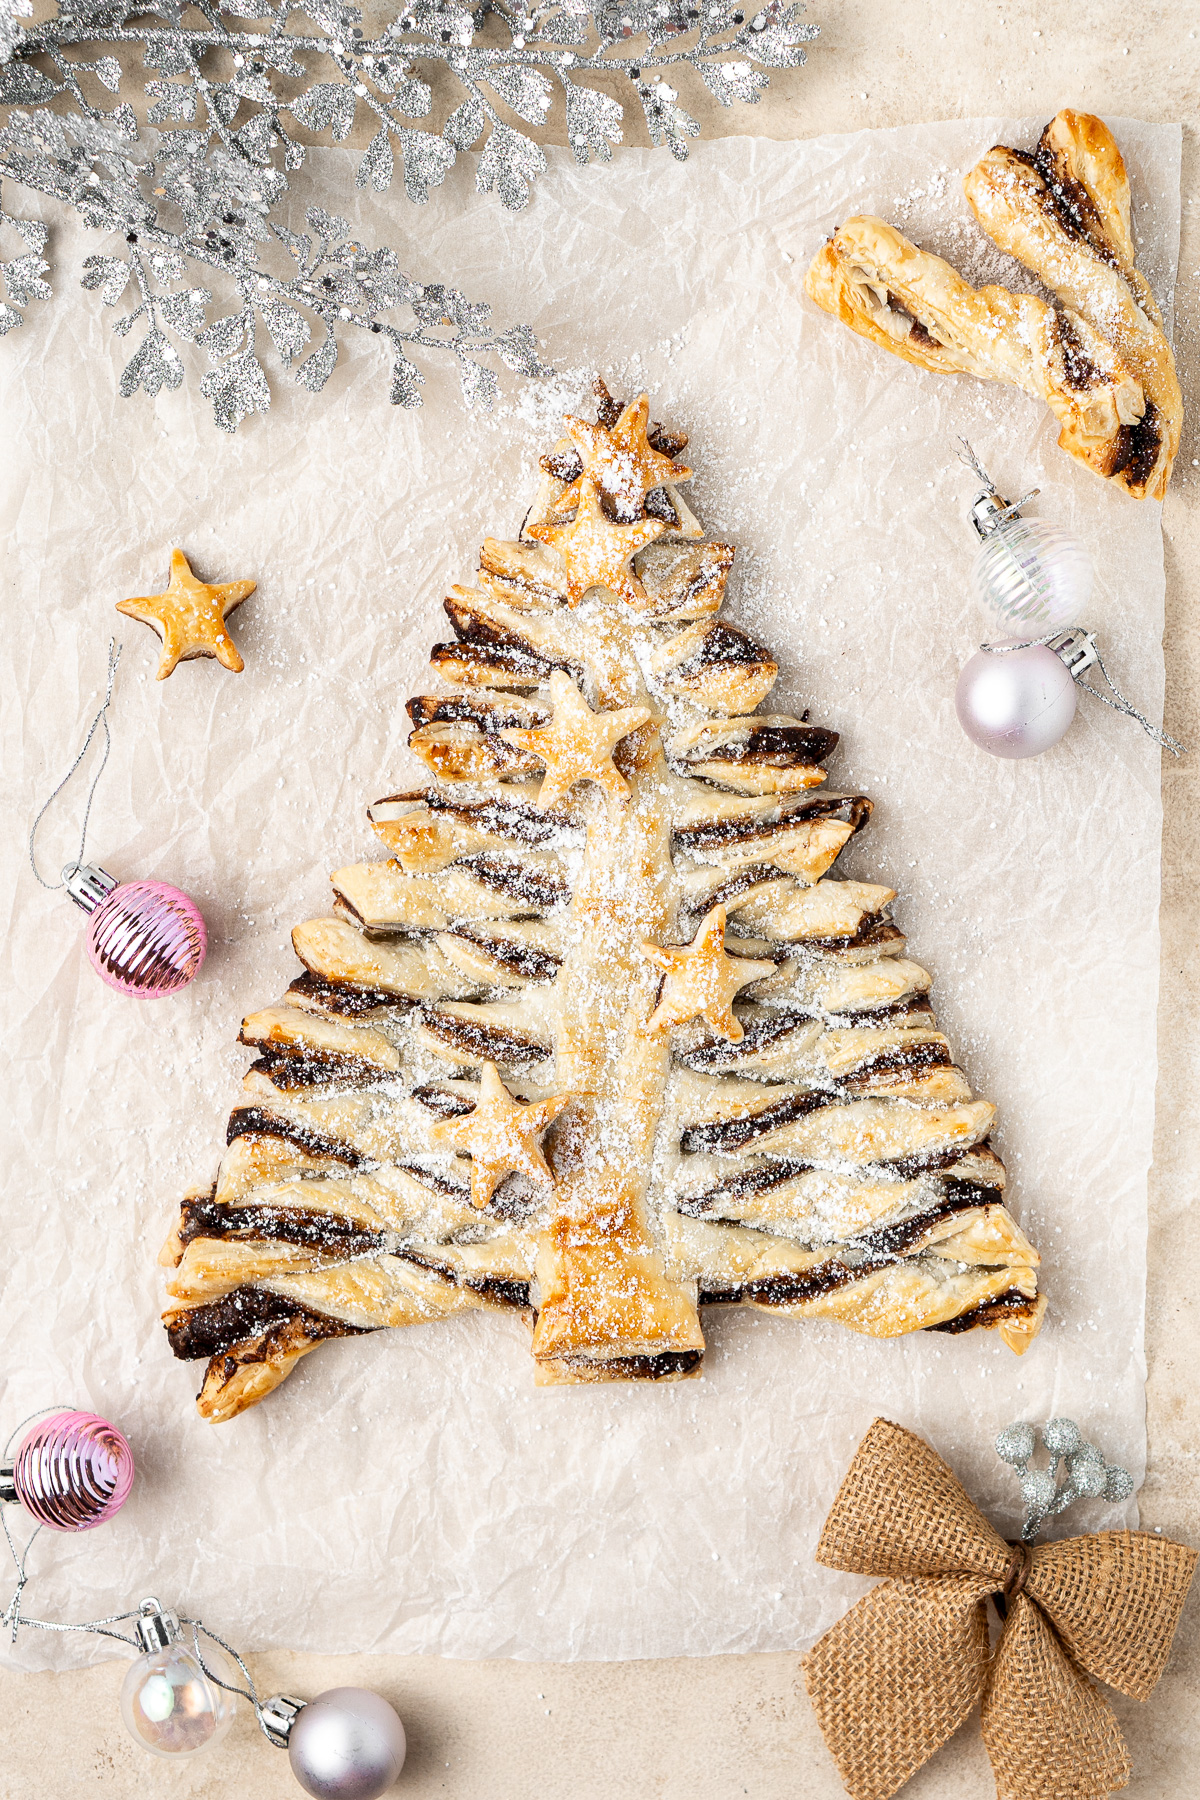
This is one of those recipes that you tend to see pop up the closer it gets to Christmas time because it’s so easy but looks insanely festive and pretty. It really is the perfect last minute sweet treat after dinner over the holidays.
I’ve always wanted to make my own version of a chocolate puff pastry Christmas tree as they are usually made using Nutella which unfortunately is not dairy free. Luckily there happen to be a few dairy free, plant-based chocolate hazelnut spreads available now that make this a super easy recipe to make dairy free and even vegan!
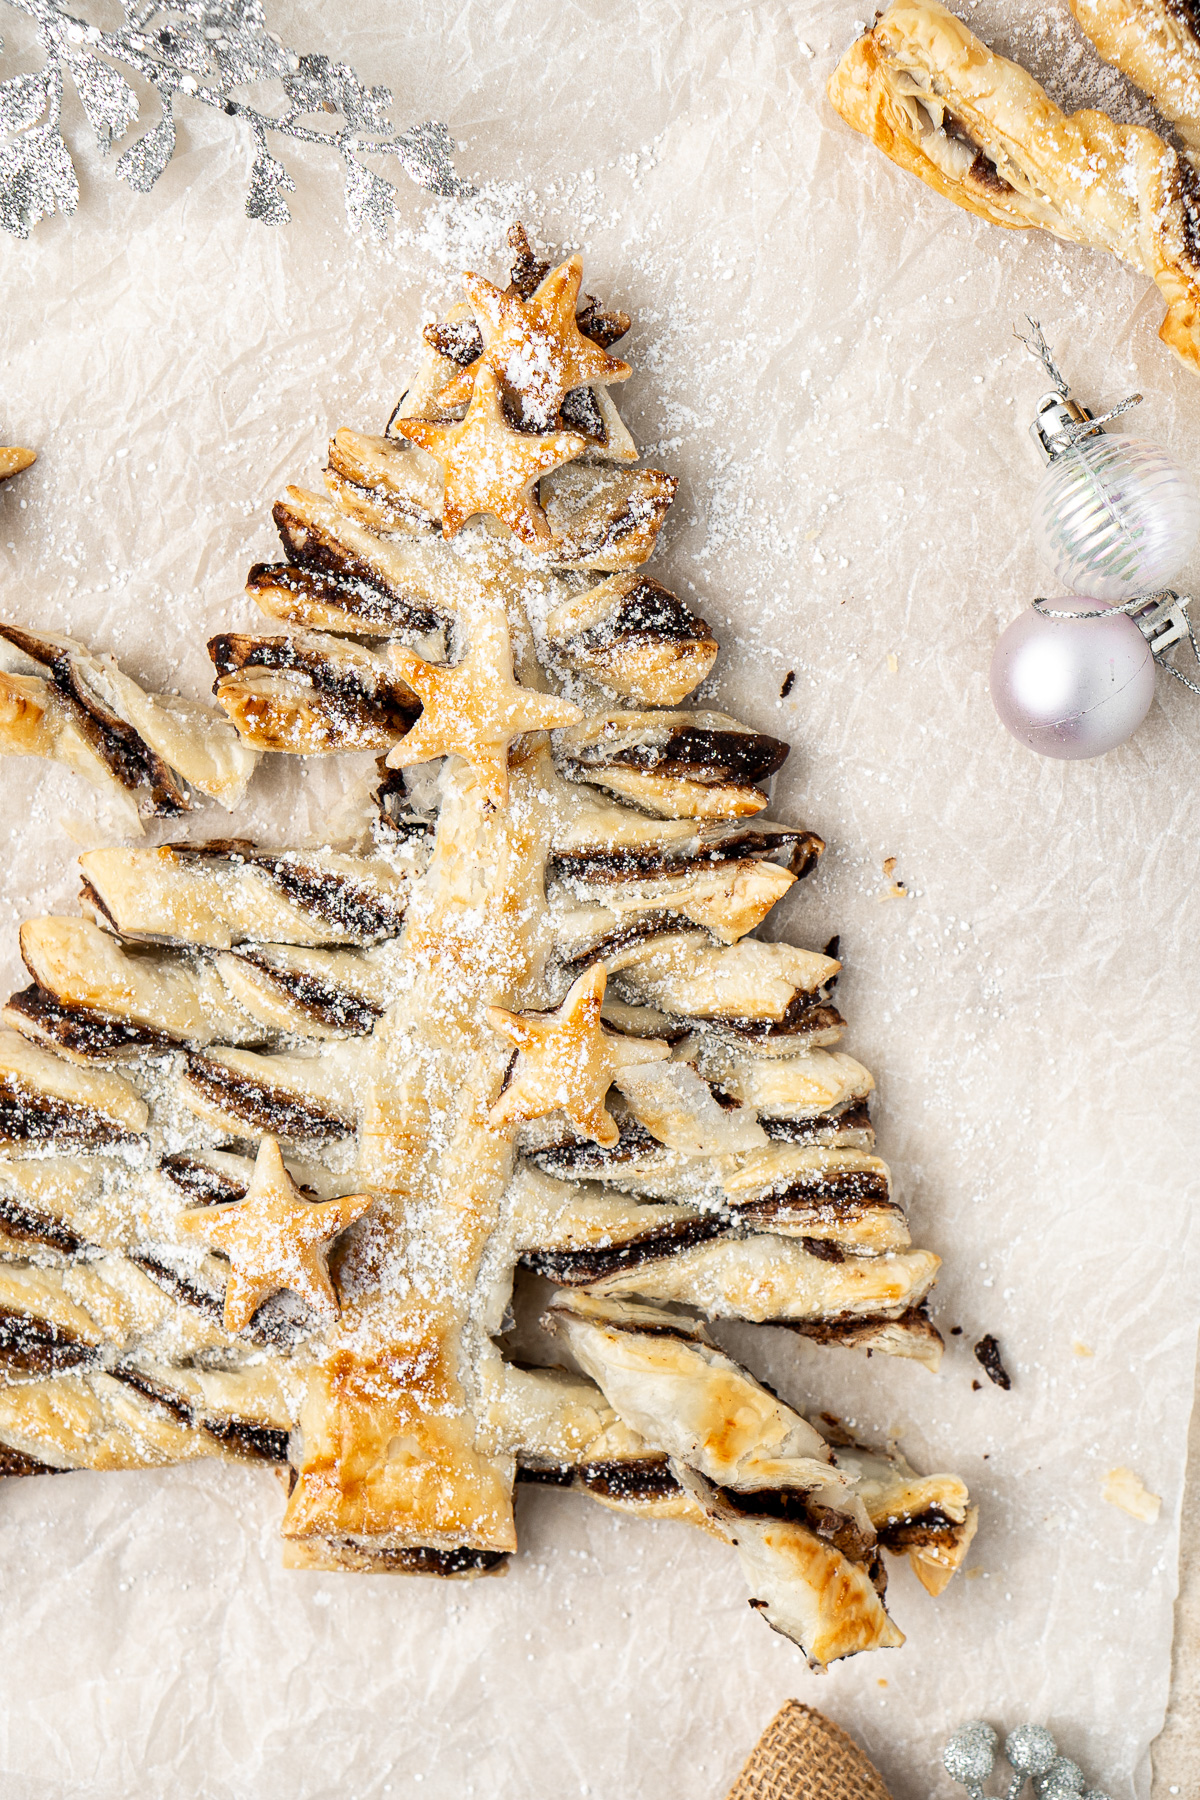
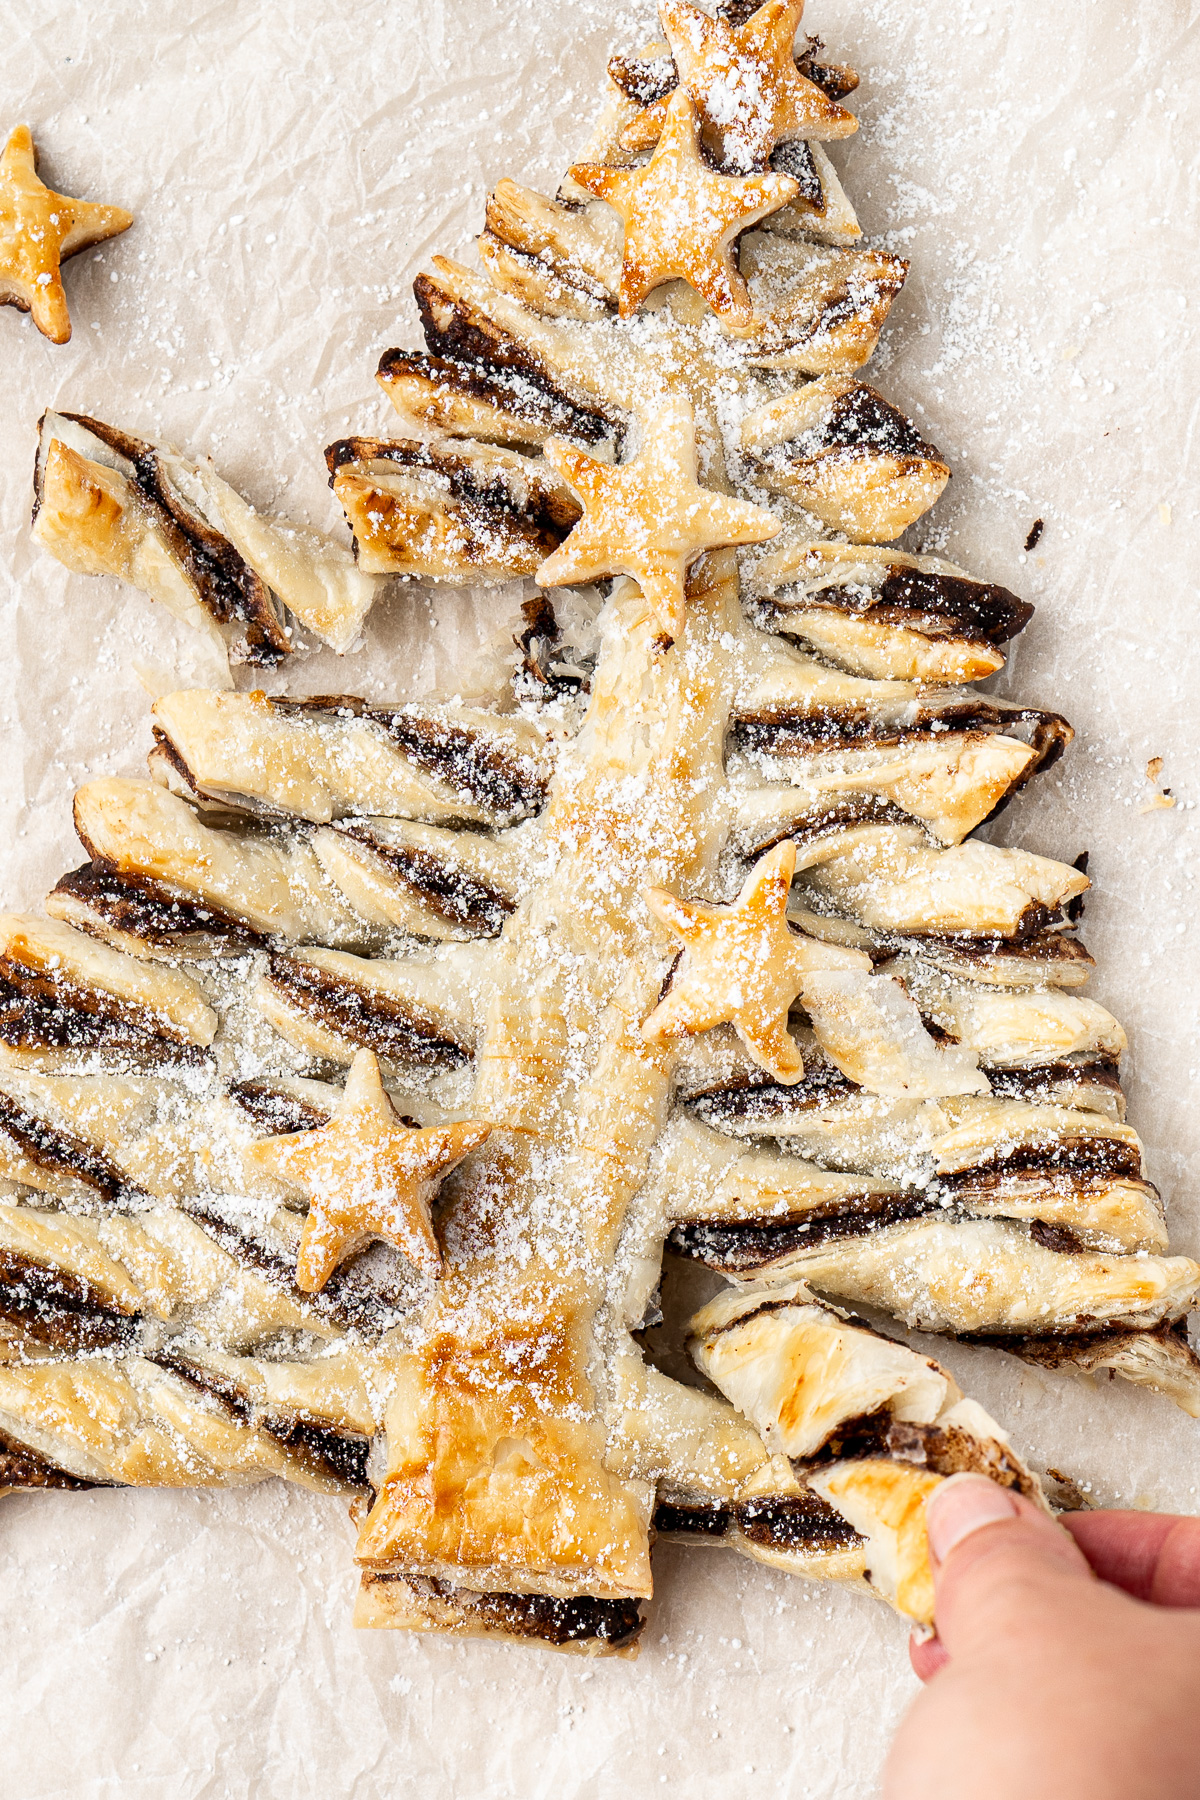
I just can’t get over how cute this tree looks dusted in icing sugar. Not to mention, who doesn’t like chocolate and pastry together! And if you’re feeling extra you can definitely break off the branches and dunk them into melted chocolate.
I’ve included full step-by-step instructions below on creating the Christmas tree design but it’s really quite simple, making it a great project to make with the whole family to get into the festive spirit.
Key Ingredients
This recipe only requires 3 ingredients making it the perfect last minute dessert idea. See later on in the post for some different variations to try as well!
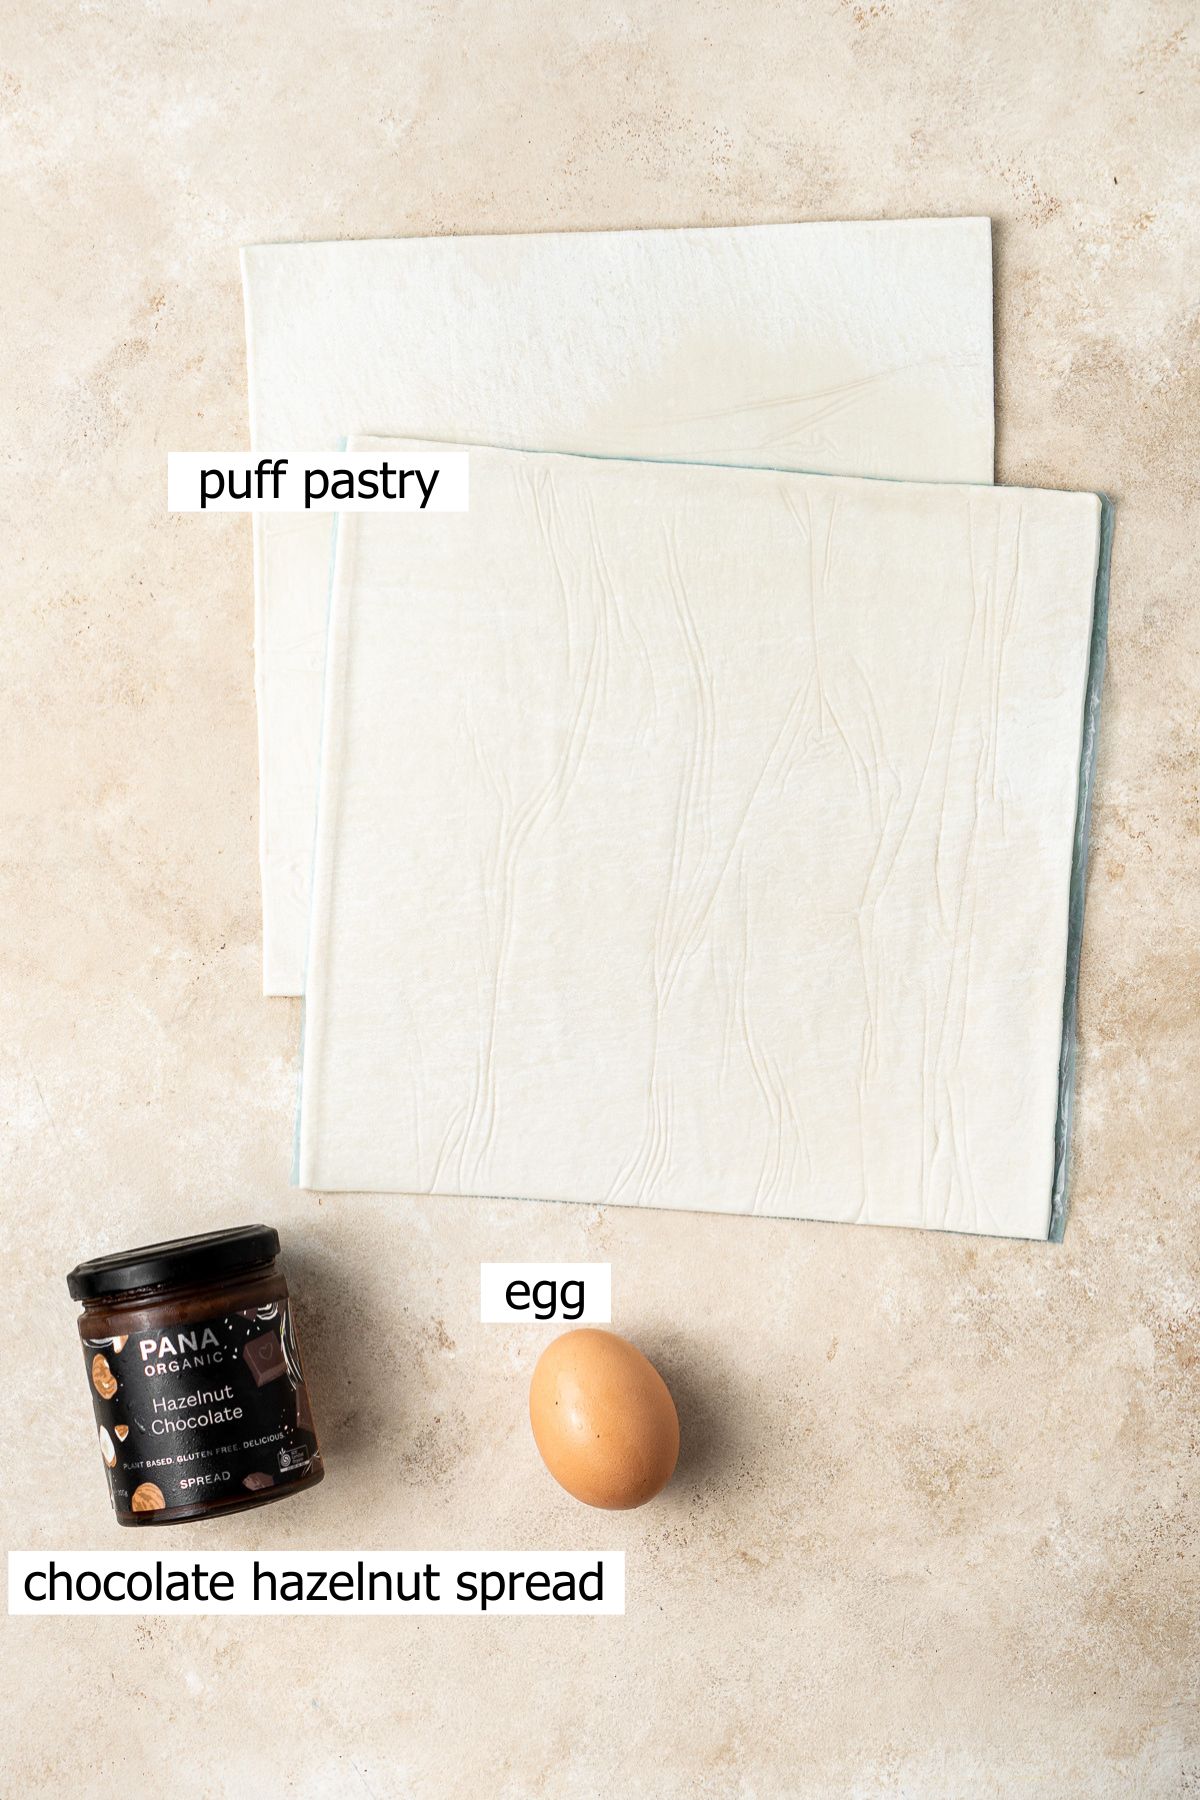
Note all ingredients and their quantities are laid out in the recipe card at the bottom of this post.
- Puff pastry – most puff pastry brands at the supermarket are dairy free and vegan but do make sure to check the label to be sure.
- Chocolate hazelnut spread – I am making this dairy free therefore using a plant-based chocolate hazelnut spread. I like the Pana Organic brand as it’s easy to find at both major supermarkets and on Amazon. You can use any spread you like, and of course if you’re not dairy free, use Nutella.
- Egg – optional for brushing the pastry with before going into the oven to make it bake up nice and golden and shiny. If you’re wanting this recipe to be vegan, you can brush it with dairy free milk instead.
Step-By-Step Instructions
To get started, make sure your puff pastry has thawed slightly but is still cold.
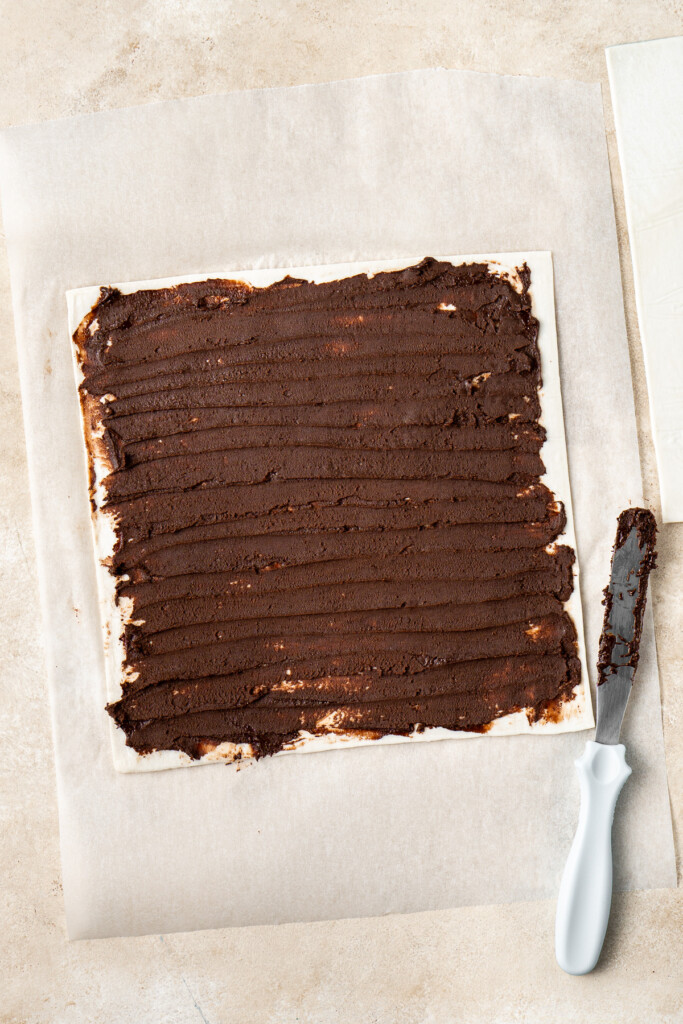
I like to assemble the Christmas tree on a sheet of baking paper as this makes it easier to transfer directly to a baking tray. Place one sheet of pastry down on the baking paper and then spread it completely in the chocolate hazelnut spread until evenly coated.
Place the second sheet of pastry over the top and press down slightly to seal the layers together.
Now it’s time to create the shape. You can get specific with a ruler if you like, but I just went freehand as it doesn’t need to be perfect.
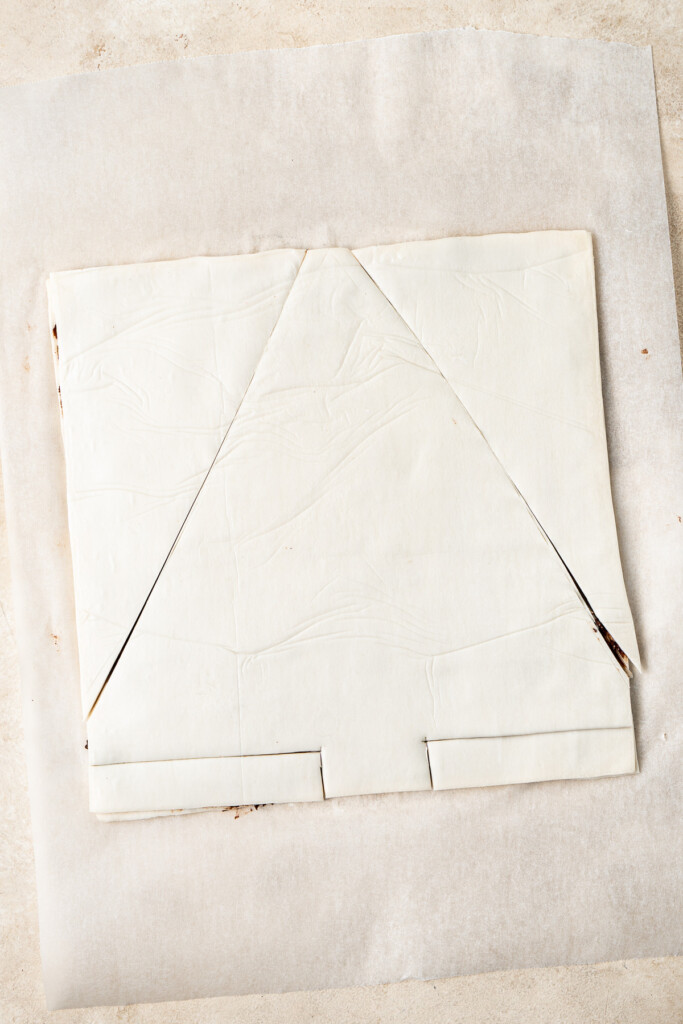
First you’ll want to cut 2 small, long rectangles from the bottom of the pastry to create the trunk of your tree. Next, cut the sides to form a triangular shape which will be your tree. The top doesn’t have to come to a point as we’re going to cover it with a decorative star anyway.
Once you have your base tree shape, it’s time to cut the branches. Starting from the bottom, cut horizontal slits on both sides of the tree, leaving a solid “trunk” in the centre. Make each branch about 1.5 to 2 centimetres wide. The trunk can taper and get narrower at the top.
Next, carefully twist each branch a few times to create a spiral effect. The top branches will only allow a singular twist.
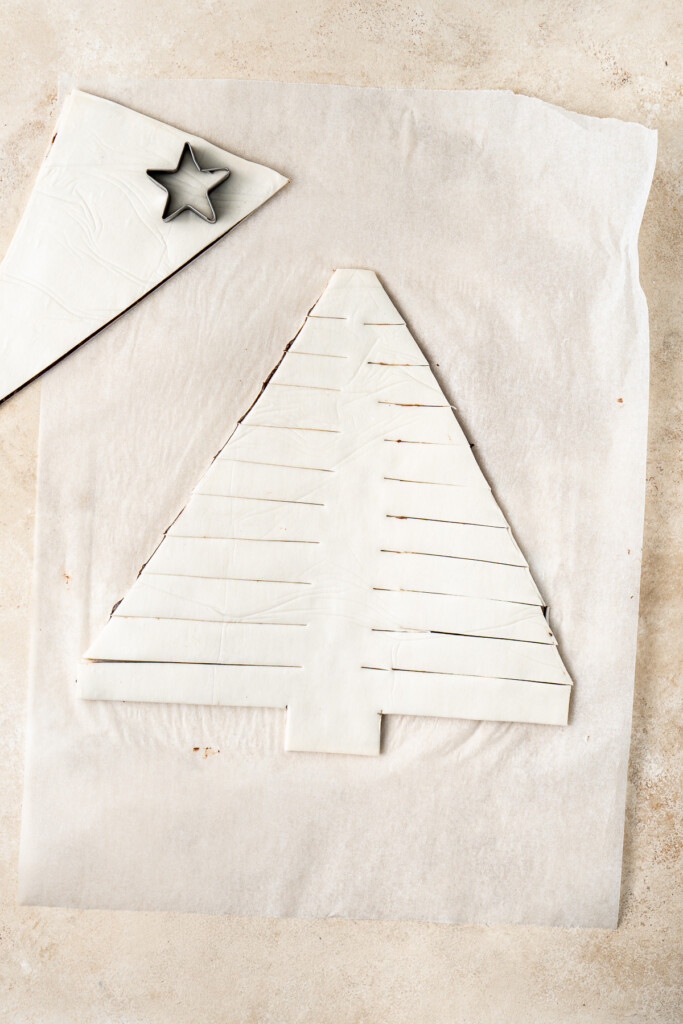
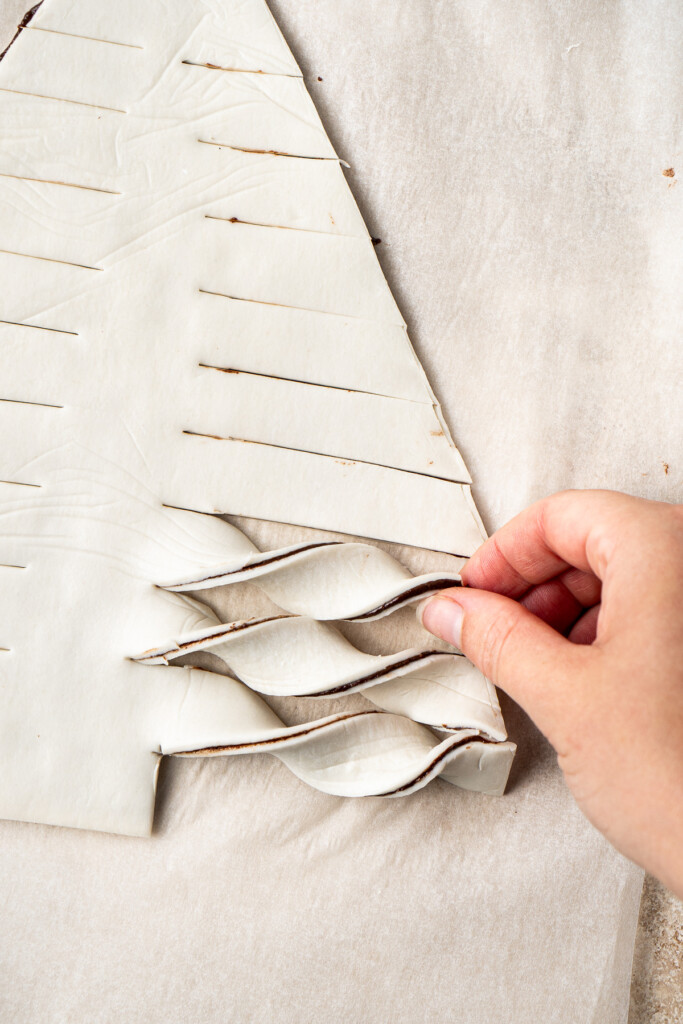
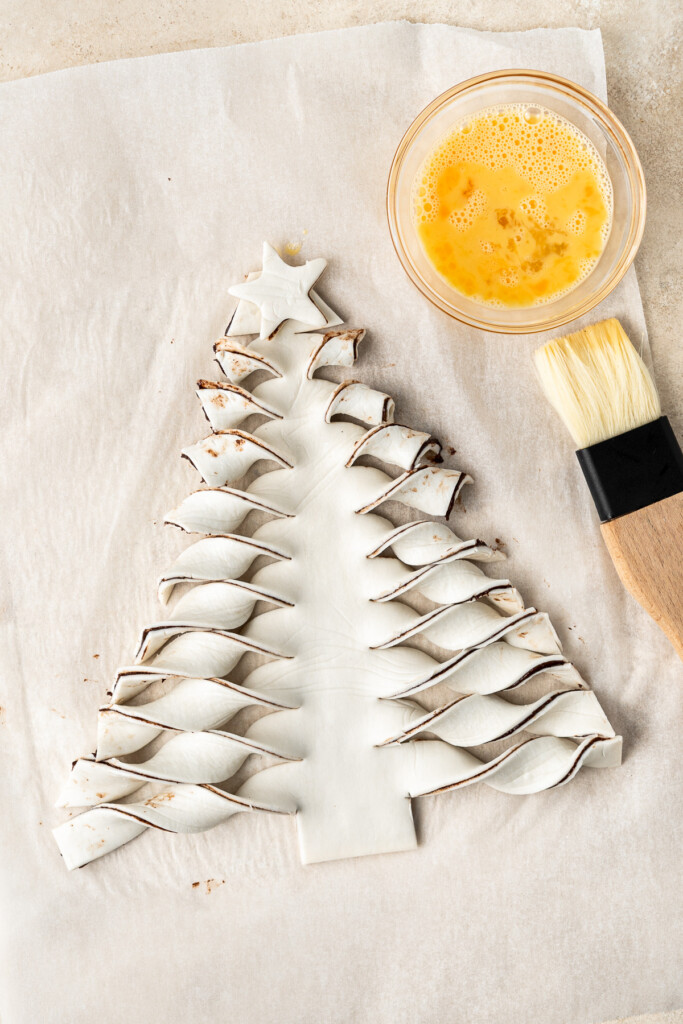
From the scrapes you cut off the sides, use a cookie cutter to cut a star and then using some of the beaten egg, stick this to the very top of your tree. You can cut other shapes out of the remaining pastry or cut strips and twist. These off cuts can bake along with the tree so there is no waste.
👉 Tip! Make sure the puff pastry doesn’t get too warm as you’re working with it as it may be more difficult to work with and stretch out of shape. If it does get too soft you can just pop it into the fridge to firm up a little before continuing.
Brush the tree and any scraps with the beaten egg and then carefully transfer the tree on the baking paper to the baking tray and bake for 20-30 minutes, or until the pastry is puffed and golden brown.
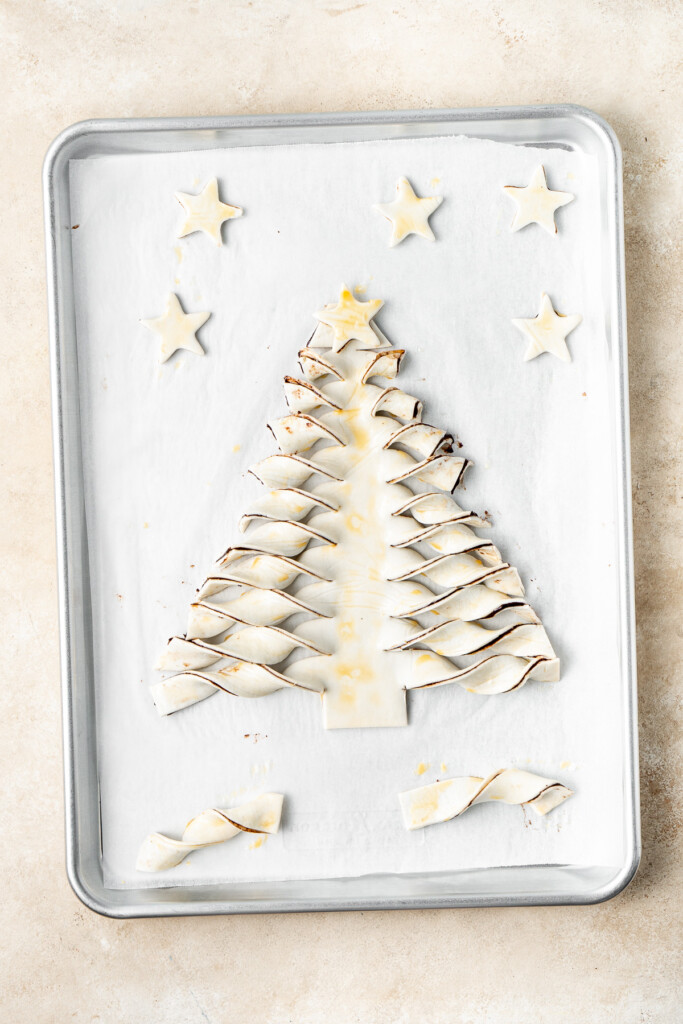
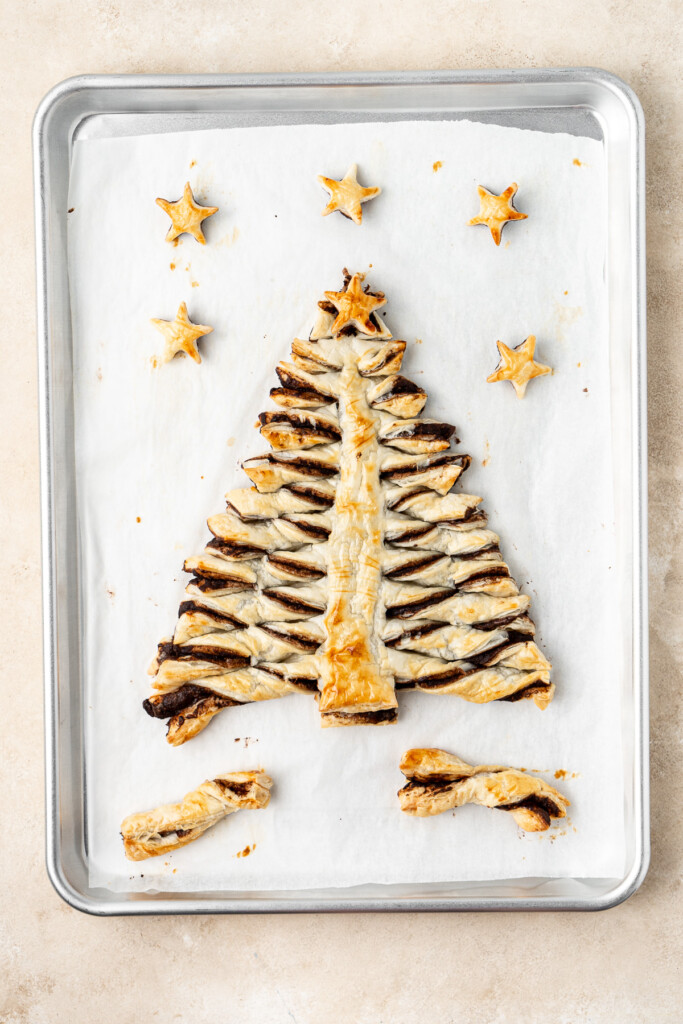
To finish, dust the chocolate puff pastry Christmas tree with icing sugar. You can also decorate the tree with extra stars from the off cuts. Serve the pastry Christmas tree immediately while still warm and crispy.
Variations
This is such a simple recipe, you can easily customise it!
- Use a different spread in the filling. You can use any nut or seed butters instead of the chocolate hazelnut spread. I really want to try it with Biscoff – I think that would be so good!
- Make it savoury! Looking for a savoury appetiser instead? Fill the Christmas tree with my dairy free basil pesto and a sprinkle of dairy free cheese or try the classic Australian option of Vegemite and cheese!
- Try a different shape. You can try cutting the pasty into strips and doing individual twists, or you can cut into the centre and twist out into a circular spiral shape. This is a great time to get creative!
More festive themed desserts:
Christmas Wreath Doughnuts
Snowflake Sugar Cookies
Vegan Cinnamon Sugar Cookies
Vegan Chocolate Peppermint Cupcakes
Christmas Sparkle Cookies

Chocolate Puff Pastry Christmas Tree
Equipment
Ingredients
- 2 sheets puff pastry thawed
- 4 tablespoons chocolate hazelnut spread approx. use more if you like
- 1 egg lightly beaten (optional, for egg wash)
Instructions
- Preheat the oven to 200°C (400°F). Lay one sheet of puff pastry flat on a sheet of baking paper and spread the chocolate hazelnut spread evenly across the surface, leaving a 1-centimetre border around the edges. Place the second sheet of puff pastry on top of the first, aligning the edges, and gently press down to seal the layers together.
- Using a sharp knife, cut the pastry into the shape of a Christmas tree, trimming away the excess pastry around the edges (see step-by-step photos in the post for more detail of what this step should look like). Save the scraps for cutting a star for the top and making mini twists / decorations. Starting from the bottom, cut horizontal slits on both sides of the tree, leaving a solid “trunk” in the centre. Make each branch about 1.5 to 2 centimetres wide.
- Carefully twist each branch a few times to create a spiral effect. Cut a star from the scraps and use a little of the beaten egg to stick it to the top of the tree. Brush the tree with the egg. Transfer the tree carefully on the baking paper to the baking tray and bake for 20-30 minutes, or until the pastry is puffed and golden brown.
- Optionally, dust the Christmas tree with icing sugar to finish. Serve immediately.
Notes
Nutrition
Nutritional information is provided as a guide only and is calculated using automated online tools, therefore we cannot guarantee the accuracy. We encourage you to make your own calculations based on the actual ingredients used in your recipe.


Made this recipe? Leave a review!