
This classic vegan choc ripple cake is one of the simplest cakes you can make needing just 4 ingredients and 15 minutes of prep. It’s a no-bake dessert that everyone can enjoy, vegan and non-vegan with an option to make it gluten free as well!
This cake is a classic and can be found in many Australian homes over the holiday period. Traditionally it’s simply made by combining a vanilla whipped cream and Arnott’s choc ripple biscuits making it a dairy-heavy dessert. That was until I discovered a new product at the supermarket that has changed my cooking life.
Most dairy free creams have a strong taste (looking at you coconut) or don’t whip well (hi oat cream), but the Flora Thickened Plant Cream is the ultimate dairy free substitute. It’s made with a lentil base which sounds strange but trust me, this vegan cream whipped up perfectly and I was eating it out of the bowl with a spoon.
But of course, if you’re not vegan or dairy free you can of course still make this recipe by substituting regular whipped cream.
This is a no-bake dessert and does require some chilling which makes it perfect as a make-ahead option and the cake is a great dessert to bring along to holiday parties or for easy entertaining at home.
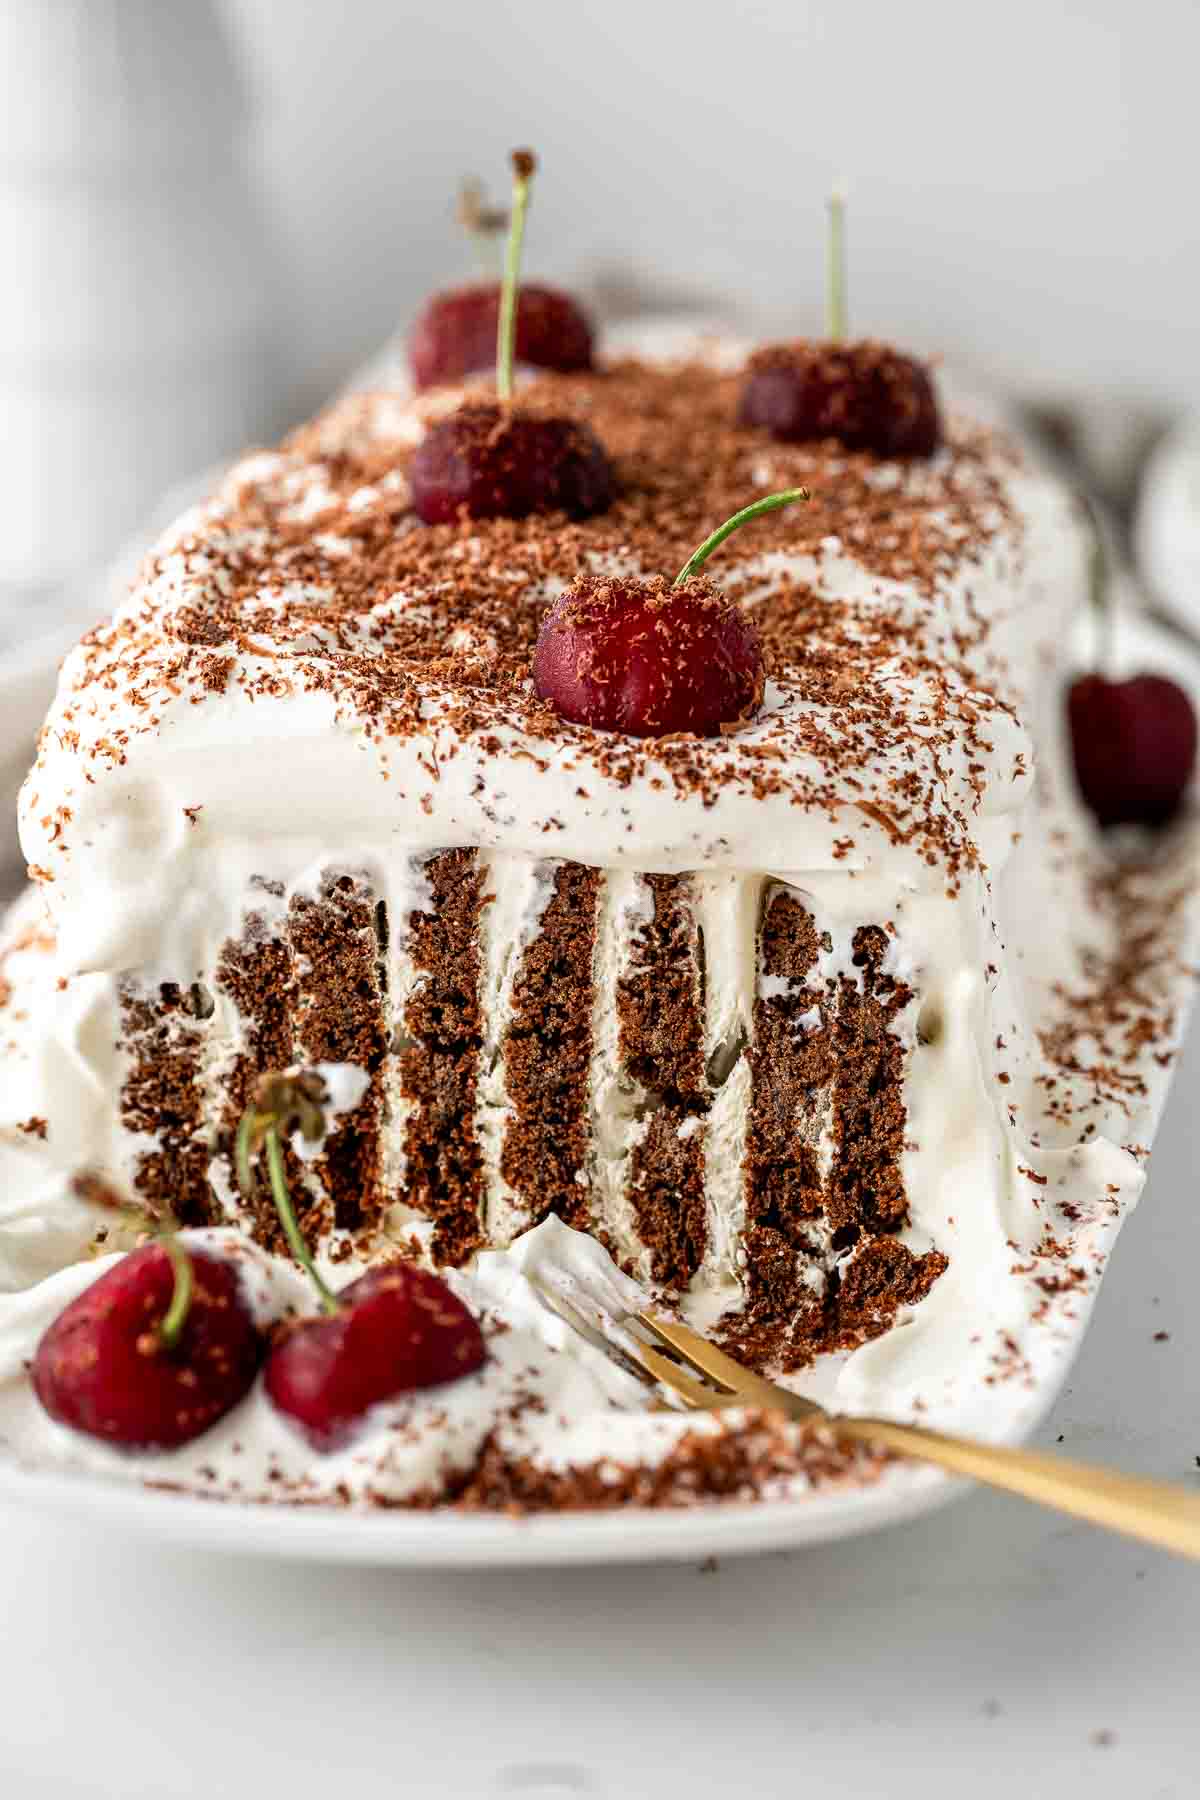
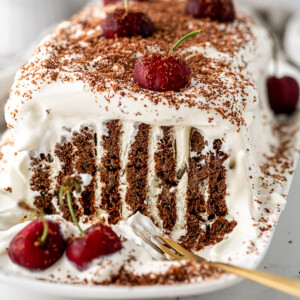
While the cake is chilling, the vanilla whipped cream soaks into the chocolate biscuits making them softer in texture (not at all soggy, just soft and delicious) so that it resembles a cake. From there, you can decorate the cake however you want.
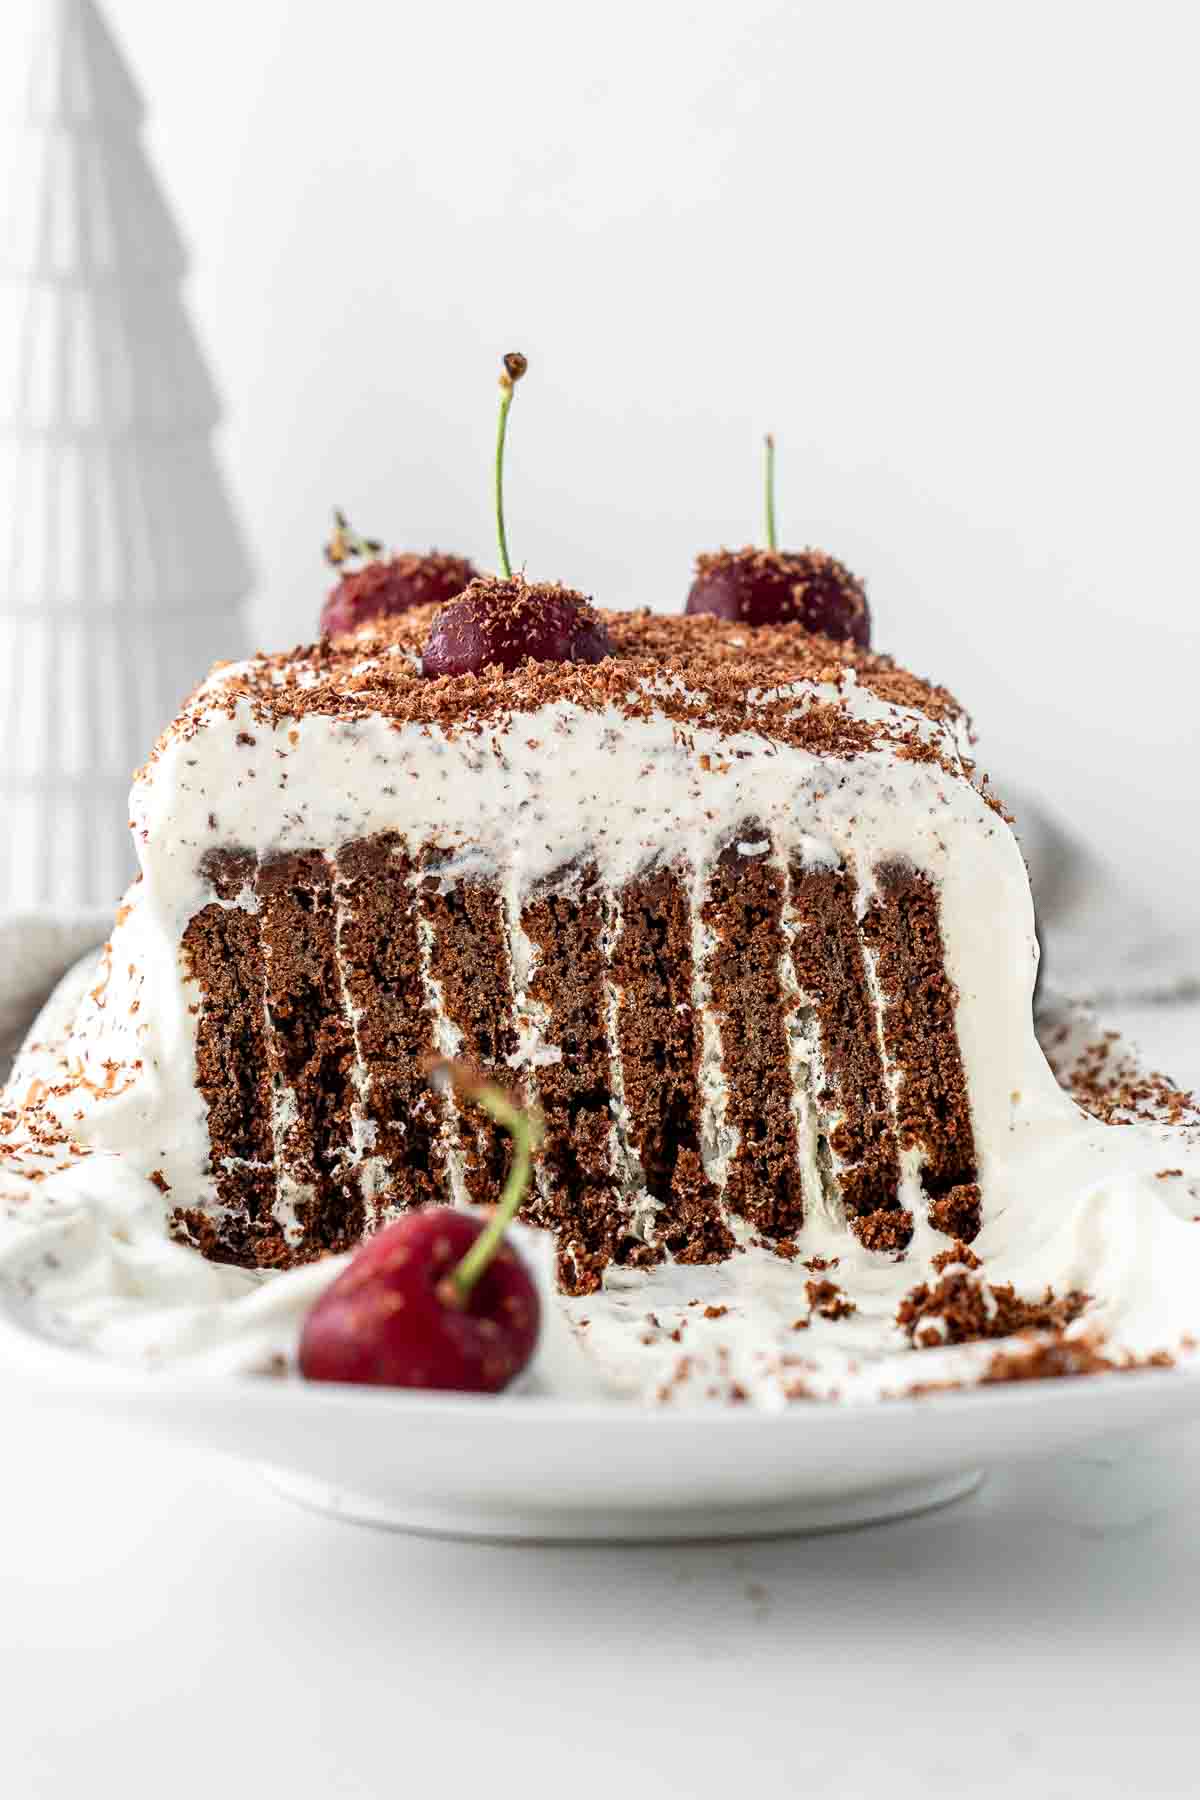
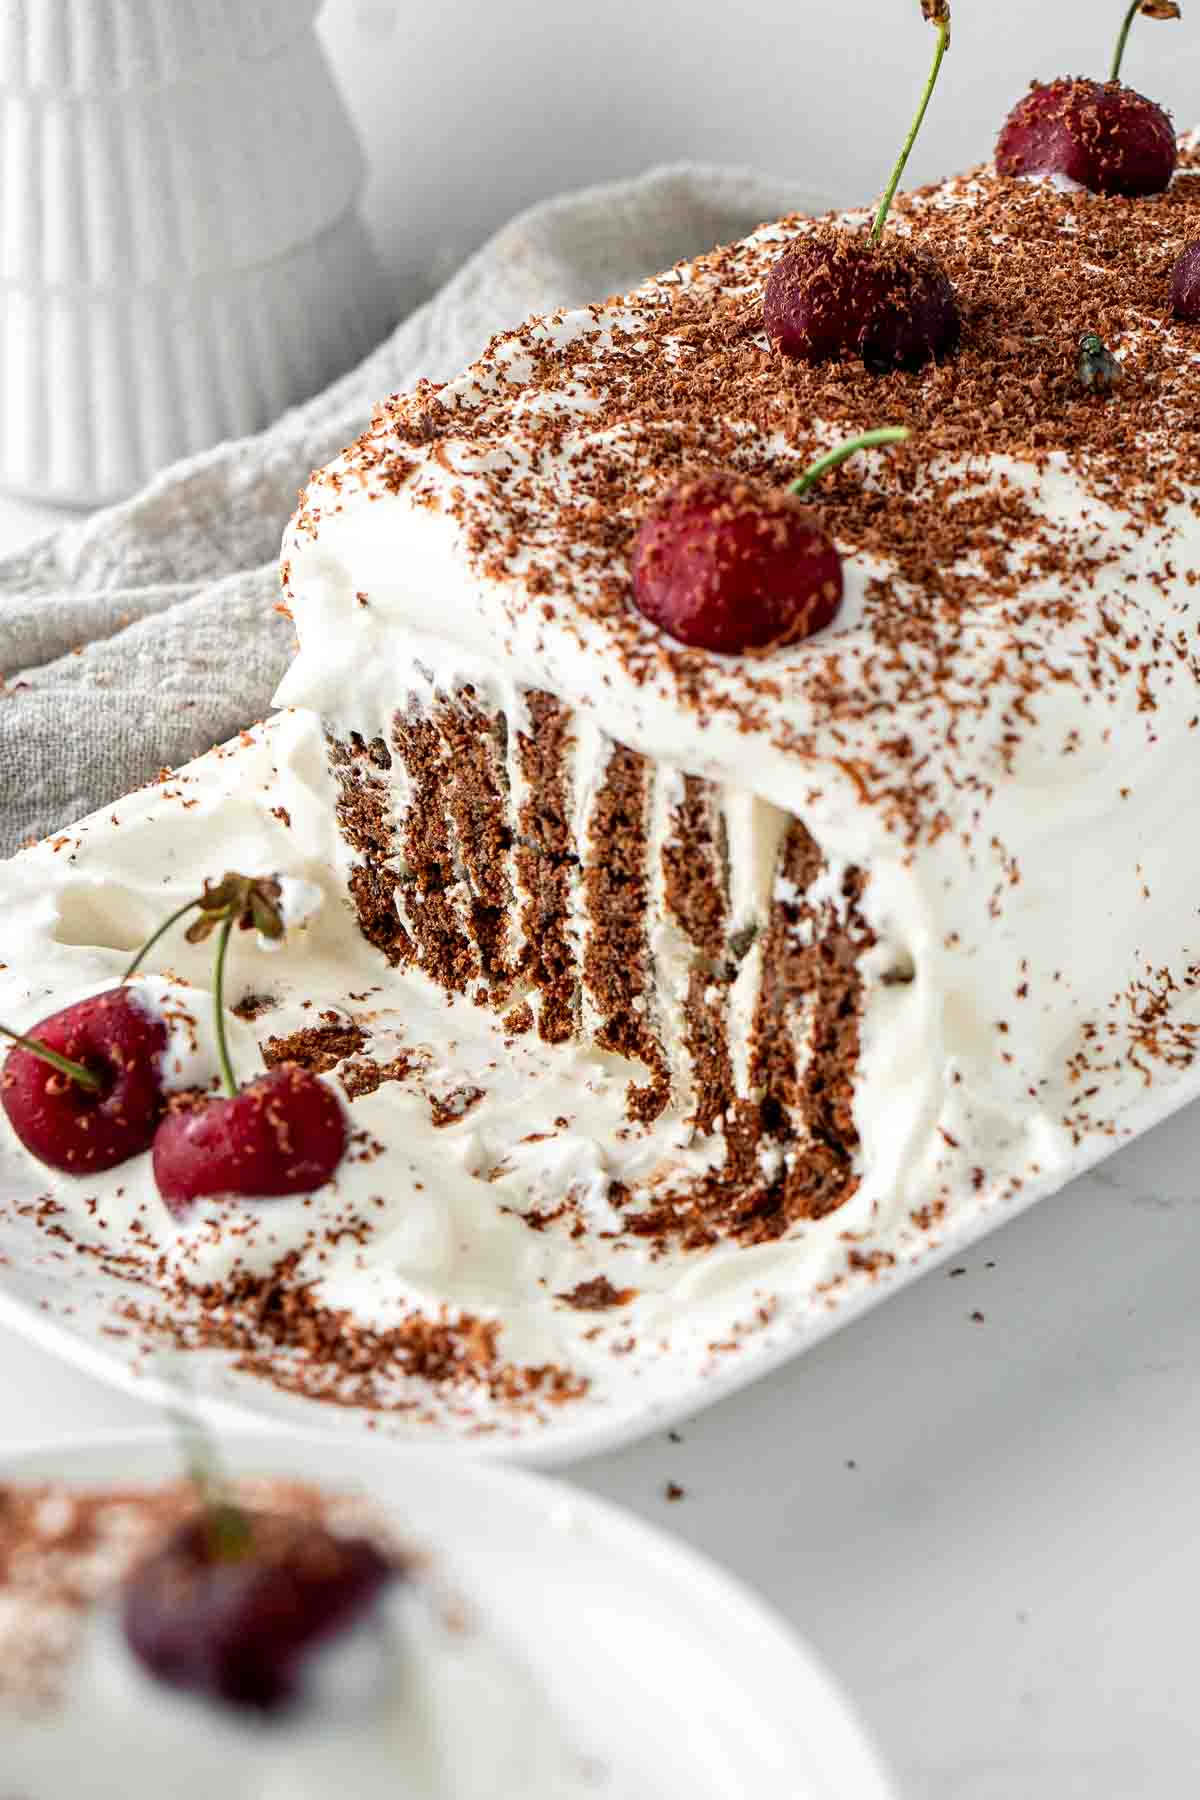
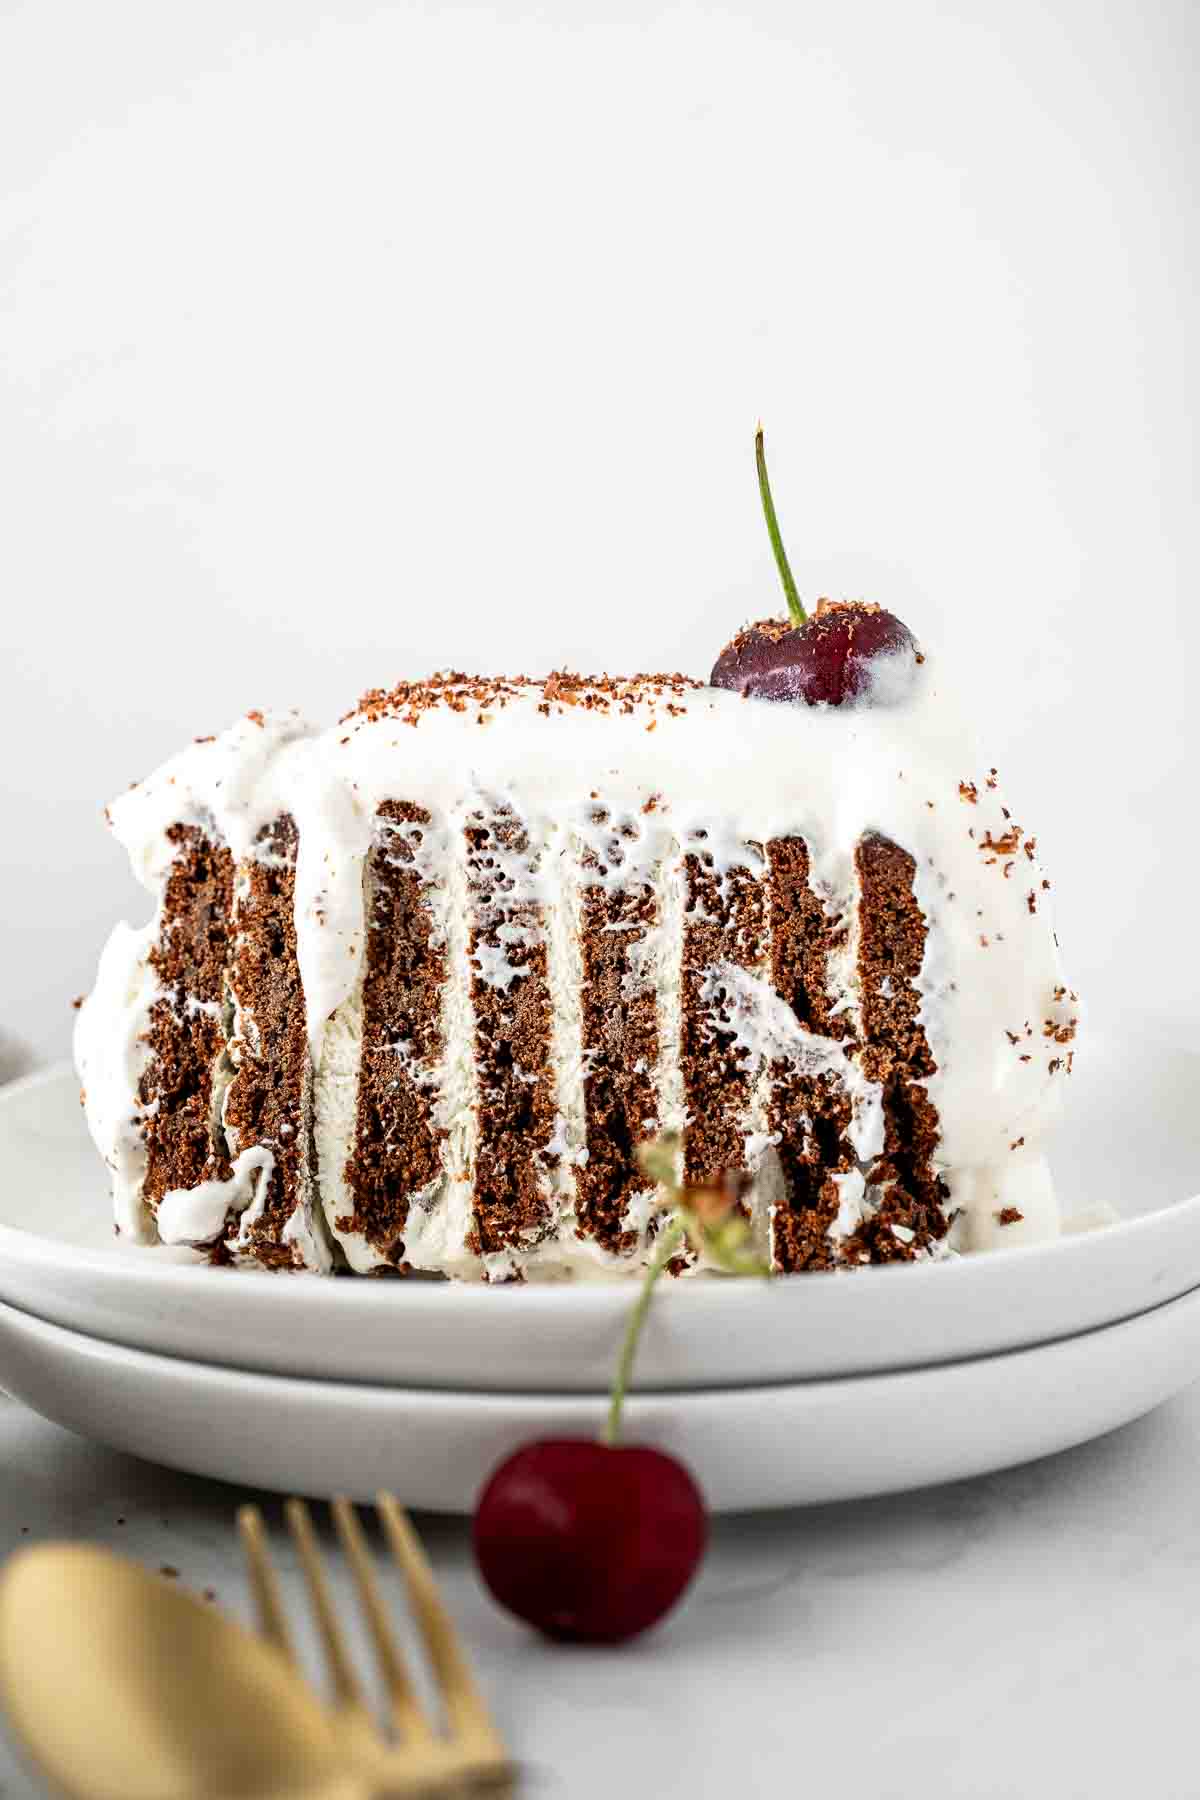
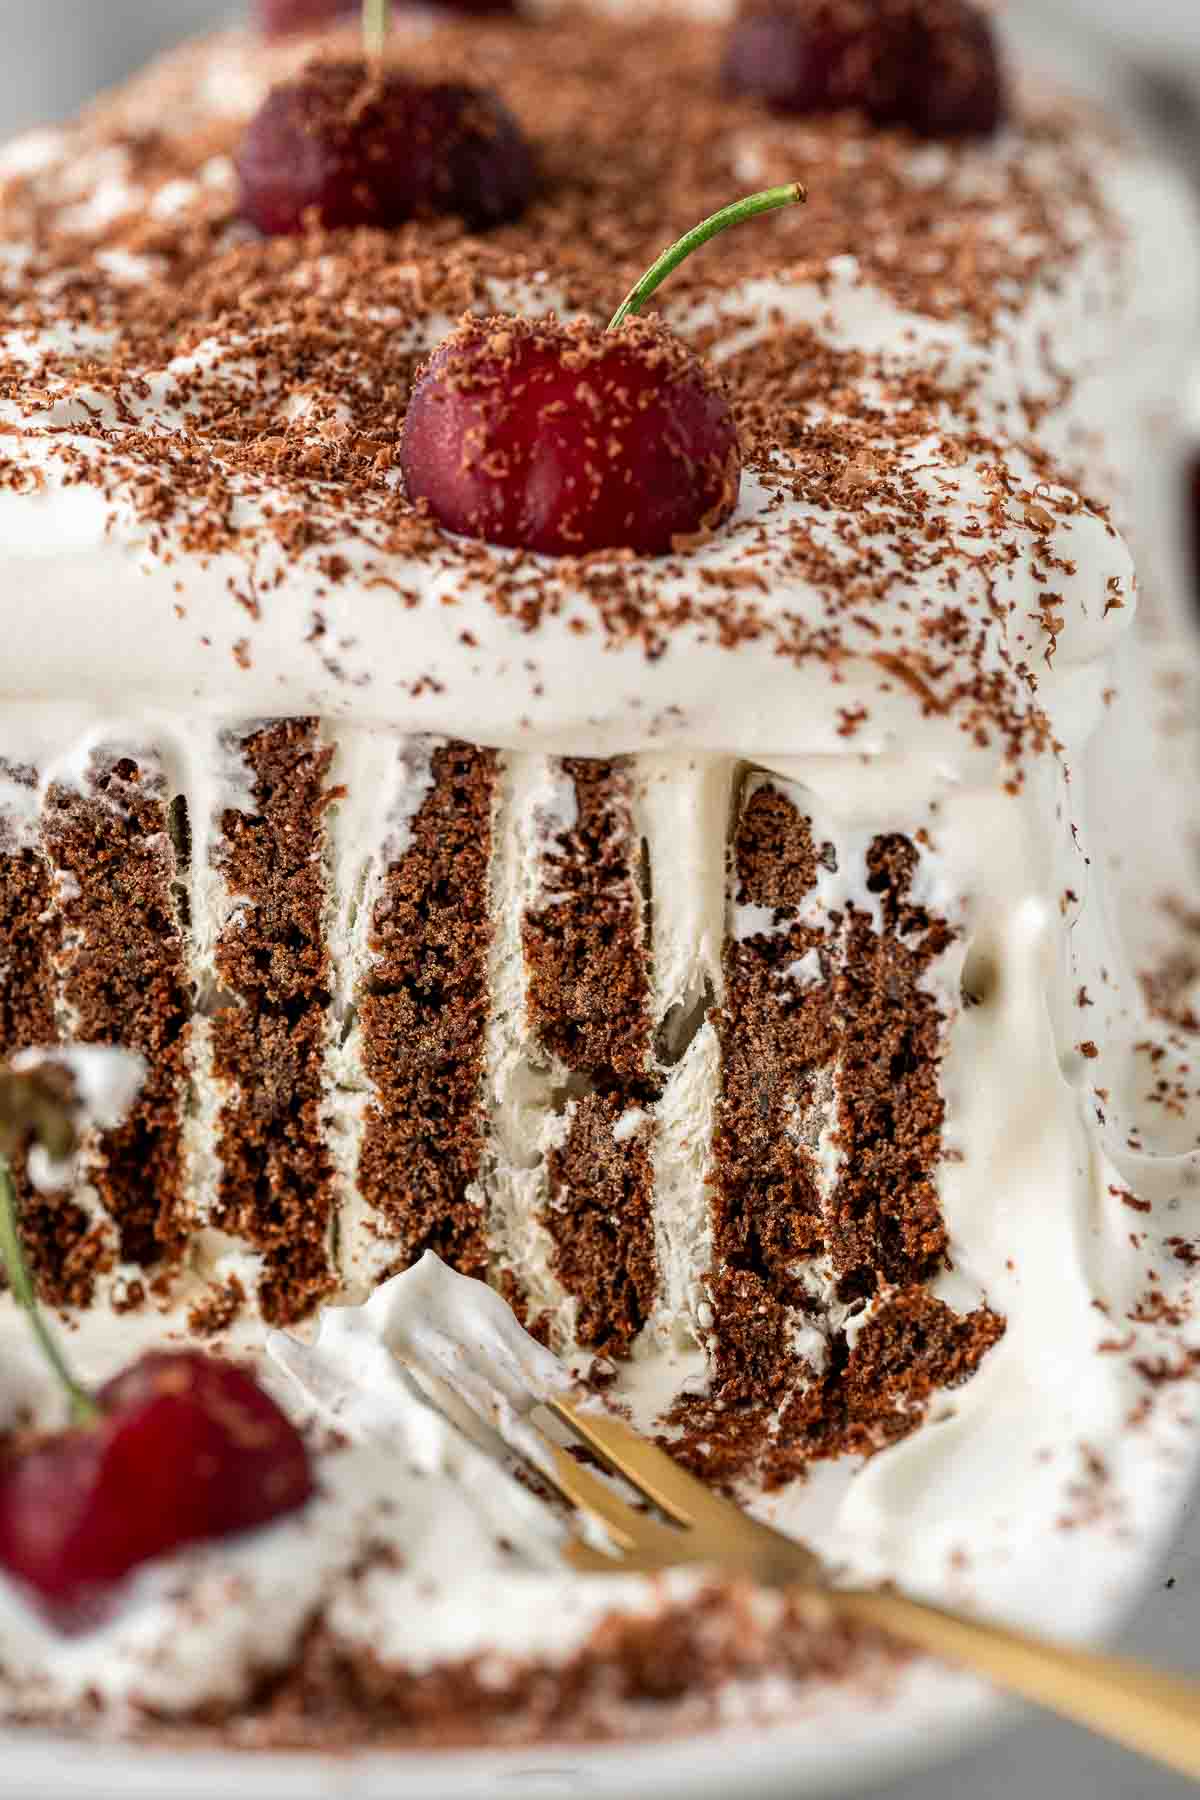
Slicing into it you can see the iconic vertical layers that make this cake appear much more complex than it really is.
Key Ingredients
This cake couldn’t be simpler to make, using just 4 ingredients! It’s perfect when you want a pretty dessert but don’t want to spend time baking.
Note all ingredients and their quantities are laid out in the recipe card at the bottom of this post.
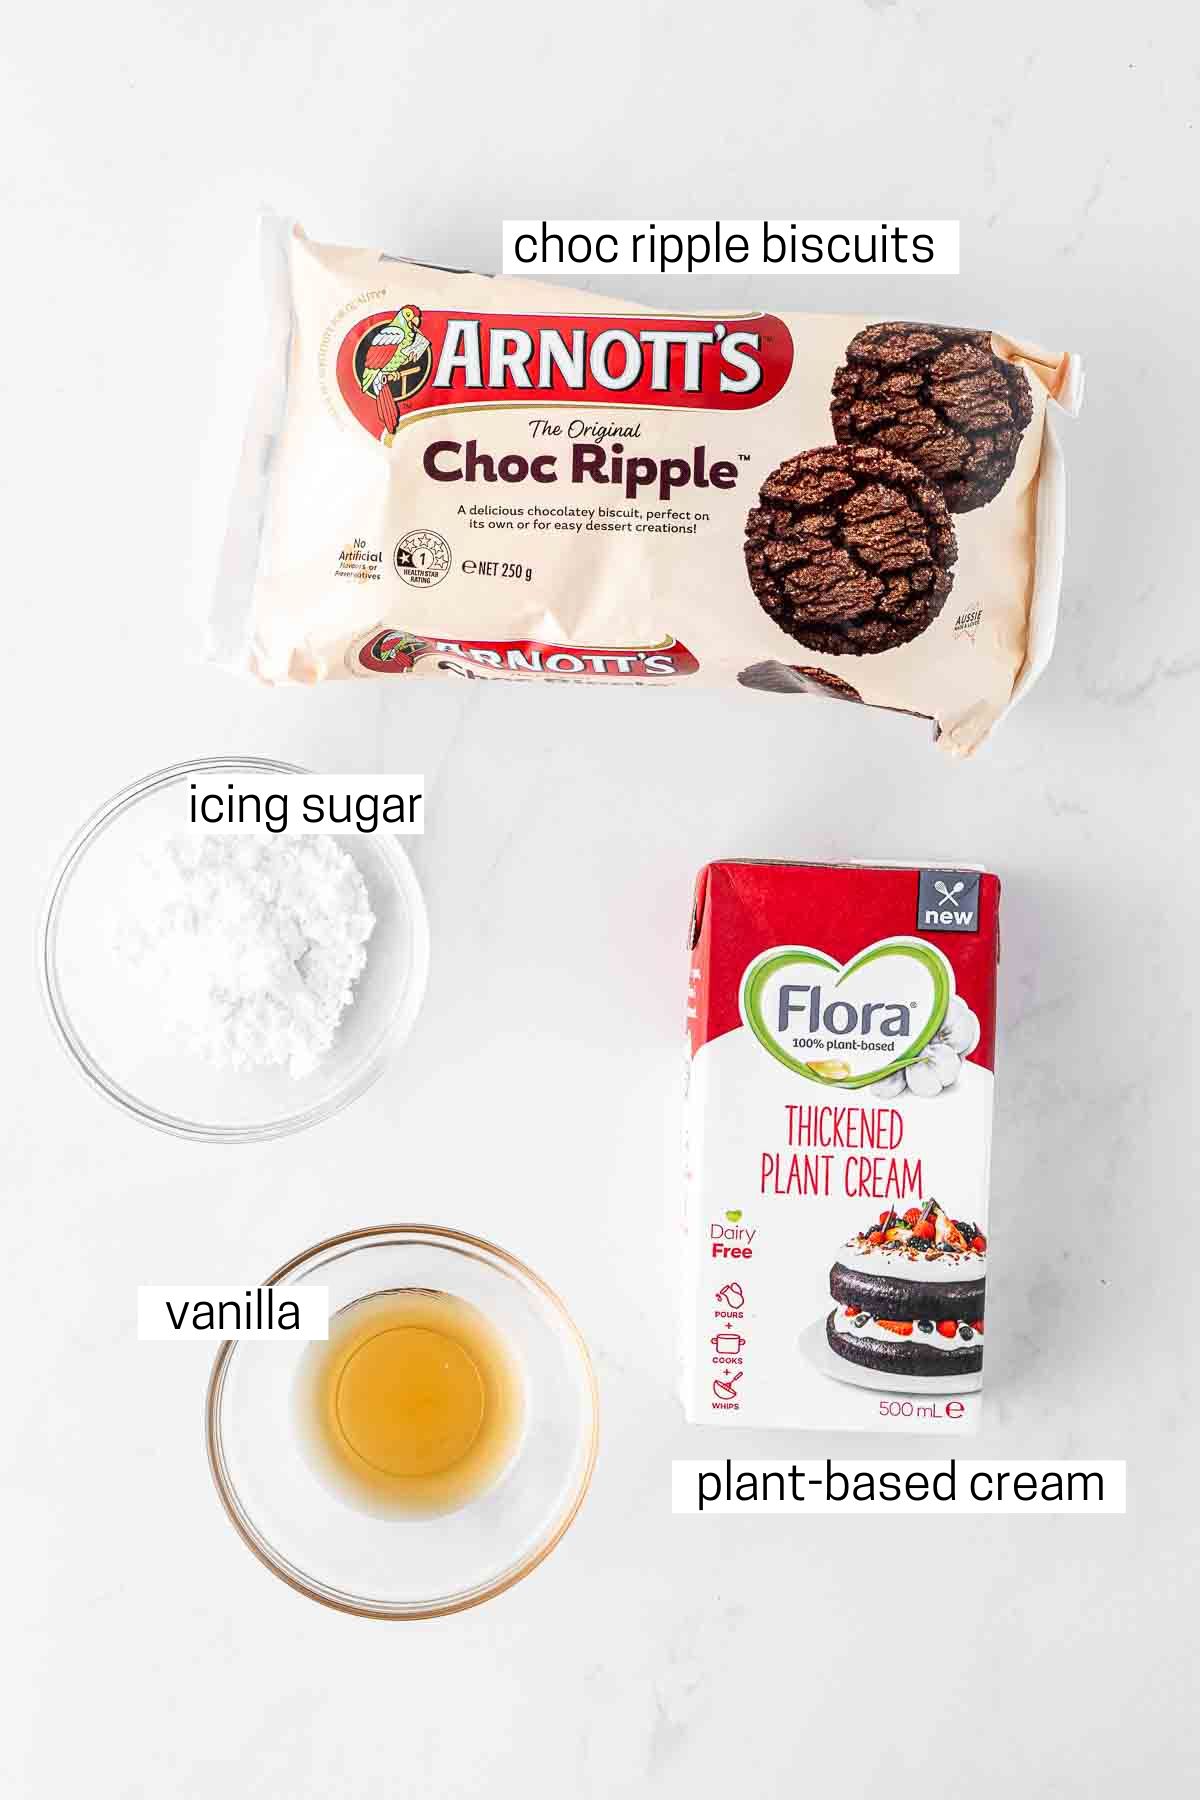
- Plant-based cream – the key ingredient to this recipe is whipped cream. I have tried a lot of dairy free options and the Flora Thickened Plant Cream is incredible and by far the best I’ve tried. It whips (most dairy free creams do not) and tastes delicious.
- Icing sugar – to give the cream a sweetness.
- Vanilla extract – adds flavour.
- Choc ripple biscuits – these classic Arnott’s biscuits are iconic and fall into the ‘accidentally vegan’ category, plus there is even a gluten-free option if needed! But you can always use any brand of crunchy chocolate biscuits. 1 x 250 gram packet is the exact quantity you’ll need for this recipe.
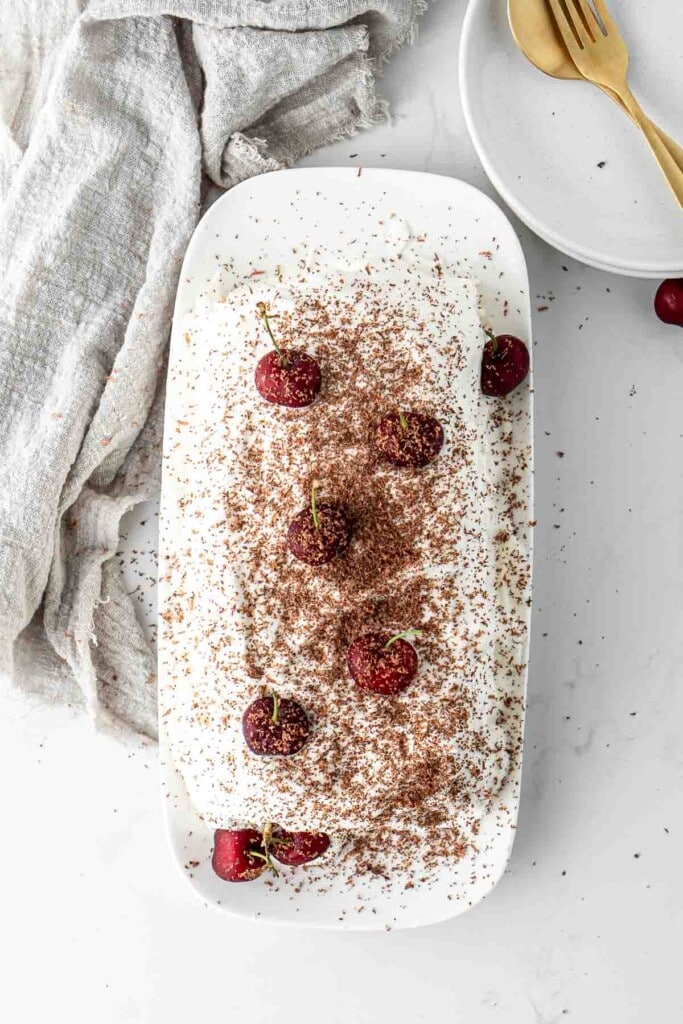
- Vegan dark chocolate and fresh cherries – how you decorate your cake is optional, you can use any fruit you prefer but to make it festive I’ve opted for cherries with some dark chocolate grated over the top.
Step-By-Step Instructions
This choc ripple cake is perfect for beginner bakers or to make with the family as there is no special equipment needed and you don’t need to turn on the oven.
You will need an electric mixer to whip the cream. You can either use a hand held mixer or a stand mixer with a balloon whisk.
Being that we need to chill the cake overnight to ensure it sets, you’ll need to also plan ahead to make this dessert the day before you need to serve it.
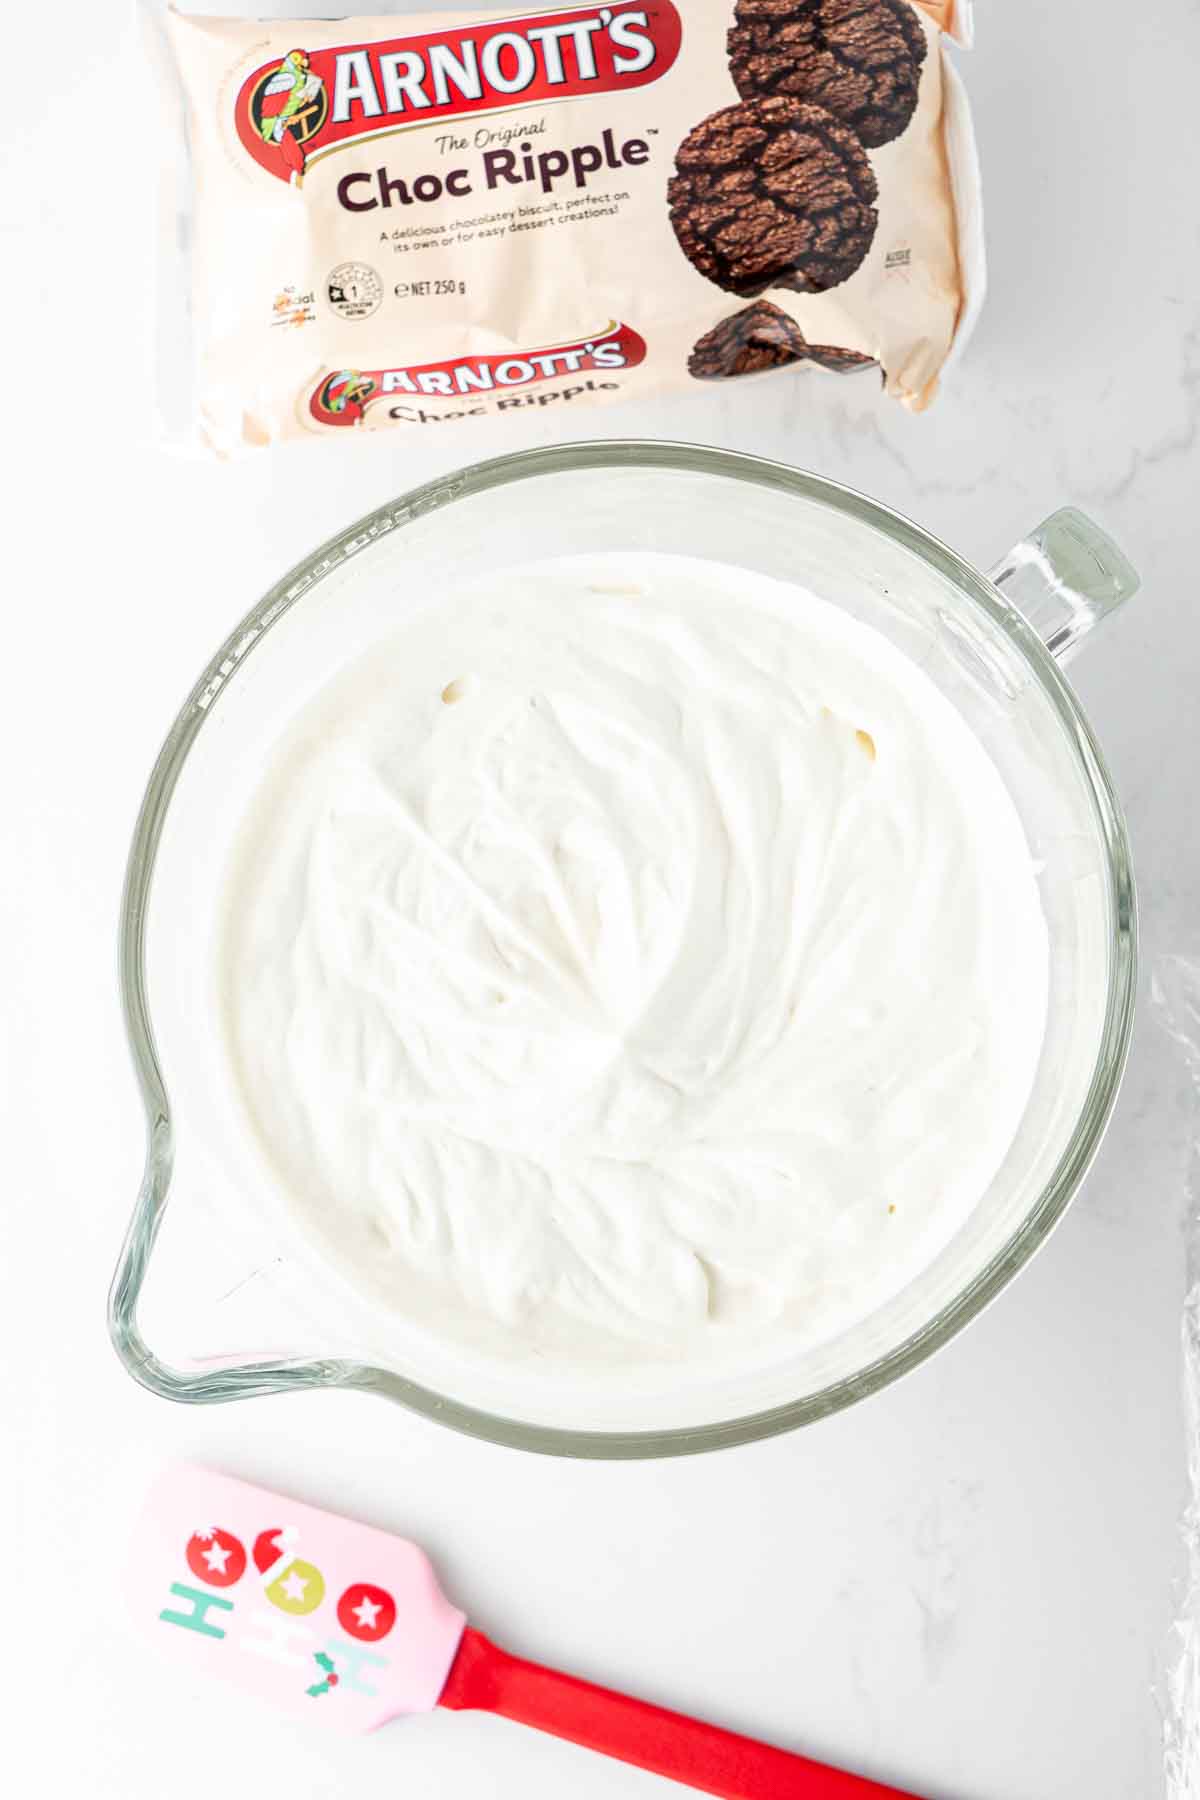
Start by making your whipped cream. Whip the plant-based cream in a large bowl until stiff peaks form. This step may take a little longer than you’re used to if having previously worked with a dairy based cream however just keep going until you get those peaks. Add in the icing sugar and vanilla extract, and mix again until well combined. Set aside.
Next, prepare a 8 x 4 inch loaf pan by lining the bottom and sides with plastic wrap. Ensure there is enough overhang to fold over the top as well.
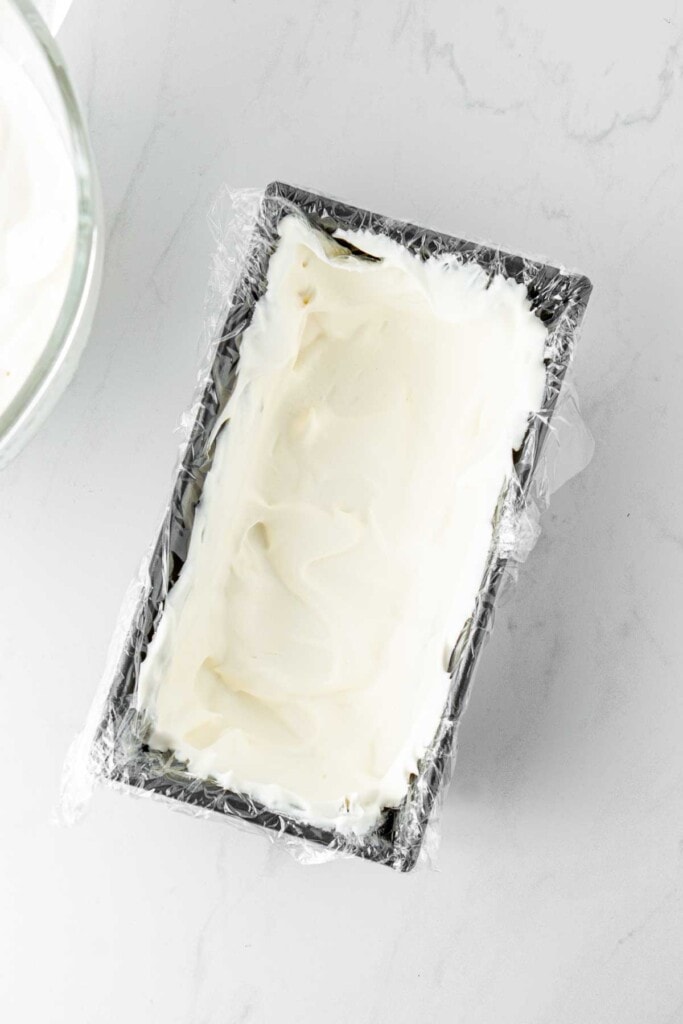
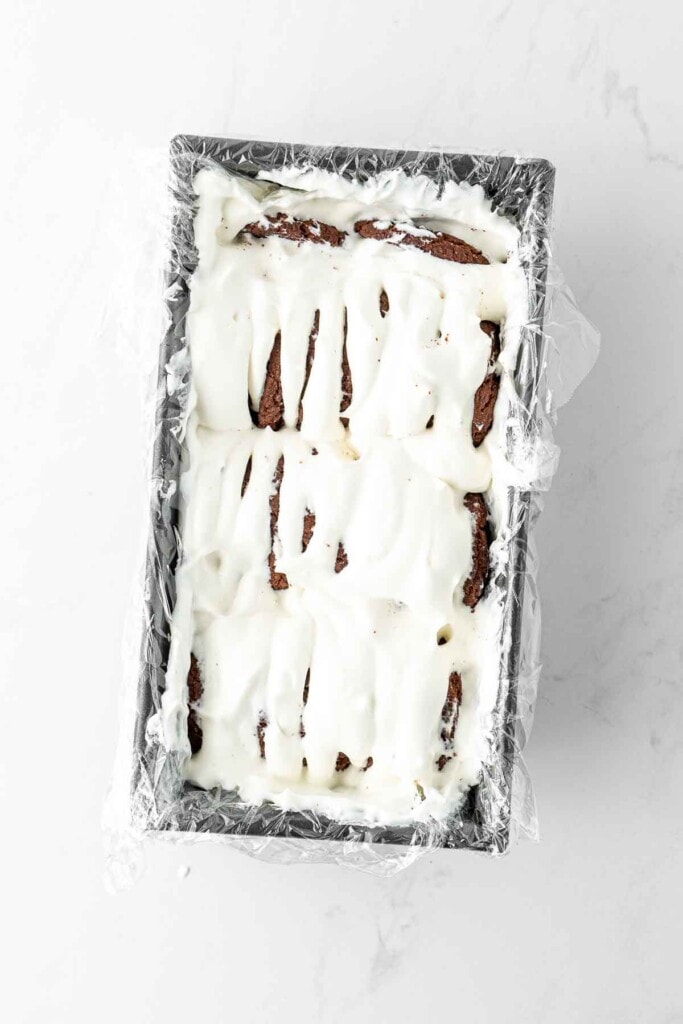
Spread a small amount of the whipped cream around the edges of the pan and to cover the bottom. Place a small amount of the whipped cream on a choc ripple biscuit and sandwich it with another and place into the loaf pan, standing up. Repeat with all of the biscuits until they are all stacked into the bottom of the pan.
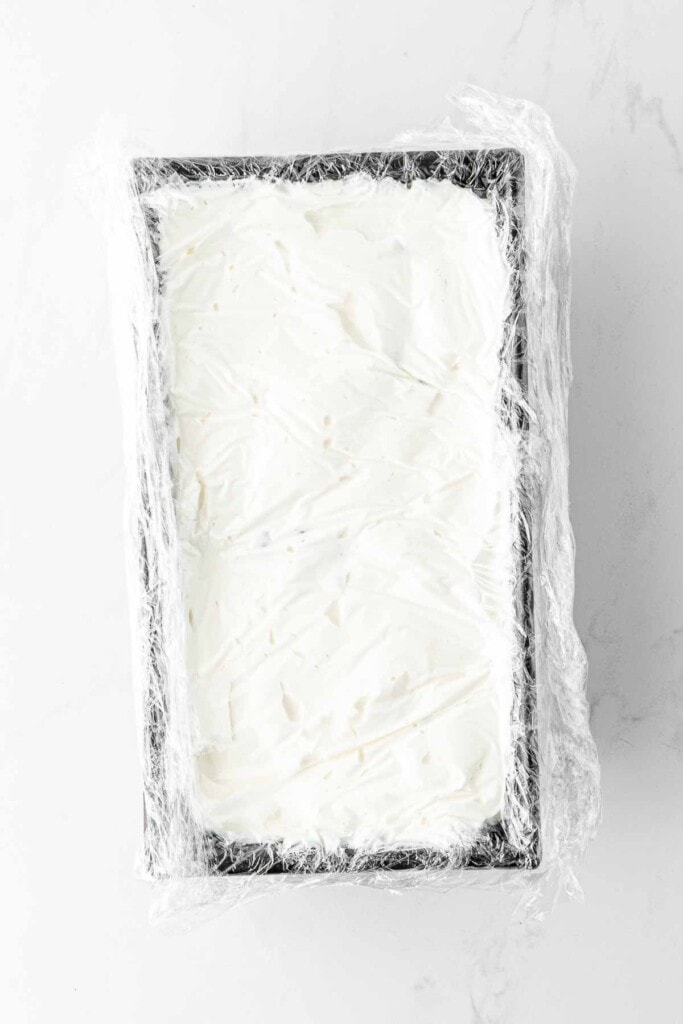
Spread a layer of whipped cream to cover the top, smoothing the surface. Cover the top with more plastic wrap and place the cake in the freezer overnight to set. Place the remaining whipped cream covered in the fridge.
The next day, remove the cake from the freezer and place in the fridge until you are ready to serve. You want to give the cake some time to soften slightly rather than serving the cake frozen.
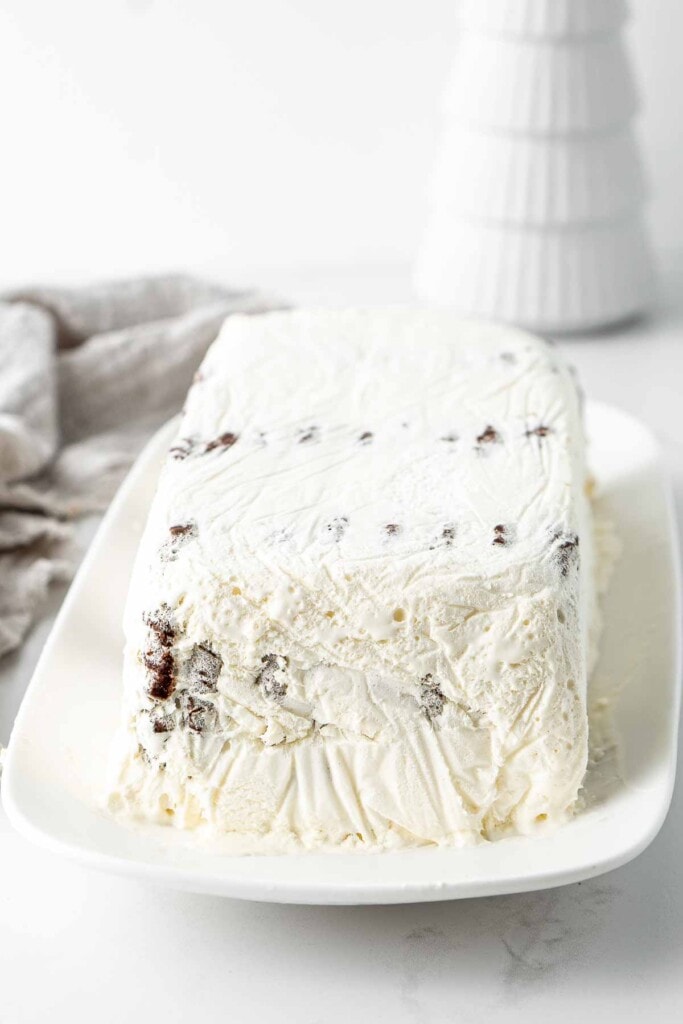
To serve, remove the cake from the loaf pan using the plastic wrap, and place on a serving plate upside down.
Overnight, your remaining whipped cream may have changed texture. This is ok, just beat it again with the electric mixer until it comes back to the silky smooth texture. Spoon the extra cream over the cake and decorate the cake with grated dark chocolate and cherries or any other toppings you prefer before slicing and serving.
Recipe FAQs
Yes, simply opt to use the Gluten Free version of the choc ripple biscuits!
This cake will keep for up to 3 days covered in the fridge. We use the freezer to set the biscuits in the cream initially however after this step, I do not recommend placing it back in the freezer so it’s best consumed within the first few days after making it.
If you do make this recipe, please be sure to leave a comment and ⭐⭐⭐⭐⭐ rating below! And tag any of your creations on Instagram with @eightforestlane as I would love to see.
More vegan no-bake desserts:
Vegan Ferrero Rocher
Amaretto Tiramisu (Vegan)
No-Bake Chocolate Tart (Vegan)
Vegan Chocolate Truffles
Chocolate Cherry Cheesecake
Vegan Choc Ripple Cake
Ingredients
- 2 cups / 500 ml plant-based cream
- 2 tablespoons icing sugar
- 2 teaspoons vanilla extract
- 1 packet choc ripple biscuits
- Vegan dark chocolate and fresh cherries to serve
Instructions
- Using a handheld electric mixer or a stand mixer with the ballon whisk attachment, whip the plant-based cream in a large bowl until stiff peaks form. Add icing sugar and vanilla extract, and mix again until well combined. Set aside.
- Line a 8 x 4 inch loaf pan with plastic wrap and spread a small amount of the whipped cream around the edges and over the bottom.
- Place a small amount of the whipped cream on a choc ripple biscuit and sandwich it with another and place into the loaf pan, standing up. Repeat with all of the biscuits until they are all stacked into the bottom of the pan.
- Spread a layer of whipped cream to cover the top, smoothing the surface. Cover the top with more plastic wrap and place the cake in the freezer overnight to set. Place the remaining whipped cream covered in the fridge.
- Remove the cake from the freezer and place in the fridge until ready to serve.
- To serve, remove the cake from the loaf pan using the plastic wrap, and place on a serving plate upside down. With the remaining whipped cream, beat it again with the electric mixer as it may have separated in the fridge and then spoon over the cake.
- Decorate the cake with grated dark chocolate and cherries before slicing and serving. Store any leftovers covered in the fridge.
Notes
Nutrition
Nutritional information is provided as a guide only and is calculated using automated online tools, therefore we cannot guarantee the accuracy. We encourage you to make your own calculations based on the actual ingredients used in your recipe.


Julie says
Can’t wait to try this! If I make it and freeze overnight, will it be ok in the fridge from the next morning til afternoon?
Sally says
Hi Julie! Yes that will be fine. Hope you enjoy!