
It can be intimidating to think about making a dairy free pie crust from scratch, let alone trying to get flaky pastry without being able to use real butter. But this is the recipe I have been using for years and it really is so quick and easy to make and tastes so good you’ll have no issues serving it up to all your guests, dairy free or not!

I’ll be honest, it took me a while into my dairy free baking journey to first attempt to make my own pie dough. Making any form of pastry from scratch always felt like I needed to have professional training to achieve.
I just hadn’t realised it was so simple to do, even a lazy home baker like myself could do it in just 10 minutes!
The secret of course is to use a food processor to do a lot of the heavy lifting. It’s going to mix everything together so quickly and you’ll get a perfect result every single time.
This recipe uses a dairy free butter to make it as close as possible flavourwise to a real butter crust. These butter substitutes are oil based, but do contain more flavour than by just making an oil based crust.
Key Ingredients
This dairy free pie crust recipe uses simple, pantry staple ingredients making it super approachable.
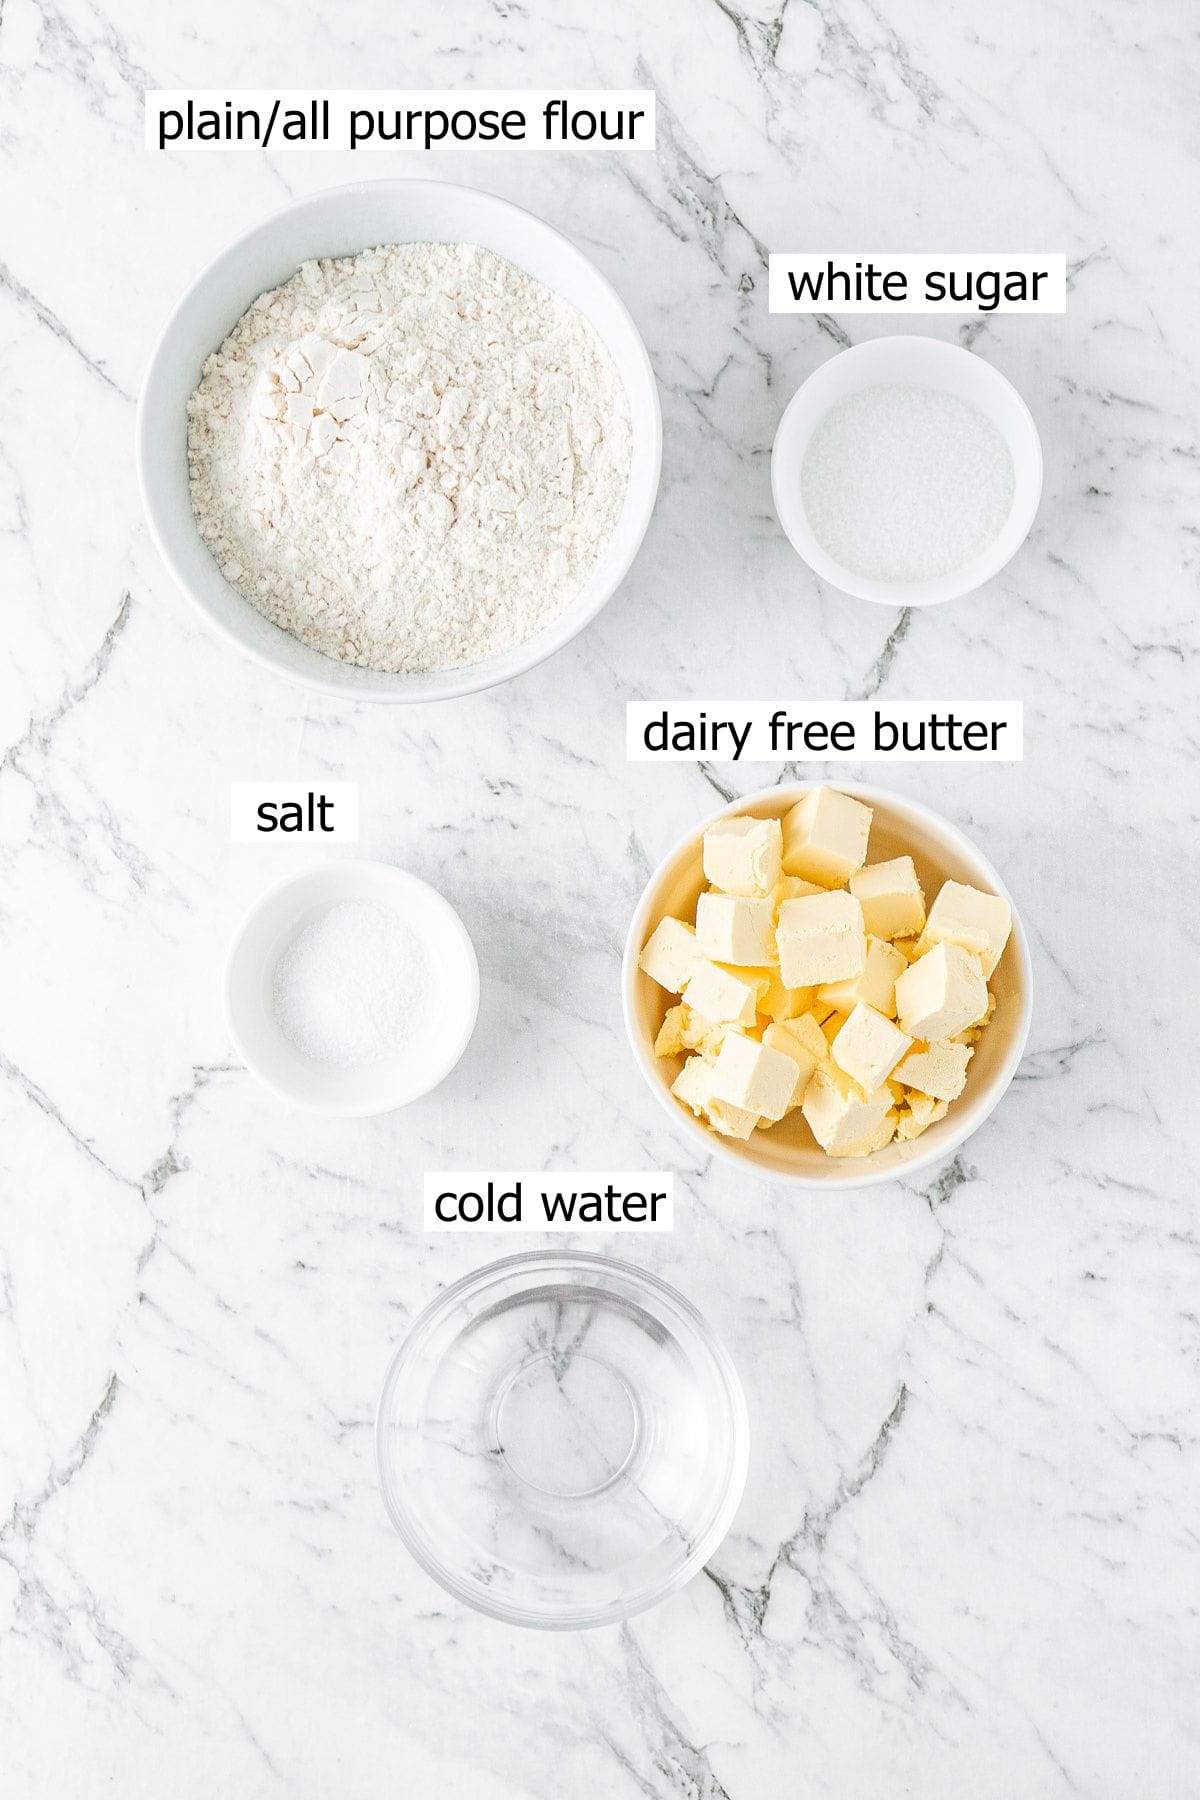
Note all ingredients and their quantities are laid out in the recipe card at the bottom of this post.
- Dairy free butter – for the best results, try and find a dairy free butter in stick form rather than the spreadable variety. This is going to help create that more flaky texture that you can expect from a traditional butter crust. If you can’t, that’s ok, I’ve still made this pastry many times with spreadable dairy free butter like Nuttelex with fine results.
- Plain flour/all purpose flour – I have not tested this recipe using a gluten free flour substitute so cannot say for sure if it will work.
- White sugar/granulated sugar – just a little bit keeps this a sweet dough, perfect for making desserts.
- Cold water – pop a couple of ice cubes in your water to keep it cold as this will help keep the butter cold which is what’s going to help keep the pastry flaky when baked.
Step-By-Step Instructions
The food processor is the real hero of this pie crust recipe. It makes it so quick and easy to make, it’s literally 10 minutes of your time.
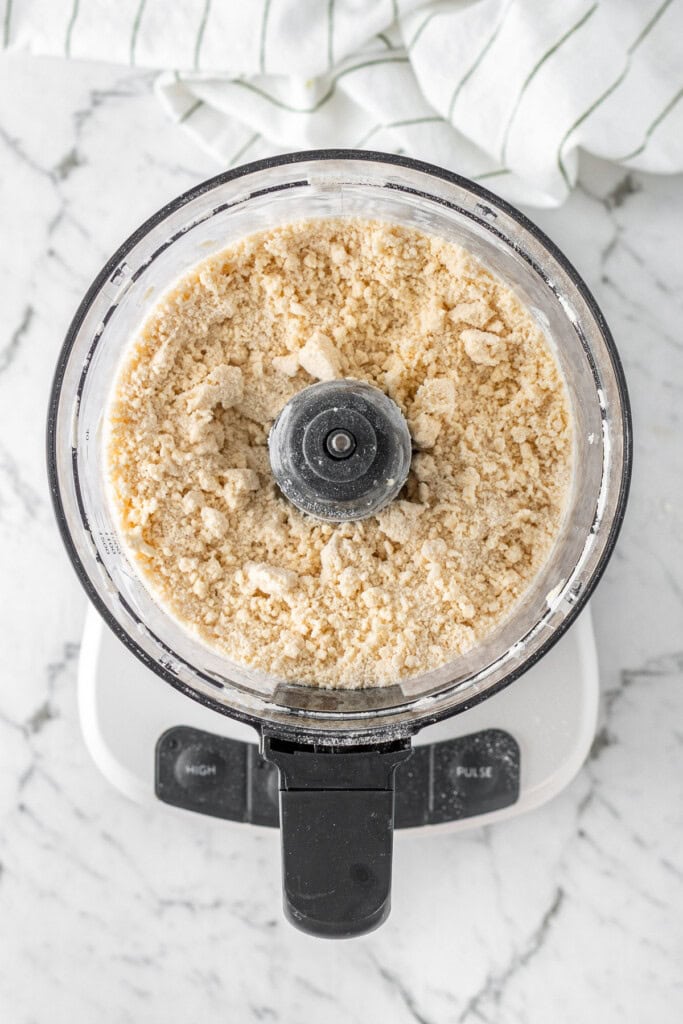
Step 1: In the bowl of a food processor, add the flour, white sugar, and salt and give it a little pulse to combine. Add the cubed cold dairy free butter and pulse a few times until the mixture resembles wet sand.
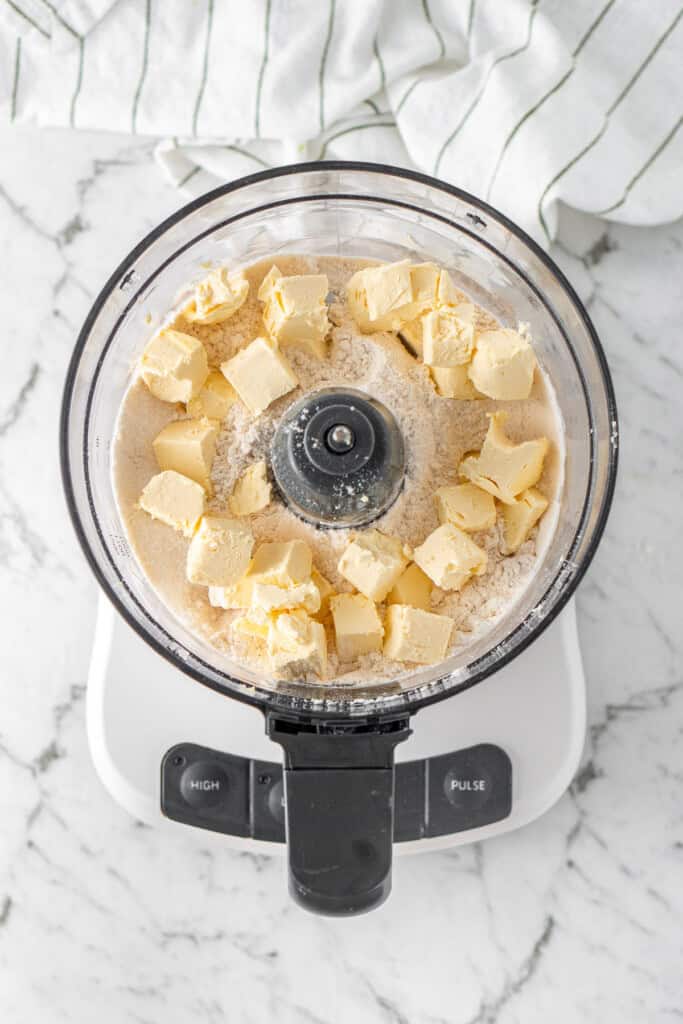
👉Tip! It’s essential that your butter is cold for this recipe, so keep it in the fridge until you’re ready to use it, especially if you’re making this on a warm day.
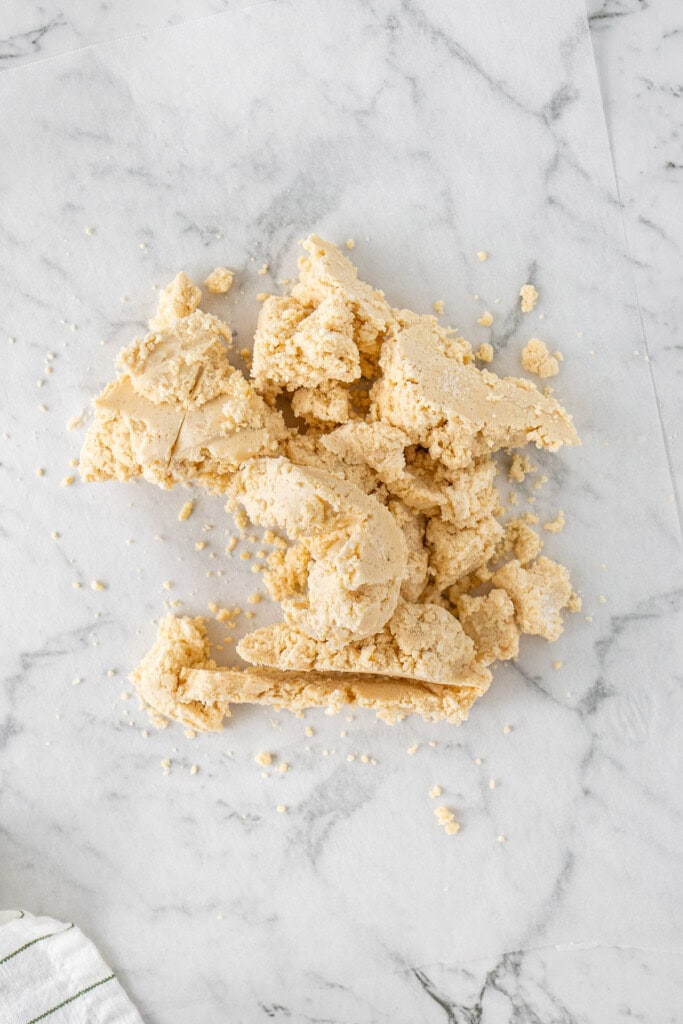
Step 2: Add the cold water one tablespoon at a time, pulsing between each addition, until the dough just begins to come together. Stop adding water as soon as the dough holds together when pressed between your fingers.
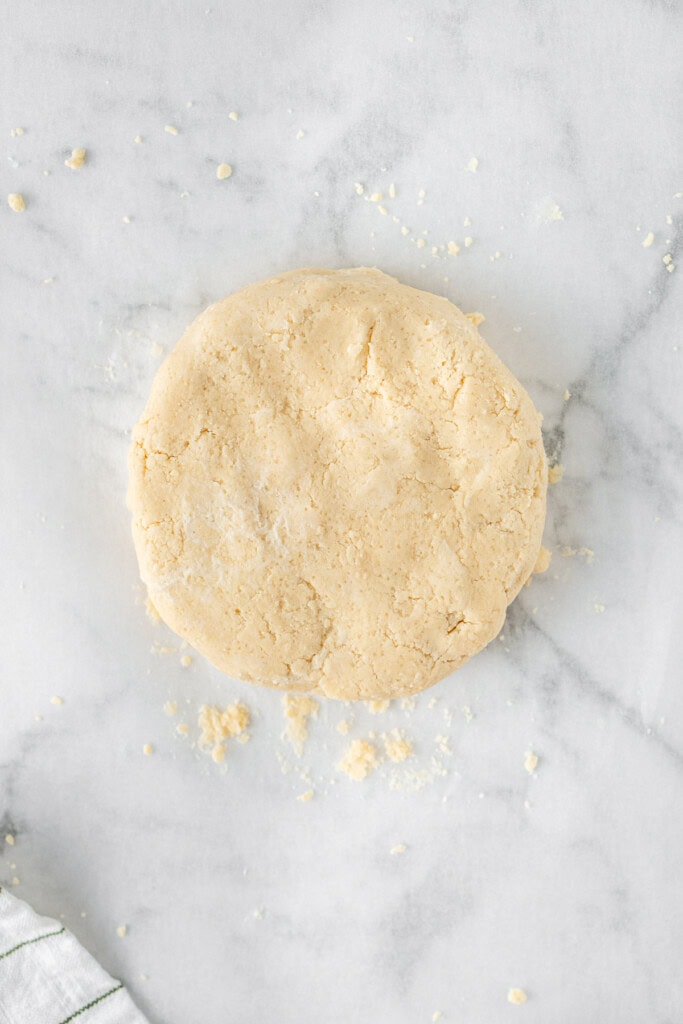
Step 3: Turn the dough out onto a lightly floured surface and gently bring it together into a ball. Flatten into a disc, wrap in plastic wrap, and refrigerate for at least 1 hour or overnight.
Depending on the recipe you’re using the pie dough for, this might be enough. Otherwise, you may need to blind bake it which just means to bake it without any filling.
How to blind bake pie crust
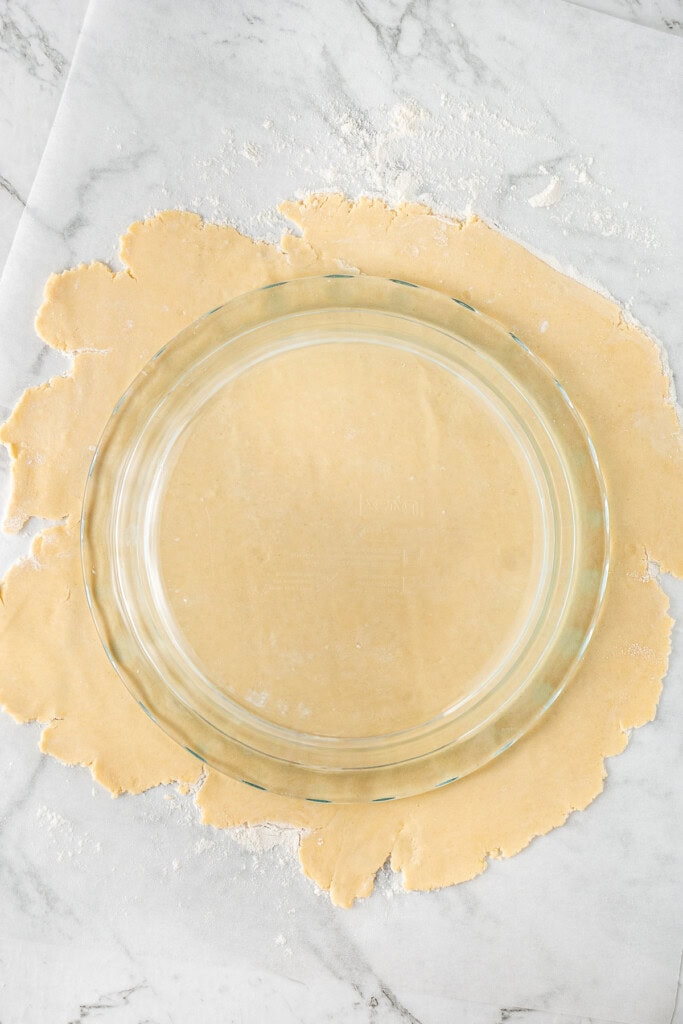
Remove the dough from the fridge and let it sit at room temperature for 10 minutes to make it easier to roll. Roll the dough out on a lightly floured surface to fit your pie dish, leaving a slight overhang.
It’s easiest to test the size by placing the pie dish upside down on the dough.
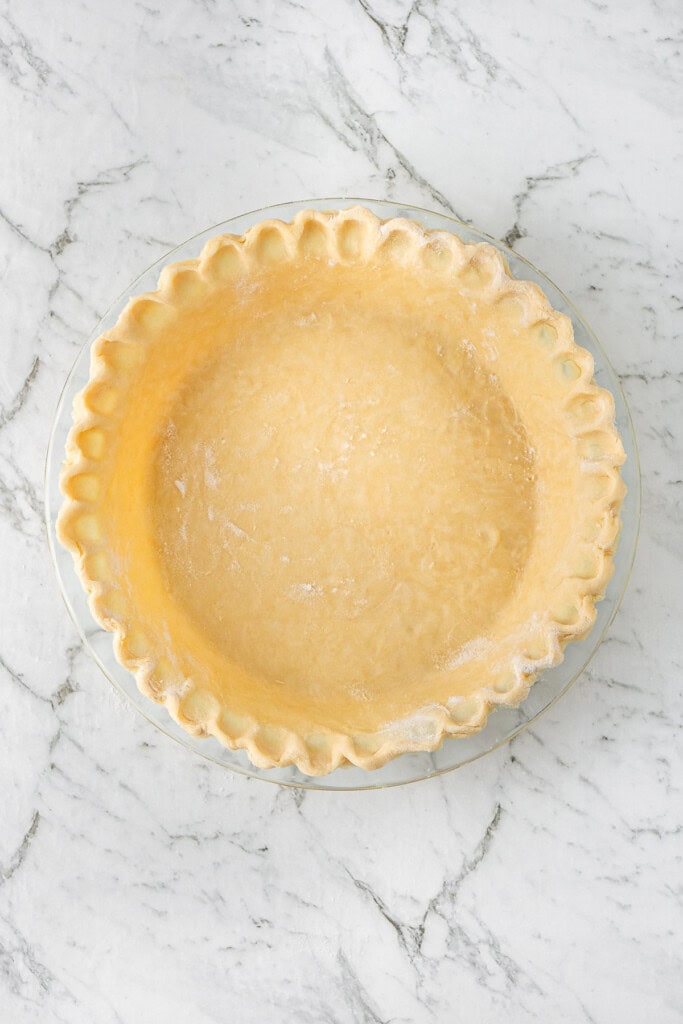
Carefully fold the dough and transfer it to the pie dish, gently pressing it into the base and sides.

If your dough breaks, that’s totally fine. Roll it back into a ball and roll it out again! If you’re having trouble, I find if the dough is a little warmer it’s easier to handle.
Trim the overhang and crimp or flute the edges. I am no expert at this and it does take practice, so I recommend watching a few videos first, otherwise just press the edges down with a fork.
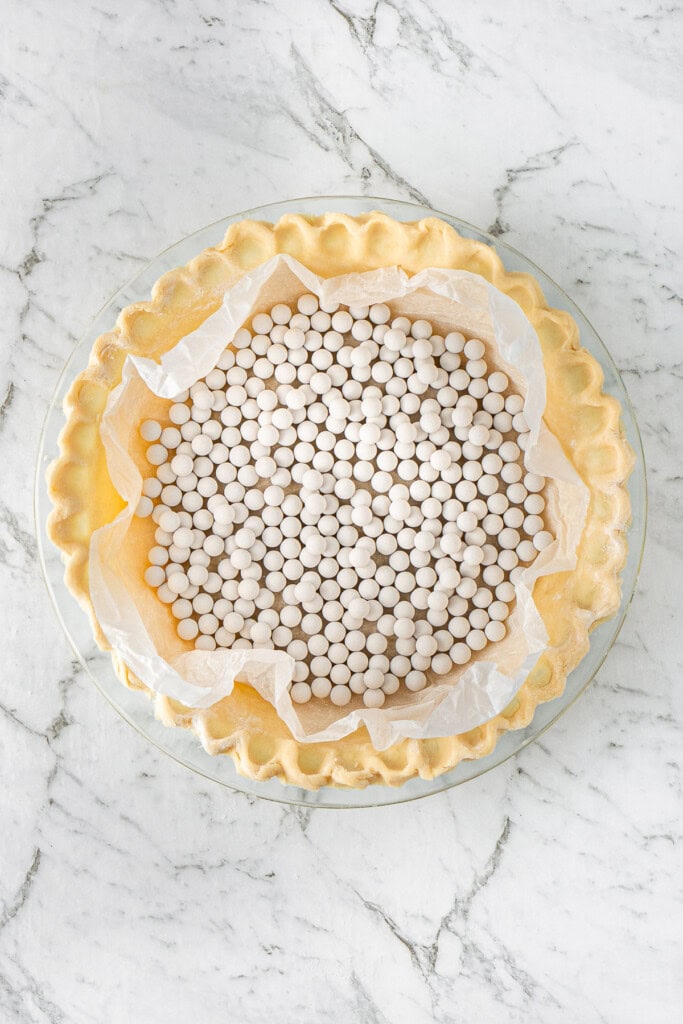
Scrunch up a sheet of baking paper as this makes it easier to shape into the pie, then place it over the pie crust. Fill with pie weights if you have them or you can use either dried beans, or rice.
Bake for 20 minutes, then carefully remove the weights and baking paper.
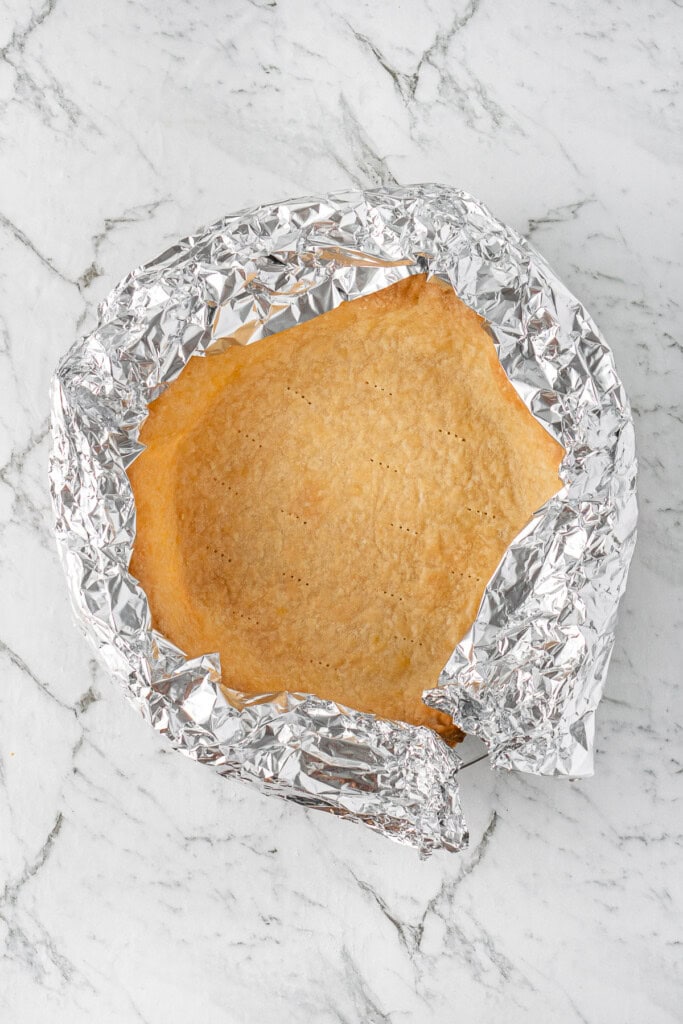
👉Tip! To keep your pie edges from burning or becoming too dark, carefully wrap them with strips of aluminium foil.
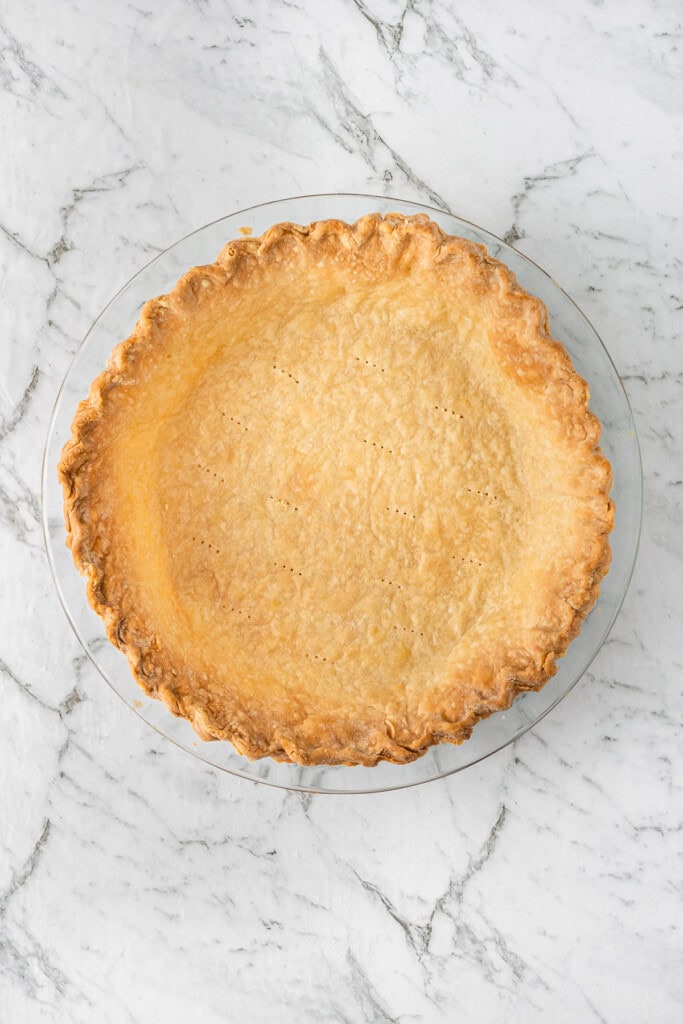
Prick the base a few times with a fork. Return the crust to the oven and bake for a further 10-15 minutes, or until the base looks dry and the edges are lightly golden. Allow to cool completely before filling.
What to Make with This Dairy Free Pie Crust
This versatile dairy free pie crust can be used in any recipe that calls for a traditional pie or tart crust. Here are a few of my favourites:
- Caramel Apple Galette – a rustic dessert perfect for autumn.
- Strawberry Galette – sweet, summery, and super simple to make.
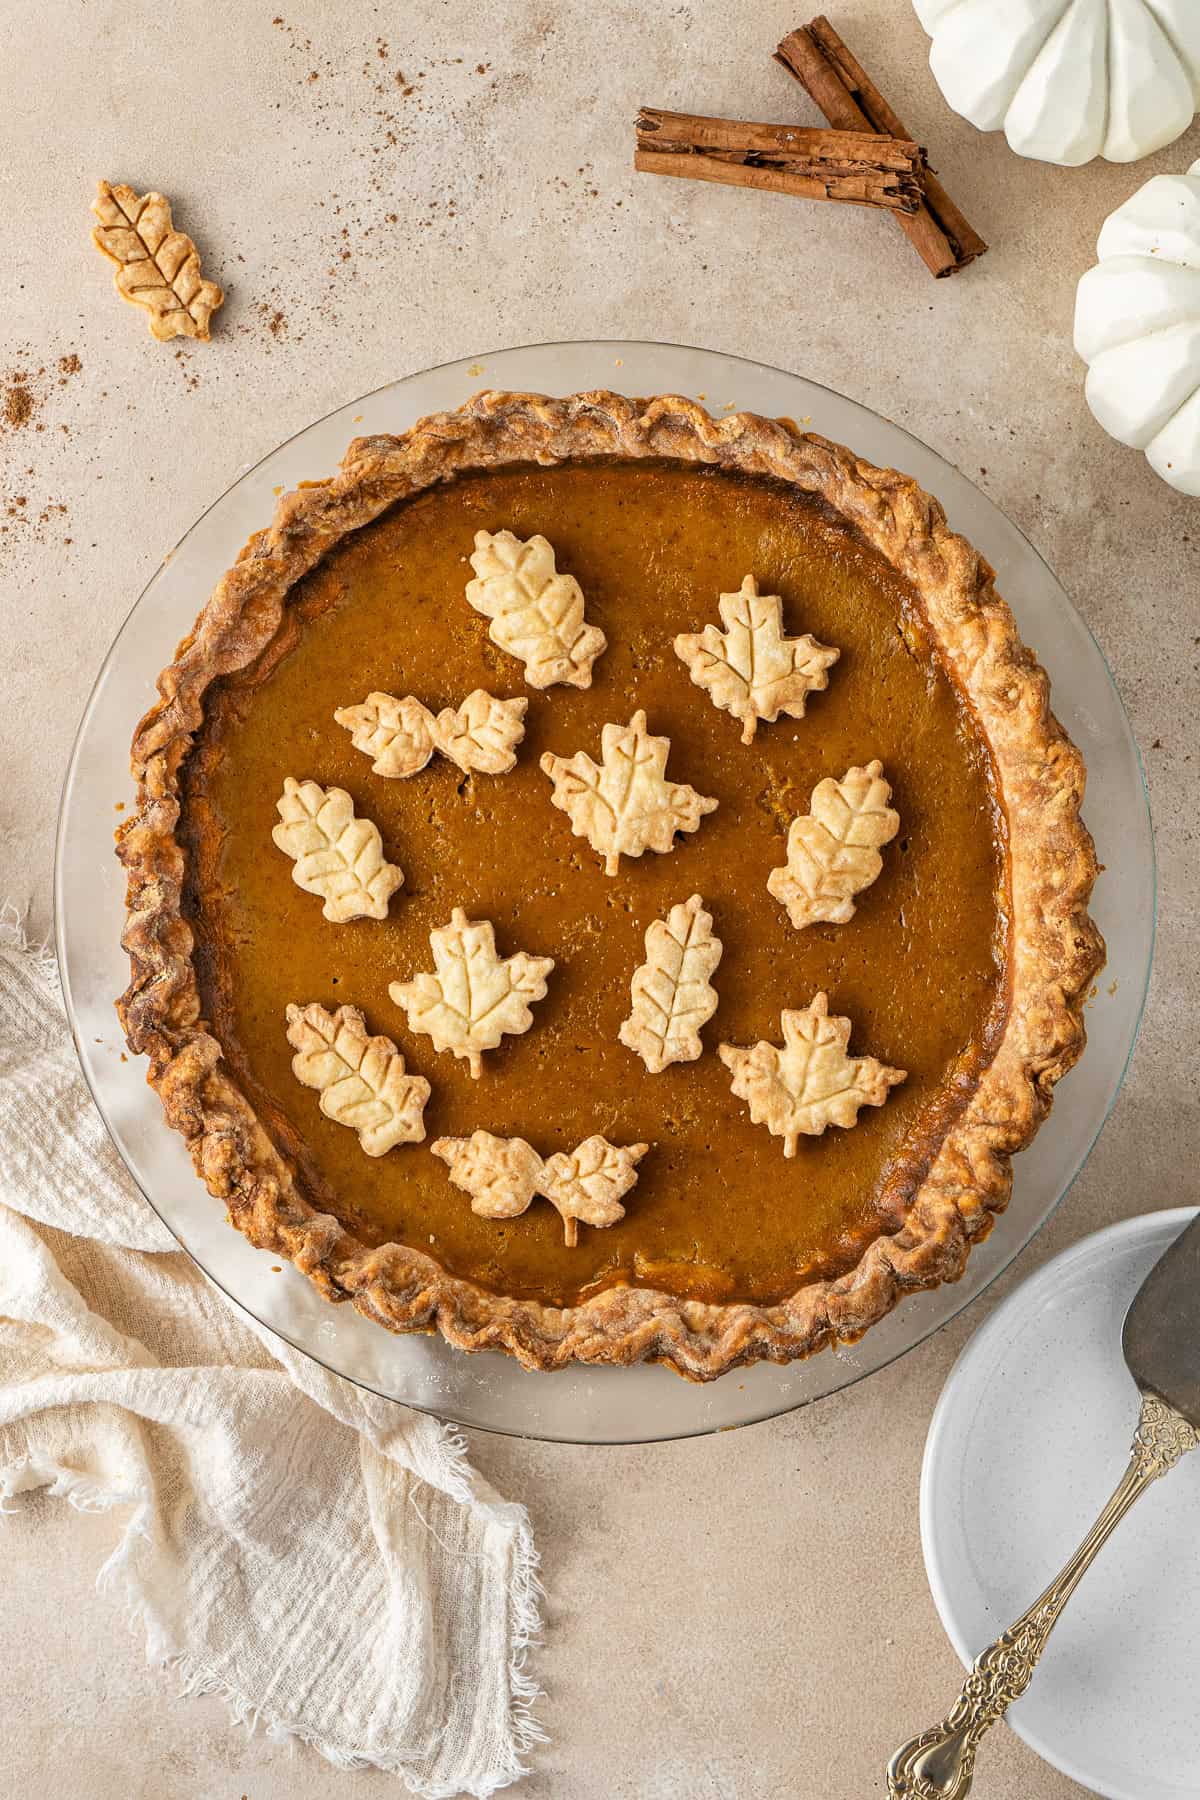
- Dairy Free Pumpkin Pie – a must for the holidays.
Recipe FAQs
The dough keeps in the fridge for up to 3 days. Just keep it tightly wrapped in plastic wrap so it doesn’t dry out. If you want to keep it longer, the dough freezes really well for up to 3 months. Thaw it in the fridge overnight before rolling it out.
A food processor makes this recipe faster and easier, but you can also make it by hand. Use a pastry cutter, two knives or even your fingers to cut the cold dairy free butter into the flour until it resembles coarse crumbs, then gradually add the cold water until it comes together.
You can! Just leave out the sugar in the dough, everything else stays the same.
If you do make this recipe, please be sure to leave a comment and ⭐⭐⭐⭐⭐ rating below! And tag any of your creations on Instagram with @eightforestlane as I would love to see.
More basic dairy free recipes:
Dairy Free Pancakes
Dairy Free Quiche
Dairy Free Pizza
Dairy Free Sugar Cookies
Dairy Free Pie Crust
Equipment
Ingredients
- 1 ½ cups plain flour/all purpose flour
- 1 tablespoon white sugar/granulated sugar
- ½ teaspoon salt
- ½ cup (125 grams) dairy free butter cold
- 2-3 tablespoons cold water
Instructions
- In the bowl of a food processor, add the flour, white sugar, and salt. Add the cold dairy free butter and pulse a few times until the mixture resembles wet sand.
- Add the cold water one tablespoon at a time, pulsing between each addition, until the dough just begins to come together. Stop adding water as soon as the dough holds together when pressed between your fingers.
- Turn the dough out onto a lightly floured surface and gently bring it together into a ball. Flatten into a disc, wrap in plastic wrap, and refrigerate for at least 1 hour or overnight.
Blind Baking (if required)
- Preheat the oven to 350°F / 180°C.
- Remove the dough from the fridge and let it sit at room temperature for 10 minutes to make it easier to roll. Roll the dough out on a lightly floured surface to fit your pie dish, leaving a slight overhang.
- Transfer the dough to the pie dish and gently press it into the base and sides.
- Trim the overhang and crimp or flute the edges, or press them down with a fork.
- Scrunch up a sheet of baking paper (this makes it easier to shape), then place it over the pie crust. Fill with pie weights, dried beans, or rice.
- Bake for 20 minutes, then carefully remove the weights and baking paper. Prick the base a few times with a fork.
- Return the crust to the oven and bake for a further 10-15 minutes, or until the base looks dry and the edges are lightly golden. Allow to cool completely before filling.
Nutrition
Nutritional information is provided as a guide only and is calculated using automated online tools, therefore we cannot guarantee the accuracy. We encourage you to make your own calculations based on the actual ingredients used in your recipe.
Never wonder what's for dinner again
Get a brand new dairy free meal plan every week, plus members only recipes and the whole of Eight Forest Lane with no ads. The planning is done, you just shop and cook.
Start your 7 day free trial →