
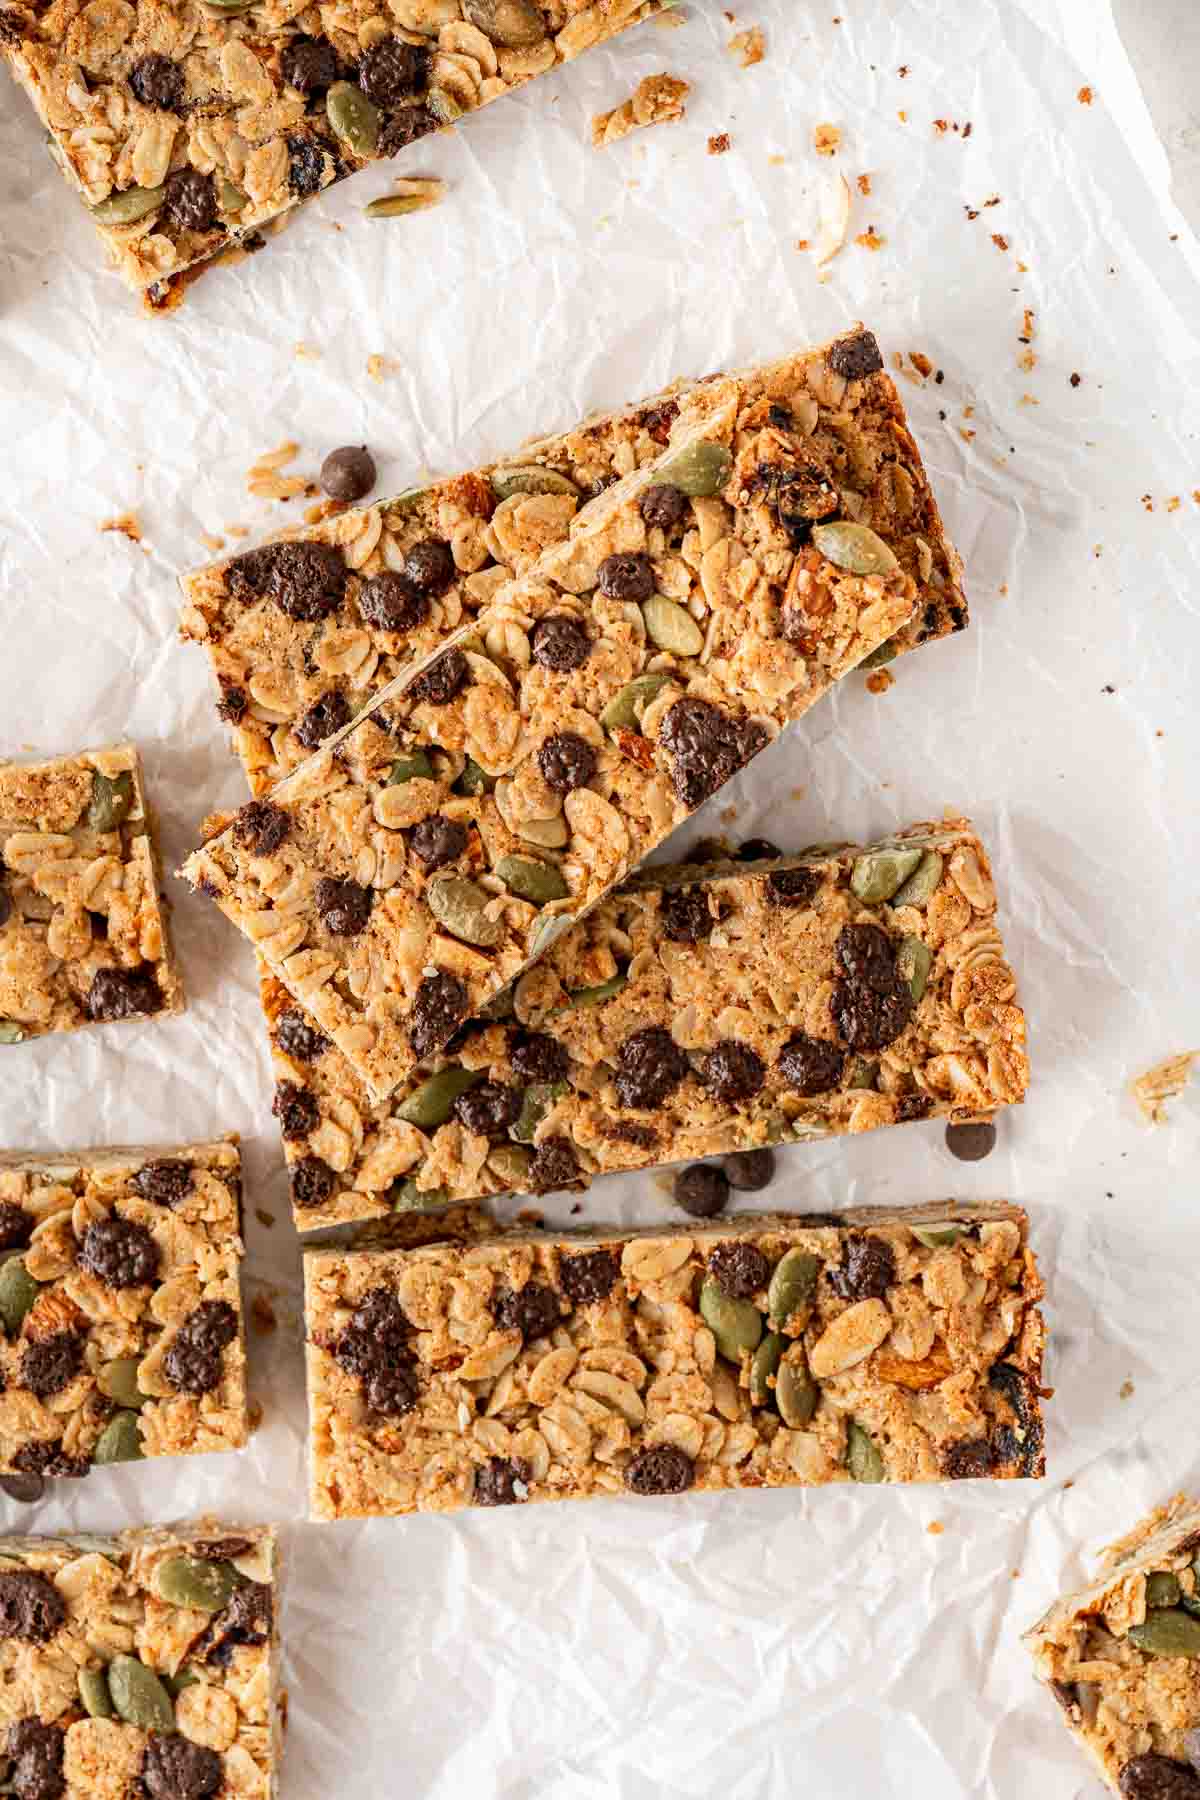
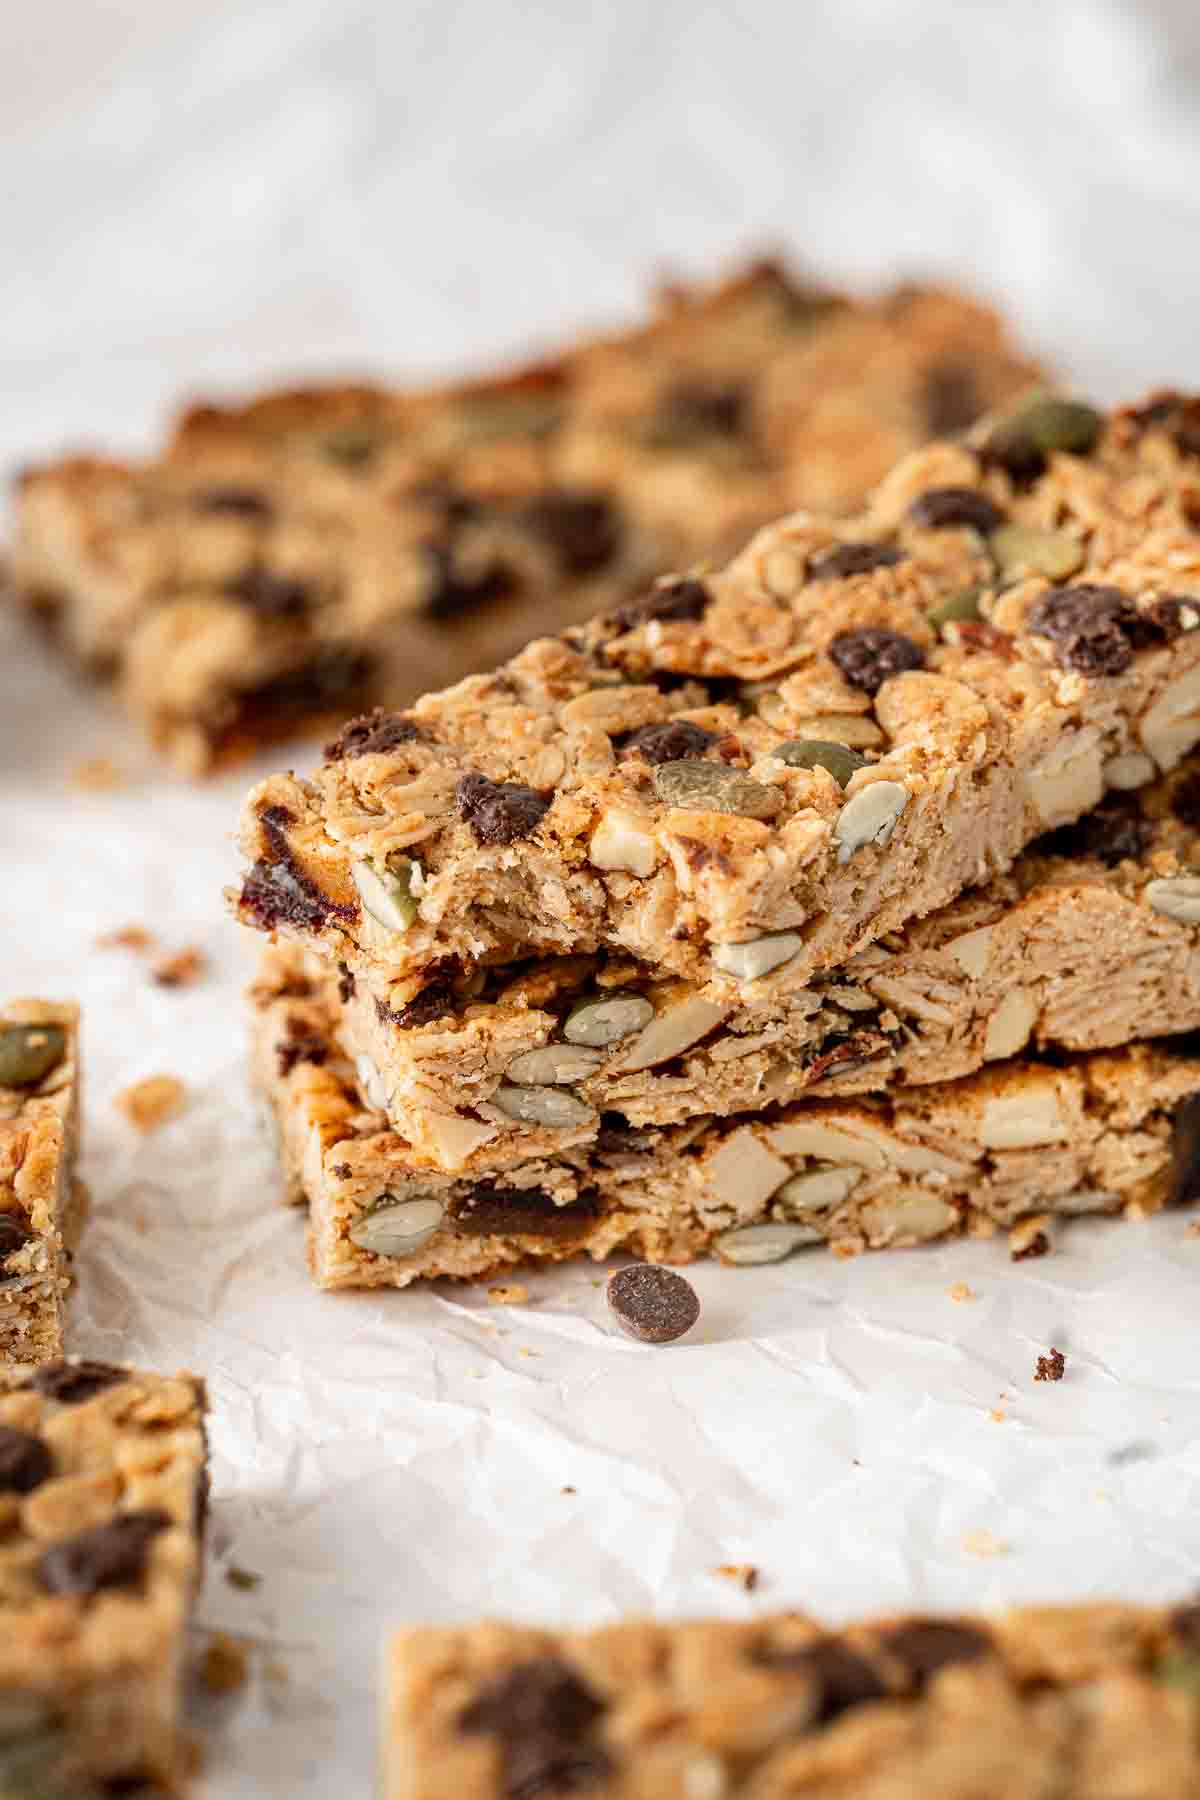
These homemade granola bars are crispy and chewy and so delicious you’ll never want a store bought bar again! Made using a combination of nuts, fruit and seeds, this recipe is easily customisable based on your tastes and what you have on hand. These granola bars are also dairy free and vegan, and are the perfect grab and go snack or quick breakfast.
One of the best snacks to easily grab when you’re feeling a little hungry between meals is always a granola bar or muesli bar. They are packed with good for you ingredients and tend to fill you up enough to curb those hunger pangs.
The store bought versions however just don’t hit the spot. I struggle to find ones that firstly are dairy free, and secondly don’t either taste dry and bland or completely artificial. This is the reason I created my no-bake peanut butter muesli bars. And while I love those a lot, this time I was in search of a crunchy bar that was also peanut free.
That’s where these bars come in. I’ve said before that I define muesli bar vs granola bar as muesli being raw and granola being baked, so that’s why these are called granola bars but honestly the terms are used interchangeably so you can call them whatever you want.
Basically we have a bunch of different add-ins mixed together and baked to create a crunchy but still a bit chewy snack bar that is perfect for road trips, hikes, or just to stash at the office when you need that quick refuel.
Unlike many store bought brands, these granola bars are actually healthy and good for you, filled with nutritious ingredients including antioxidants and plant-based proteins, all while being less than 200 calories per snack bar.
Key Ingredients
There are a few ingredients needed for these homemade granola bars, but most should be inexpensive and can be stored in the pantry for a while so you can make a batch of these whenever you need. You can also adjust and substitute based on what you have, just make sure you keep the ratios of wet and dry ingredients the same.
Note all ingredients and their quantities are laid out in the recipe card at the bottom of this post.
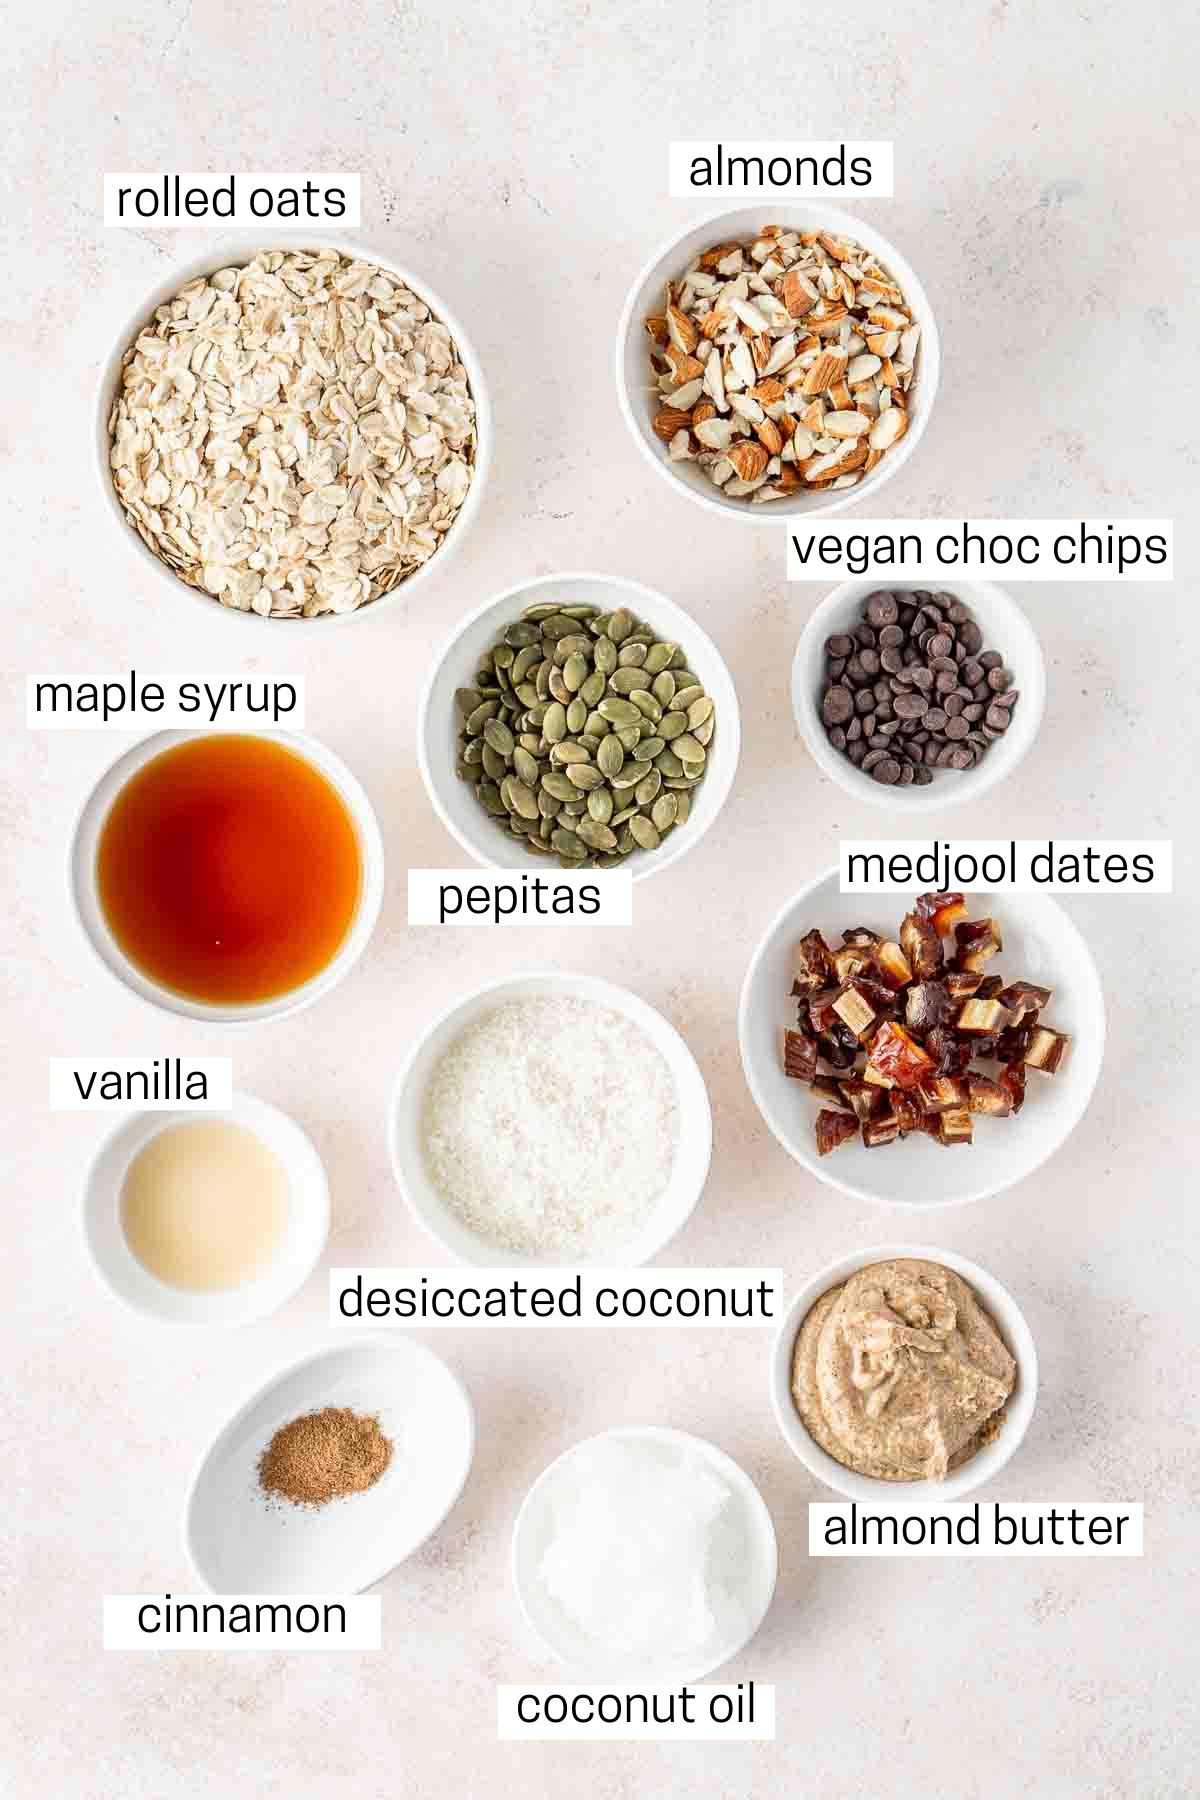
- Rolled oats – the base of these granola bars. You want to use old fashioned rolled oats here, not the smaller, quick cooking oats.
- Almonds – you can substitute with any nut you like. I am just roughly chopping up whole, raw almonds.
- Pepitas – I always like to add pumpkin seeds to my granola or muesli bars as they add amazing crunch and colour plus contain healthy fats to help keep you full.
- Coconut – I am using desiccated coconut but shredded coconut will also work, however due to the additional moisture content your bars may not be quite as crispy as when using desiccated coconut.
- Medjool dates – adds natural sweetness and a chewy texture. You can use any dried fruit that you like. Dried apricots would be a good alternative with a similar chewiness.
- Flavourings – I like to add both cinnamon and vanilla extract just to make these granola bars super delicious.
- Maple syrup – is the sweetener used to help bind the bars. If you don’t need these to be vegan you can use honey instead.
- Almond butter – I am using my homemade almond butter which honestly makes these taste so good and keeps them peanut free. You can however substitute with a natural peanut butter instead if you prefer.
- Coconut oil – helping bind the bars and also making sure they get nice and crispy when baked.
- Vegan choc chips – just like store bought bars, adding a little vegan chocolate to the top of these bars makes them super delicious. I like the Pana Organic brand choc chips as they are super small and work well when sprinkled over the top.

Step-By-Step Instructions
You don’t need anything special to make these granola bars, just a large mixing bowl, a baking tray and a 23cm or 9 inch square pan.
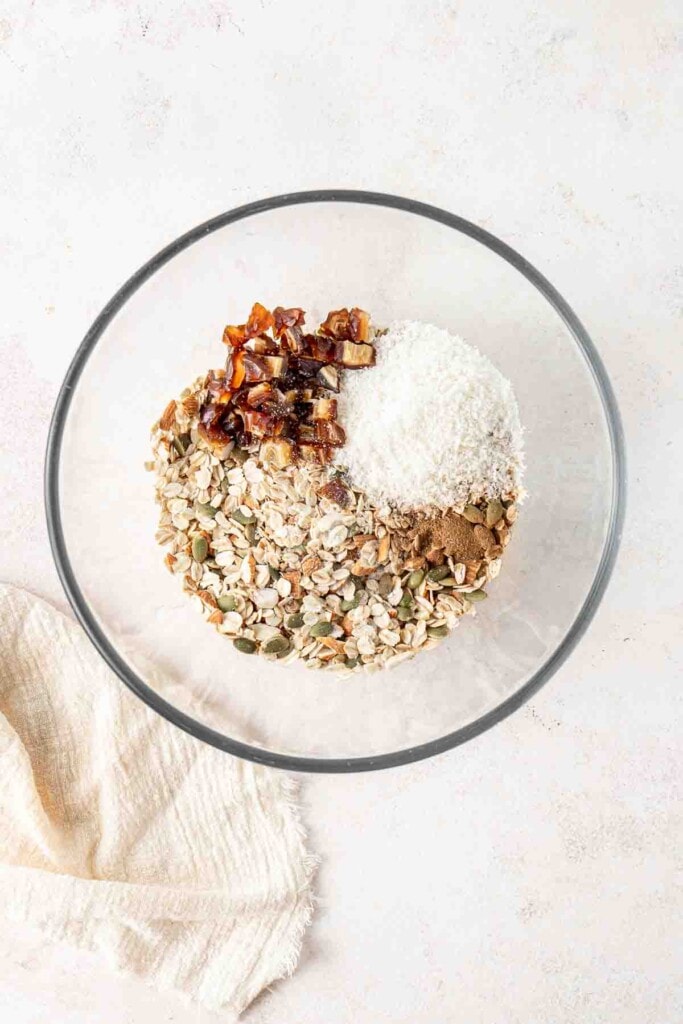
Start by preheating the oven and lining a baking tray with baking paper. Spread out the rolled oats, chopped almonds and pepitas evenly on the tray and lightly toast them for about 10 minutes in the oven until just golden.

This is going to give our bars a roasted flavour and help ensure they get crispy instead of being soft.
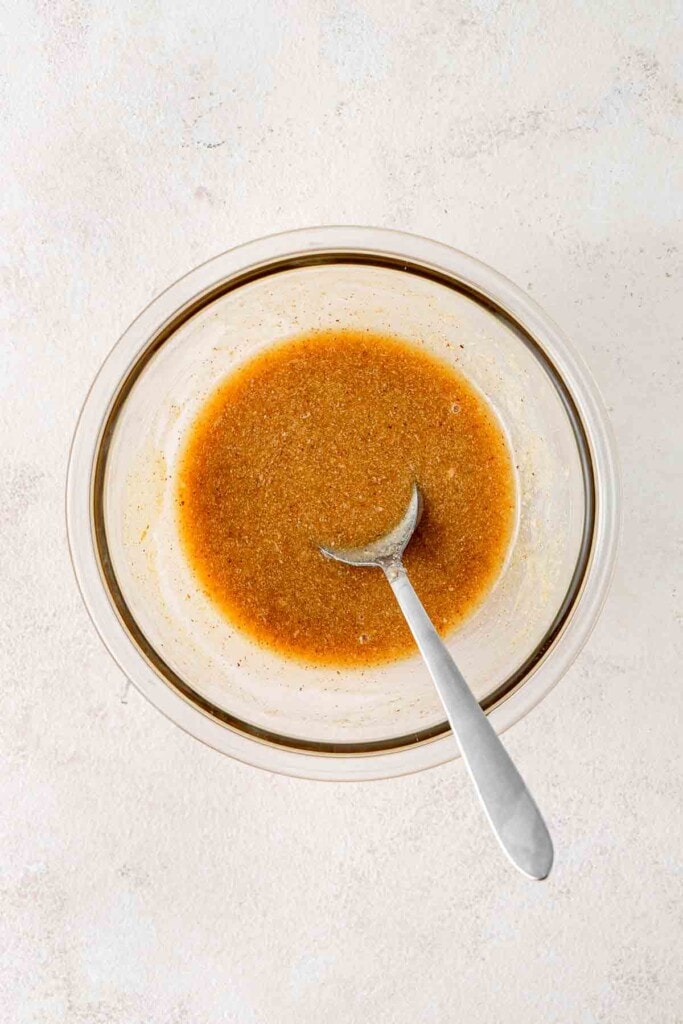
While the oats are toasting, gather the rest of your ingredients and make your granola bar ‘glue’ by mixing together the maple syrup with the melted coconut oil and the almond butter until combined.
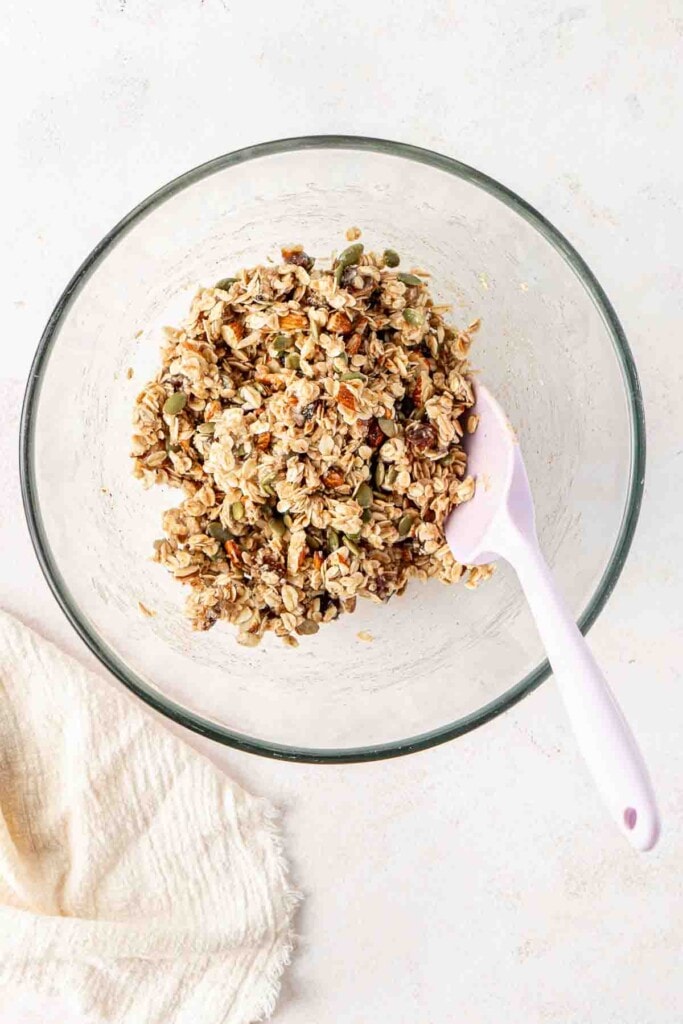
Once the oats are done, add them to a large mixing bowl with the remaining dry ingredients with the exception of the chocolate chips. Pour in the glue mixture and and use a rubber spatula mix well until everything is completely combined.
You can even use your hands to really make sure there are no dry bits as this will make the bars crumbly.
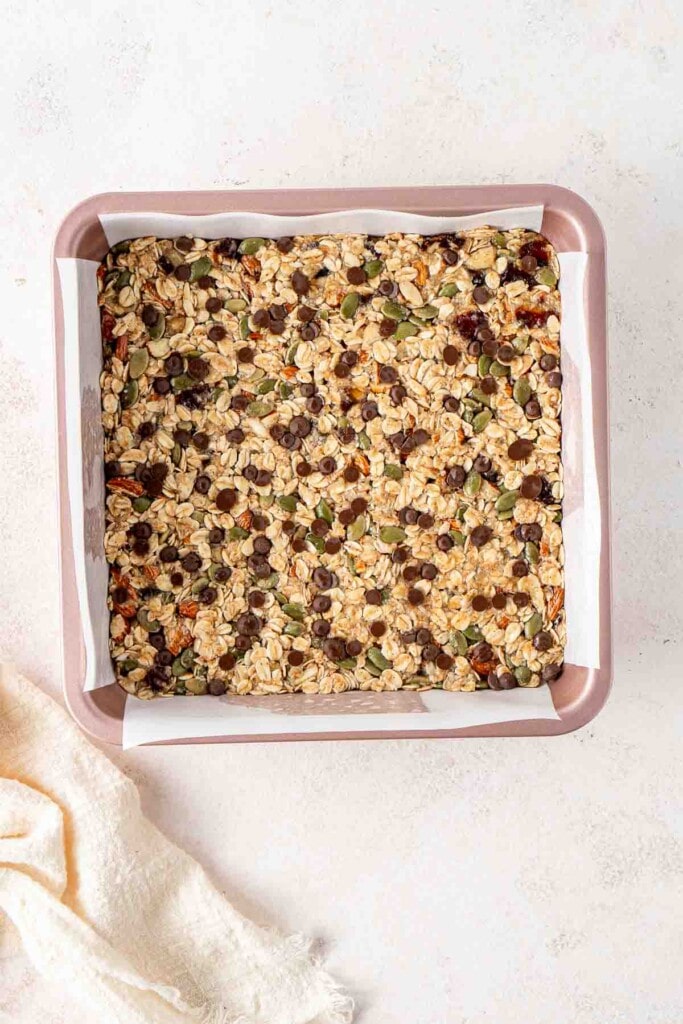
Line your square pan with baking paper, allowing a little overhang for easy removal, and pour in your mixture and spread it out evenly.
Place another sheet of baking paper over the top and use the base of a glass to press the mixture down well. Don’t rush this step as if it’s not pressed down the bars won’t hold together. Keep pressing down until it’s firm.
Sprinkle over the chocolate chips and press them in again using the extra sheet of baking paper and the glass, before placing the pan in the oven for 20 minutes or until golden brown on top.
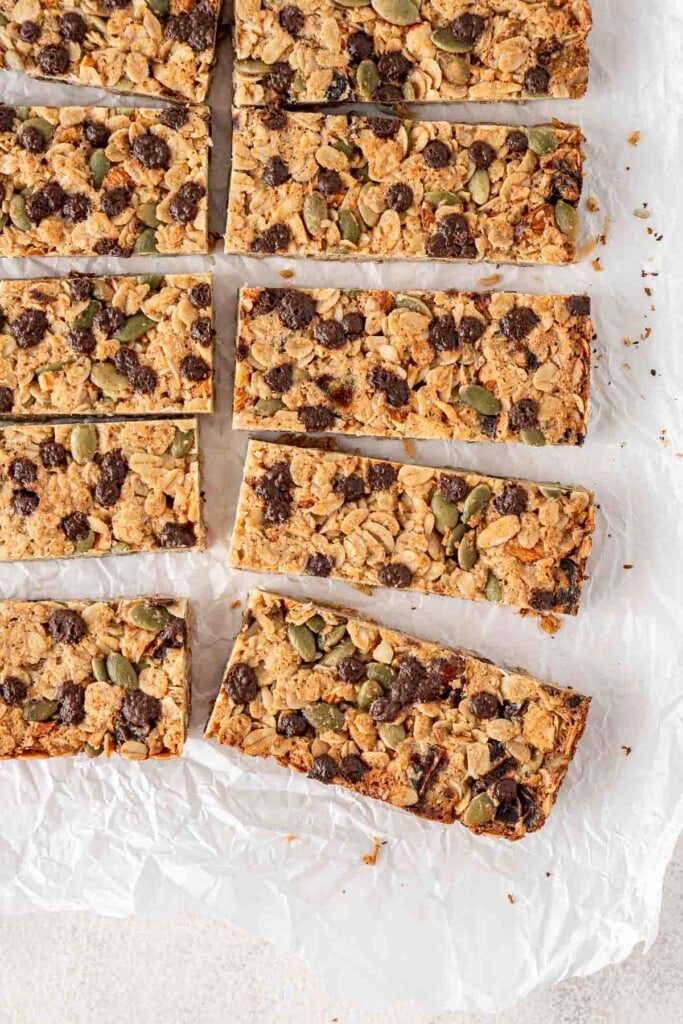
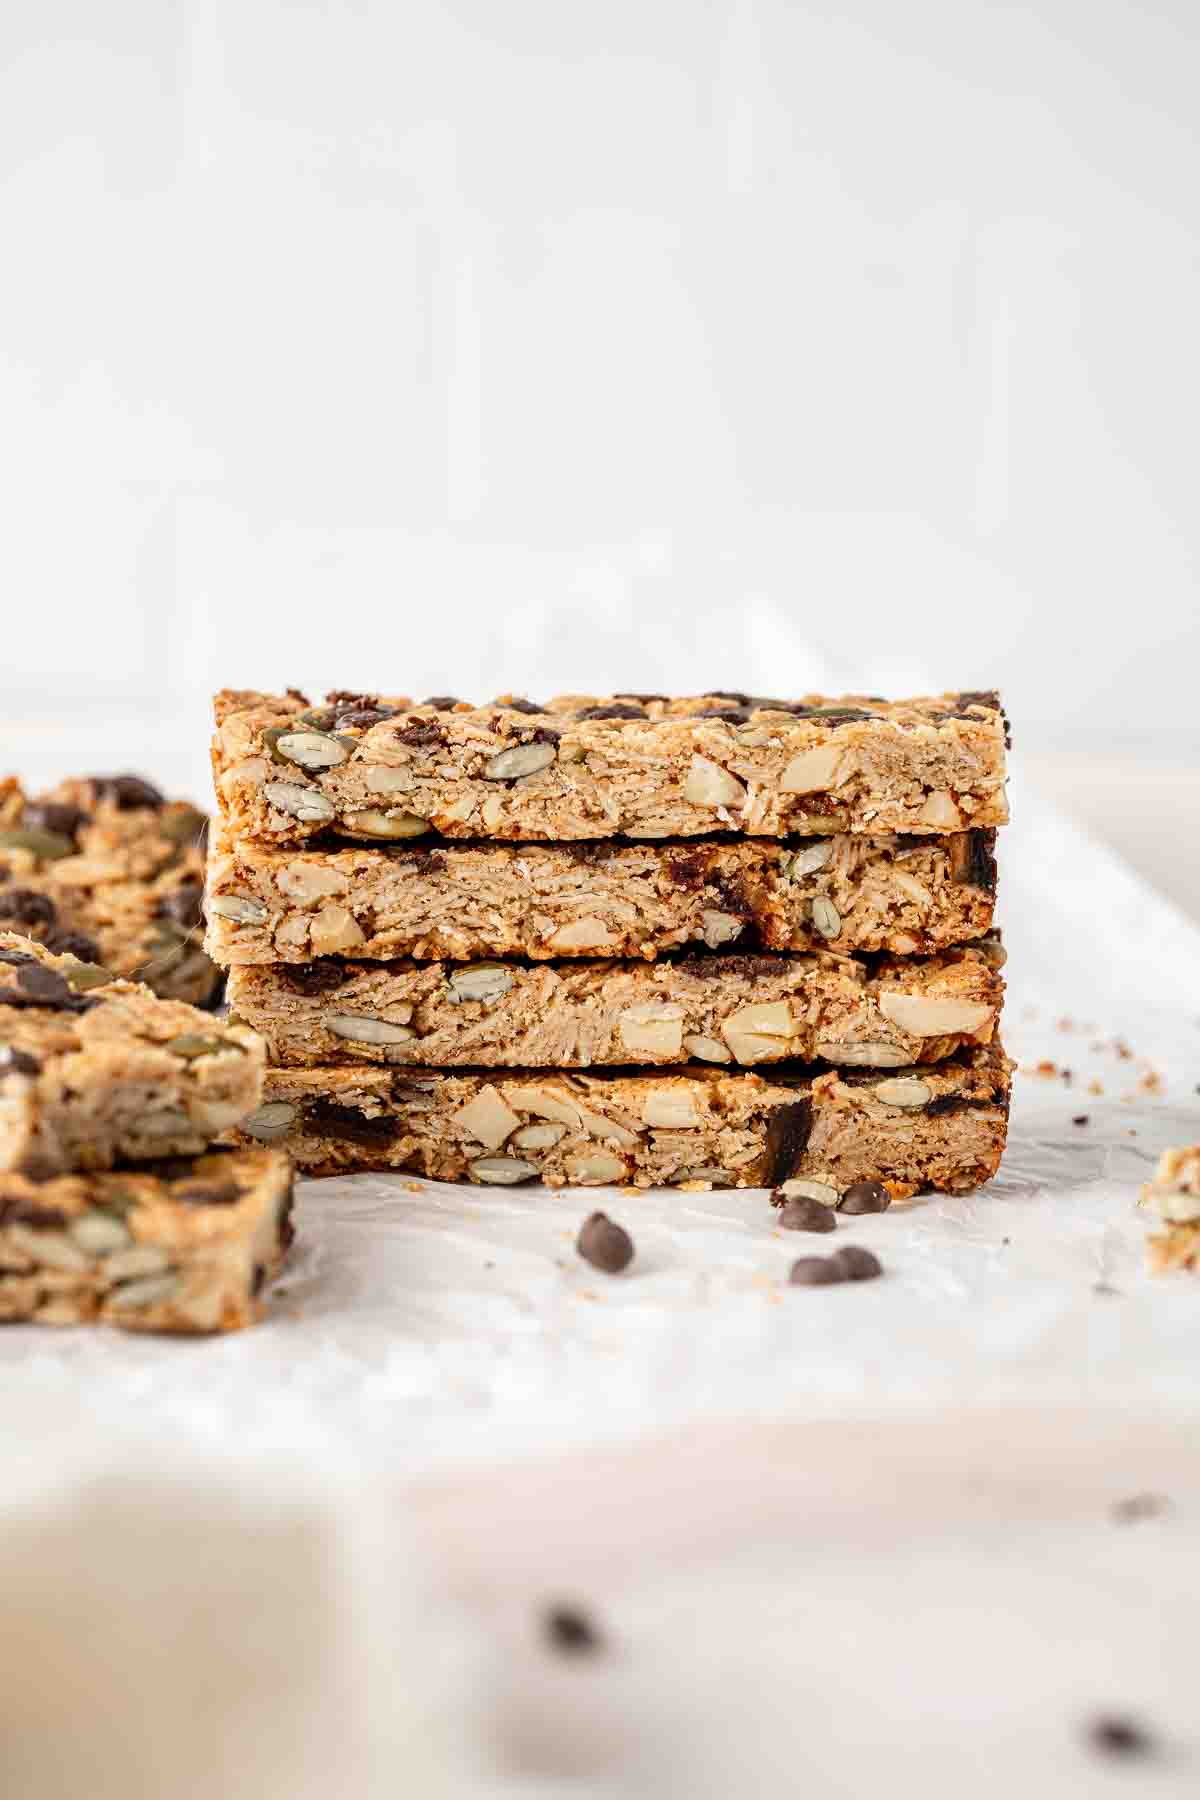
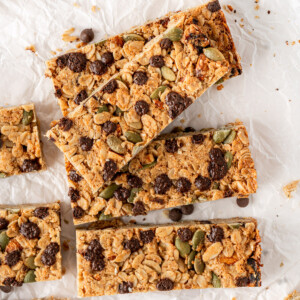
Let the bars cool completely in the pan as they are still quite soft when freshly baked and may break easily. Once cool, remove from the pan onto a chopping board and using your sharpest kitchen knife, slice into 10 bars.
I store my bars in an airtight container in the fridge for up to 2 weeks. I find they stay crisper in the fridge than at room temperature, which may just be due to the high humidity where I live.
If you do make this recipe, please be sure to leave a comment and ⭐⭐⭐⭐⭐ rating below! And tag any of your creations on Instagram with @eightforestlane as I would love to see.
More healthy snacks:
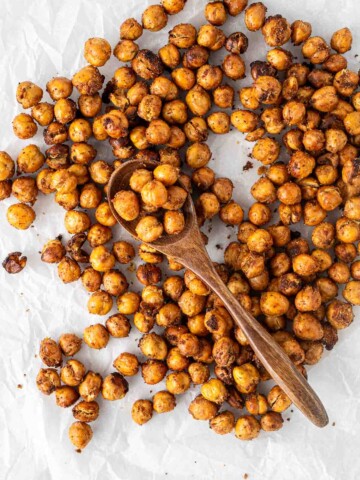
Air Fryer Crispy Chickpeas
No-Bake Peanut Butter Muesli Bars
Peanut Butter Stuffed Dates
Easy No-Bake Lamington Bars
Homemade Granola Bars
Ingredients
- 1 cups rolled oats
- ⅓ cup roughly chopped almonds
- ¼ cup pepitas
- ¼ cup desiccated coconut
- ¼ cup chopped medjool dates
- ½ teaspoon vanilla extract
- ¼ teaspoon cinnamon
- pinch salt
- ¼ cup maple syrup
- 2 tablespoons coconut oil
- 2 tablespoons
almond butter - 1-2 tablespoons vegan chocolate chips
Instructions
- Preheat your oven to 180°C/350°F and line a baking tray with baking paper. Spread rolled oats, chopped almonds, and pepitas evenly on the tray. Toast in the oven for about 10 minutes until lightly golden.
- While the oats are toasting, mix maple syrup, melted coconut oil, and almond butter until well combined. This mixture will act as the glue for the bars.
- Once toasted, transfer oats to a large mixing bowl. Add remaining dry ingredients (excluding chocolate chips). Pour in the glue mixture and mix thoroughly using a rubber spatula or your hands to ensure even distribution and avoid dry spots.
- Line a 9inch/23cm square pan with baking paper, leaving overhang for easy removal. Pour the mixture into the pan and spread evenly. Place another sheet of baking paper on top and press the mixture firmly using the base of a glass to compact it well.
- Sprinkle chocolate chips over the mixture and press them in gently using the baking paper and glass.
- Place the pan in the oven and bake for 20 minutes or until the top turns golden brown.
- Allow the bars to cool completely in the pan as they are soft and break easily when freshly baked. They will firm up as they cool.
- Once cooled, remove the bars from the pan onto a chopping board. Use a sharp kitchen knife to slice into 10 bars.
- Store the bars in an airtight container in the fridge for up to 2 weeks.
Notes
Nutrition
Nutritional information is provided as a guide only and is calculated using automated online tools, therefore we cannot guarantee the accuracy. We encourage you to make your own calculations based on the actual ingredients used in your recipe.


Never wonder what's for dinner again
Get a brand new dairy free meal plan every week, plus members only recipes and the whole of Eight Forest Lane with no ads. The planning is done, you just shop and cook.
Start your 7 day free trial →